Update: The official Windows 11 is already available since October 5, 2021.
The next generation of Windows operating system (OS) is around the corner. Many people are expecting its new appearance and new features while some users have already been experiencing the new OS by joining Microsoft Windows Insider Program.
Among those beta users, some praise the fresh new experience of Windows 11 while others complain about the errors that Win11 has brought to them. Generally, the new system has both advantages and disadvantages.
Here in this article, we will focus on one of the backup features in the coming Windows 11 OS – File History. After reading the following content, you will have a better understanding of File History in Windows 11.
What Is File History in Windows 11?
File History Windows 11 is still the files/folders backup utility in Microsoft Windows. The different thing is that it is built in the coming new version 11 system.

What Does File History Do in Windows 11?
Being the same as Windows 10 File History, Windows 11 File History enables users to back up documentaries including Documents, Pictures, Music, Videos, Desktop, Downloads, OneDrive, Contacts, etc. to another internal or external hard drive automatically with a frequency of every a few minutes, every a few hours, or daily.
How Does Windows 11 File History Work?
In general, Win11 File History create a copy of selected folders/files and save the copy in the destination which locates on a different hard disk. So, if you want to set up a File History backup for your files in Windows 11, you need to, first of all, prepare an extra disk to store the backup copy.
Windows 11 File History Backup
Now, let us see how to conduct file backup with File History on Windows 11.
1. Click on the search icon (magnifier) in the center of the taskbar and type “file history” in the search column within the pop-up window.
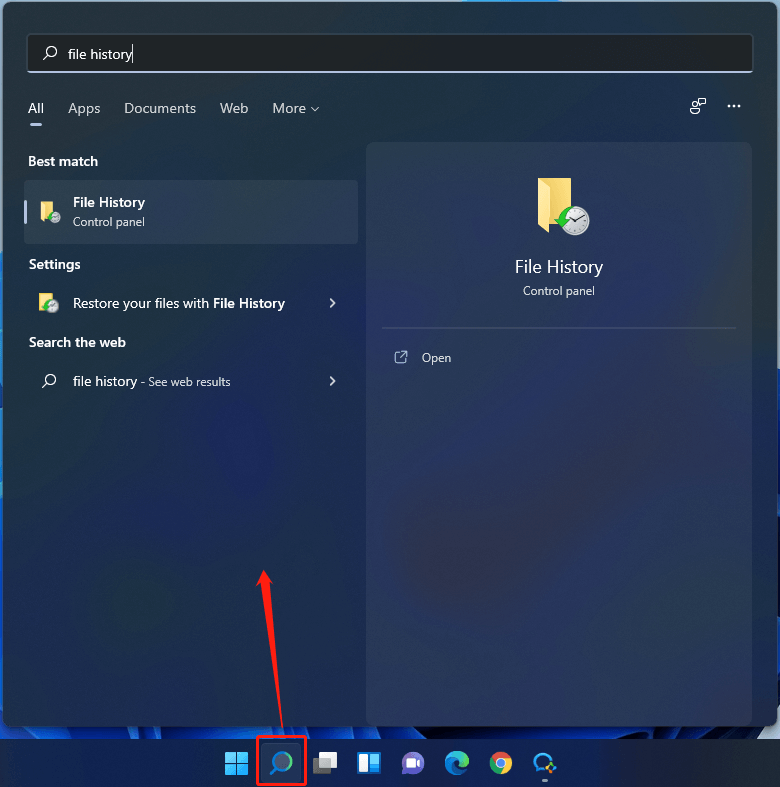
2. In the search result, open the best match File History.
3. It will open the Windows 11 Control Panel and direct you to Control Panel > All Control Panel Items > File History.
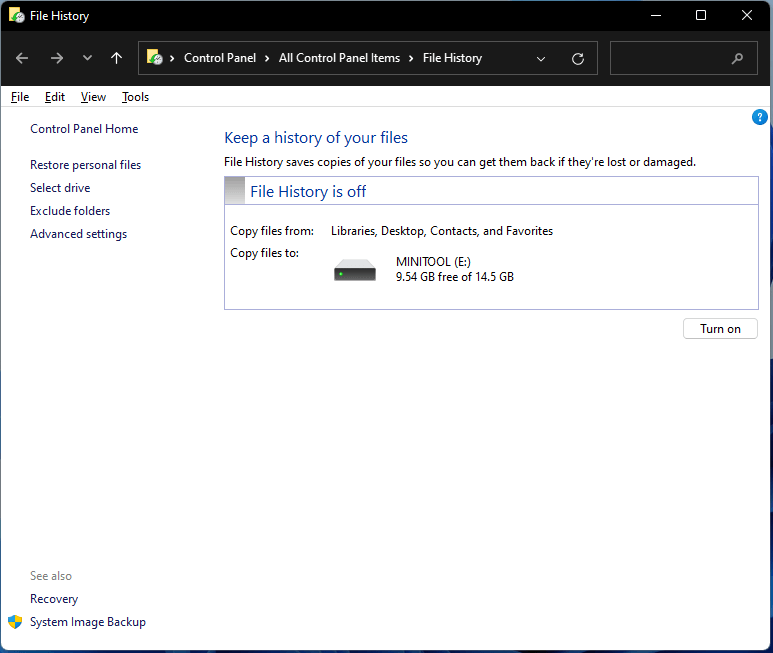
If it notifies you with the following content, you need to do as it recommends.
No usable drive was found. We recommend that you use an external hard drive for File History. Connect a drive and refresh this page, or use a network location.

4. If you are satisfied with the default settings including source files and destination selection in the right section, just click the Turn on button there to enable File History Windows 11.
If you change your mind while the task is processing, you can either click the Stop option or Turn off File History Windows 11 to disable it and cancel this backup.
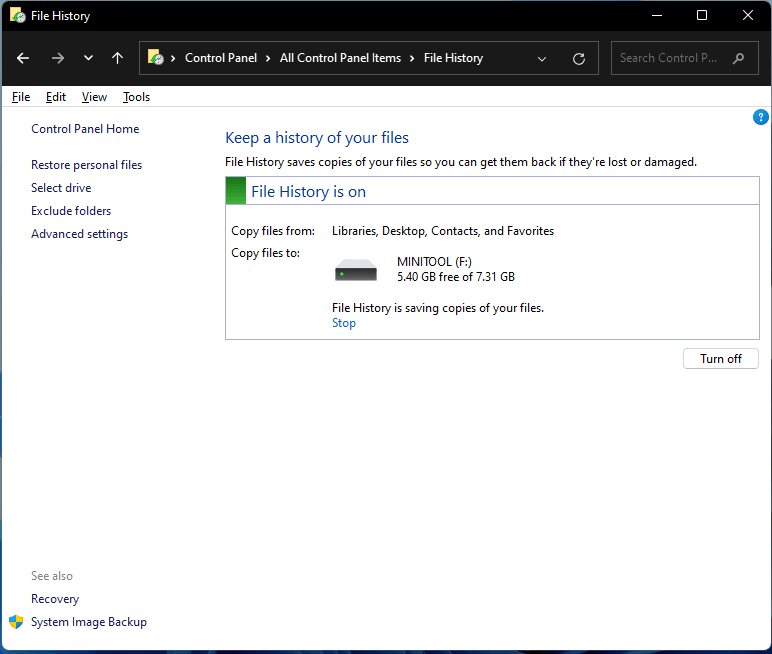
If you want to retrieve the previous File History backup, just click Run now or the Turn on button.
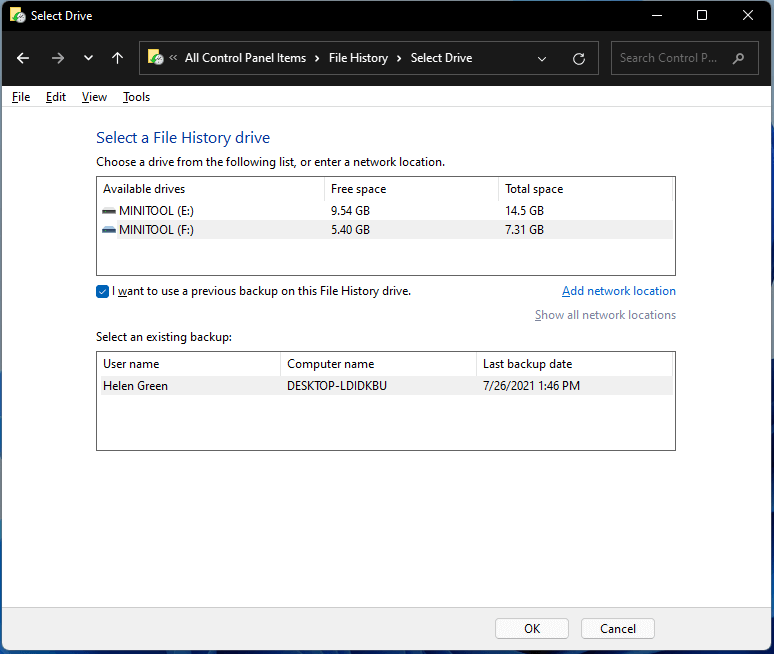
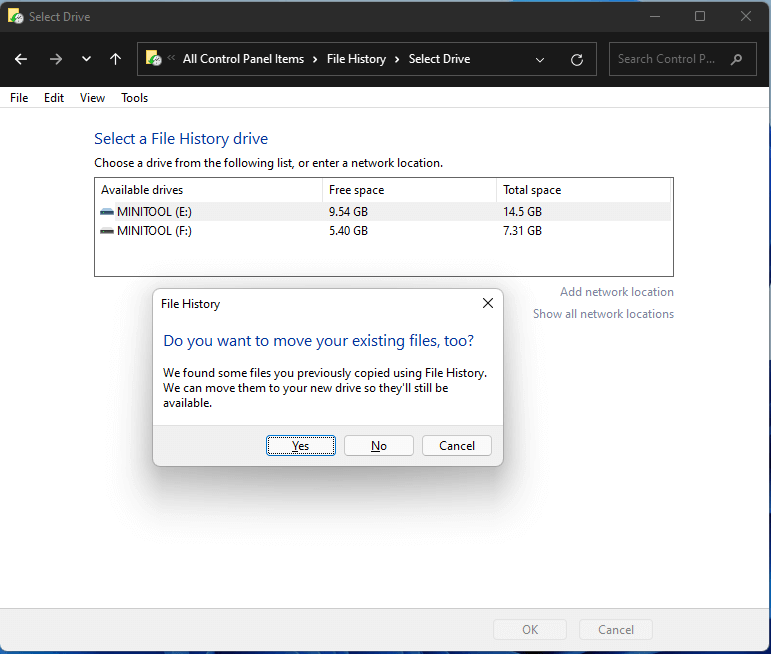
5. If you are not satisfied with the default configuration and want to personalize your own settings, just click the Select drive option in the left panel. In the new window, choose the drive you would like to use as the file backup destination. Or, you can just select a network location as your target storage by clicking the Add network location option and select a folder. Don’t forget to click OK to save changes and go back to the previous page.
If the drive you select contains File History copies you created on other computers, there will be an option called “I want to use a previous backup on this File History drive”. You can choose this offer and select an existing backup on the drive, which enables you to achieve windows 11 file history restore to new computer.
If you have saved File History backups to one hard drive on this PC but want to change the destination to another disk while the previous target disk is still connected to this machine, it will allow you to move your previous backups to the new storage. Of course, you can refuse it.
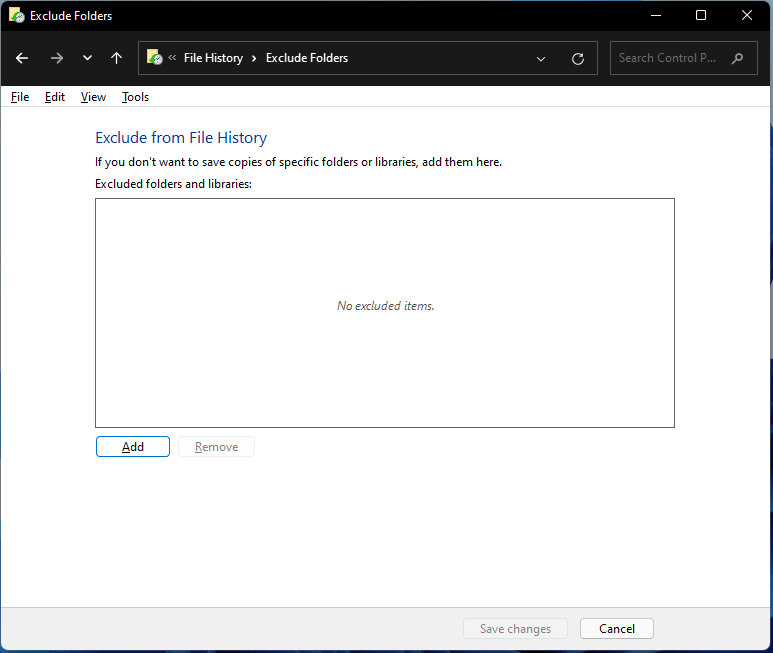
6. Click on the Exclude folders option in the left menu to filter out folders that you do not want to back up. Just click on the Add button on the new screen and add the items. Also, don’t forget to click the Save Changes button.
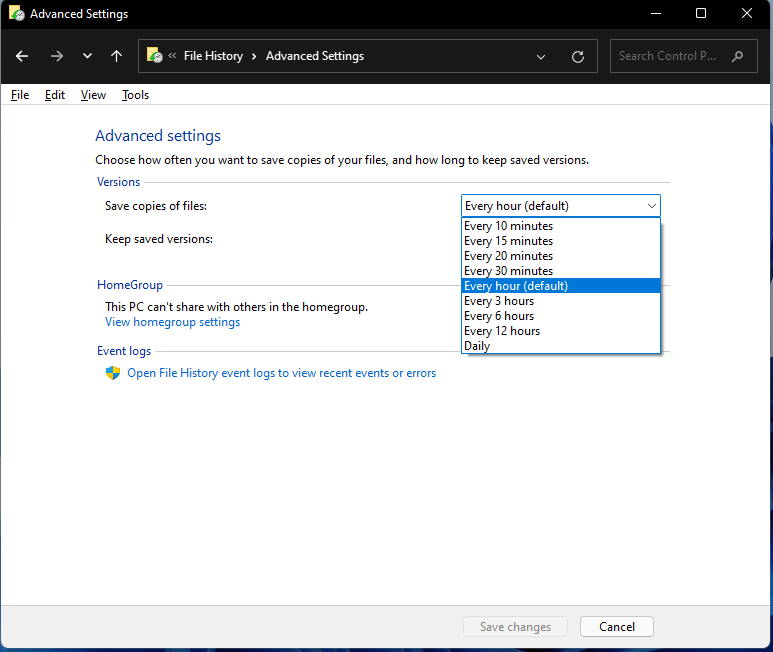
7. Click on the Advanced settings in the left part to trigger more important settings for this File History Windows 11 process.
Behind Save copies of files, you can customize how often Windows File History scans for file and folder changes:
- Every 10 minutes
- Every 15 minutes
- Every 20 minutes
- Every 30 minutes
- Every hour (default)
- Every 3 hours
- Every 6 hours
- Every 12 hours
- Daily
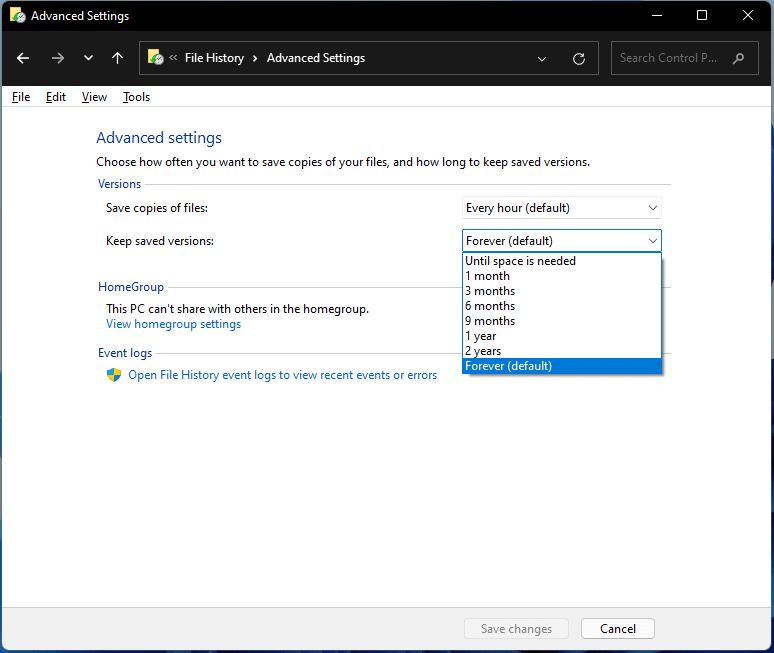
Behind Keep saved versions, you are able to decide how long to retain the Windows 11 File History backup. There are seven options:
- Until space is needed
- 1 month
- 3 months
- 6 months
- 9 months
- 1 year
- 2 years
- Forever (default)
Also, you can manually manage backup files by clicking the Clean up versions option right below and select one of the following standards. Once set, it will delete versions of files and folders older than the selected age, except the most recent version of a file or folder. All other files and folders, such as versions that were excluded or removed from your libraries, are also deleted.
- All but the latest one
- Older than 1 month
- Older than 3 months
- Older than 6 months
- Older than 9 months
- Older than 1 year (default)
- Older than 2 years
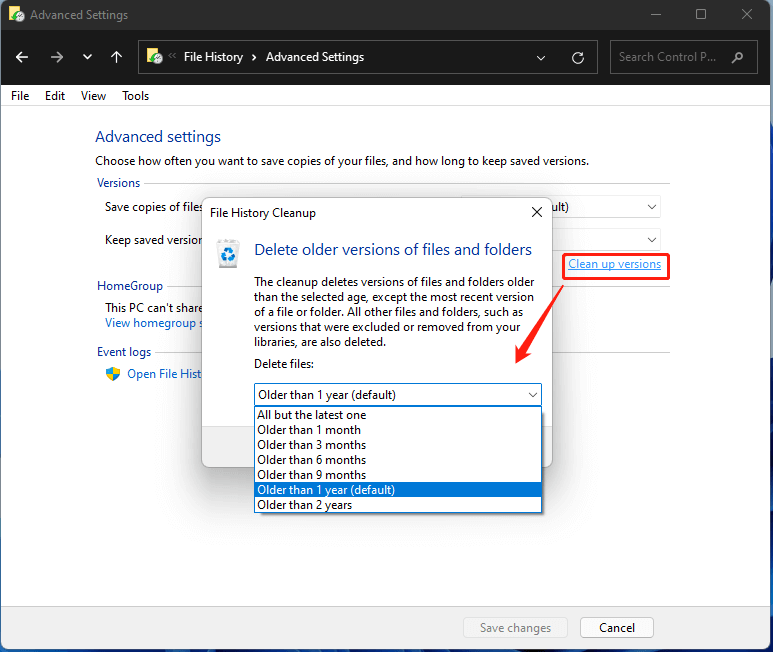
Once set, click the Clean up button to start the deletion.
Finally, click the Save changes button to return to the previous Windows 11 File History page in Control Panel.
Windows 11 File History Recovery
Next, let’s see how to restore the backed-up files once the original copy is lost or damaged due to accidents or cyberattacks.
1. Click Restore personal files in the able File History page in Control Panel.
2. In the new window, select the proper restore point (backup copy) by switching back or forward using the buttons at the bottom center. Once selected, click the refresh-like button to start the restoration.
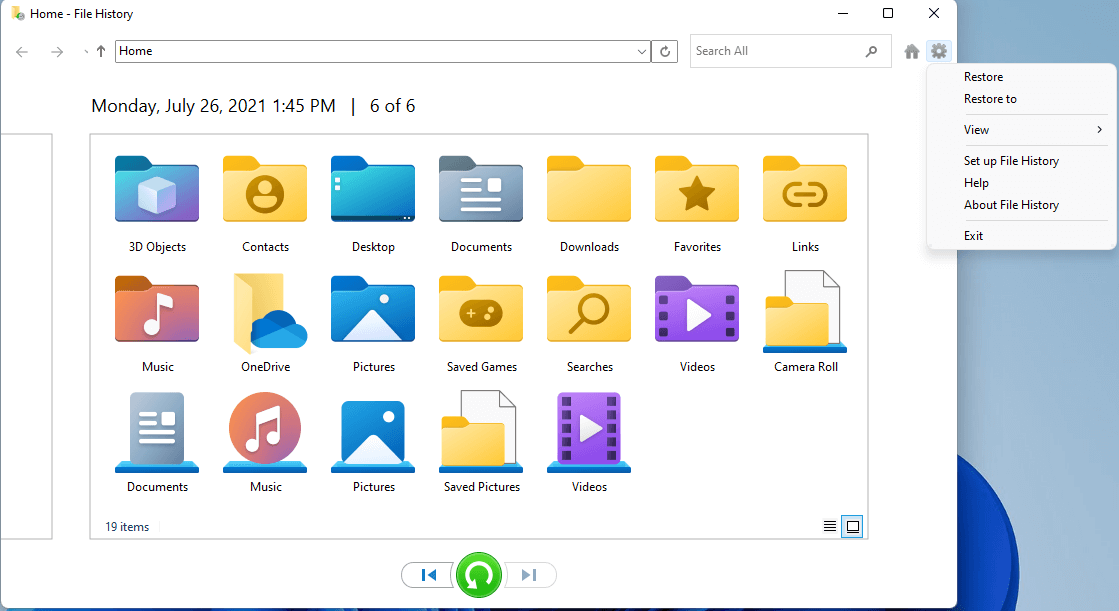
This will restore all those files to their original location. If you only want to recover some of them, just select them like in File Explorer and click the green restore button.
If you would like to restore them to a different location, just click the Options icon (cog) on the top right and select Restore to. Then, in the popup, pick up a location you prefer.
- You can also restore File History backup to its original location by choosing Restore in the Options menu.
- You can go back to Set up File History from the Options menu.
Windows 11 File History vs Windows 10 File History
In this part, we will talk about the File History differences between two editions of OS, Win 10 and Win 11.
In general, there are no big differences in the features of File History in version 10 and version 11 operating systems. the biggest difference is that Microsoft removed File History from Windows Settings and you can’t set up file backup tasks there. You can configure File History tasks in both Settings and Control Panel in Win10 while you can only carry out File History processes in Control Panel.
Besides, in Control Panel, the steps for setting up File History in Windows 11 are the same as in Windows 10. The only difference is the address of File History in the Control Panel. File History in Windows 11 (current build 10.0.22000.120) locates in Control Panel > All Control Panel Items > File History while in Windows 10 is Control Panel > System and Security > File History.
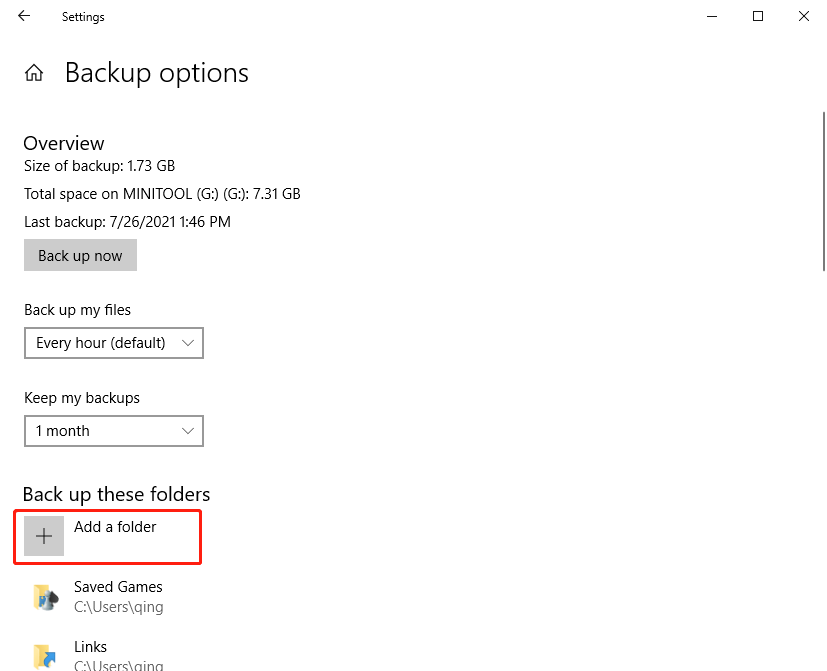
However, Win10 File History in Windows Settings allows users to select files on other non-system volumes with the Add a folder option while we haven’t found any corresponding option in Windows 11 File History. Thus, if you want to protect other files outside of the certain folders selected by File History by default, you have to, first of all, put them into one of the certain folders.
All in all, for File History, the win10 version is better than the Win11 version. Yet, for the whole OS, File History may not be that important since Microsoft intends to replace it with OneDrive.
Windows 11 File History Alternative
Although Microsoft continues to support File History in its new version of OS, it decreases the importance of File History by removing it from Windows Settings and replacing it with OneDrive backup.
Besides, File History itself has some shortcomings since in Windows 10 such as backup source limitation (only certain files mainly on system C volume/partition) and large destination storage requirement (since it doesn’t compress the backup copy).
Eliminating Windows 11 File History disadvantages, MiniTool ShadowMaker can be a complementary and replacement for the File History utility. MiniTool ShadowMaker is a professional and reliable data backup software that fully supports Windows 11.
Let’s see how to back up any data on your computer with MiniTool ShadowMaker.
MiniTool ShadowMaker TrialClick to Download100%Clean & Safe
1. Download, install, and open MiniTool ShadowMaker on your computer.
2. If it requires you to buy, just click the Keep Trial button on the upper left of the screen to continue.
3. Then, it will enter into its main user interface (UI). There, click the Backup in the top menu.

4. In the Backup tab, click the Source module to select anything on this machine, files/folders, partitions/volumes, system (selected by default), or even the entire hard disk.
5. Click the Destination module to choose a location to store the backup image, internal, external, or network location.
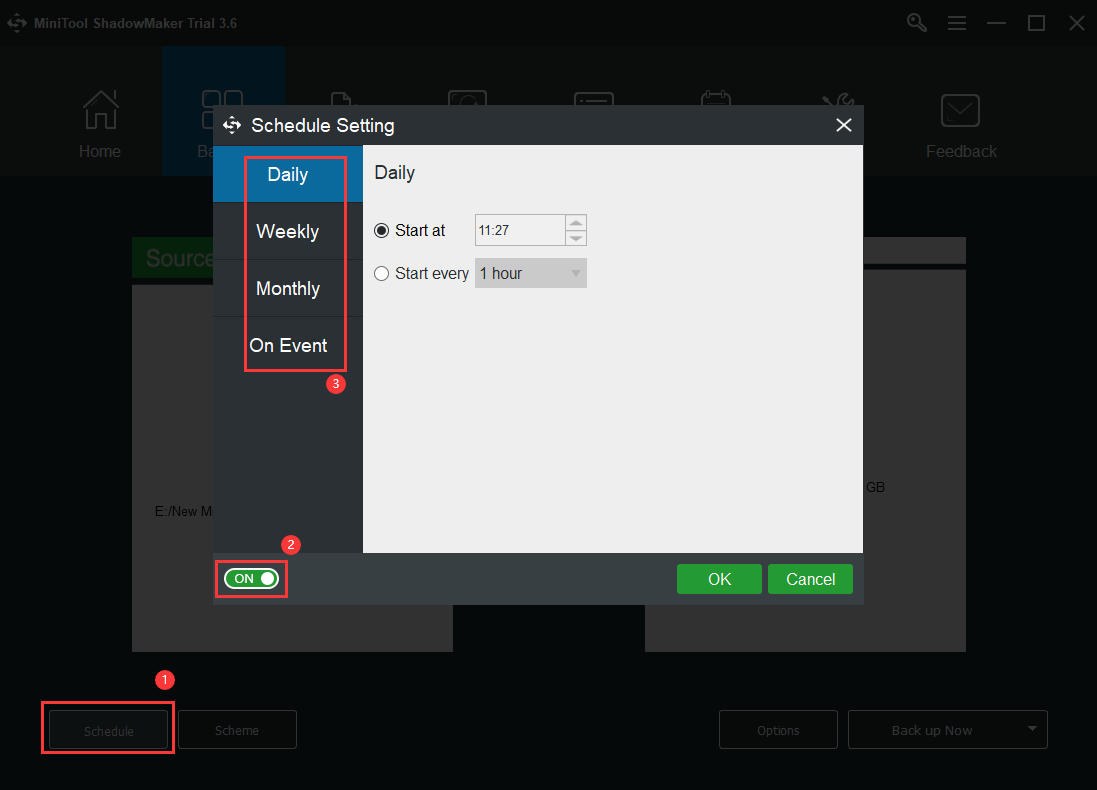
6. Before starting the backup process, you are recommended to click the Schedule button in the lower-left to set up a schedule (daily, weekly, monthly, or on special events) to automatically back up the select source at a set frequency in the future.
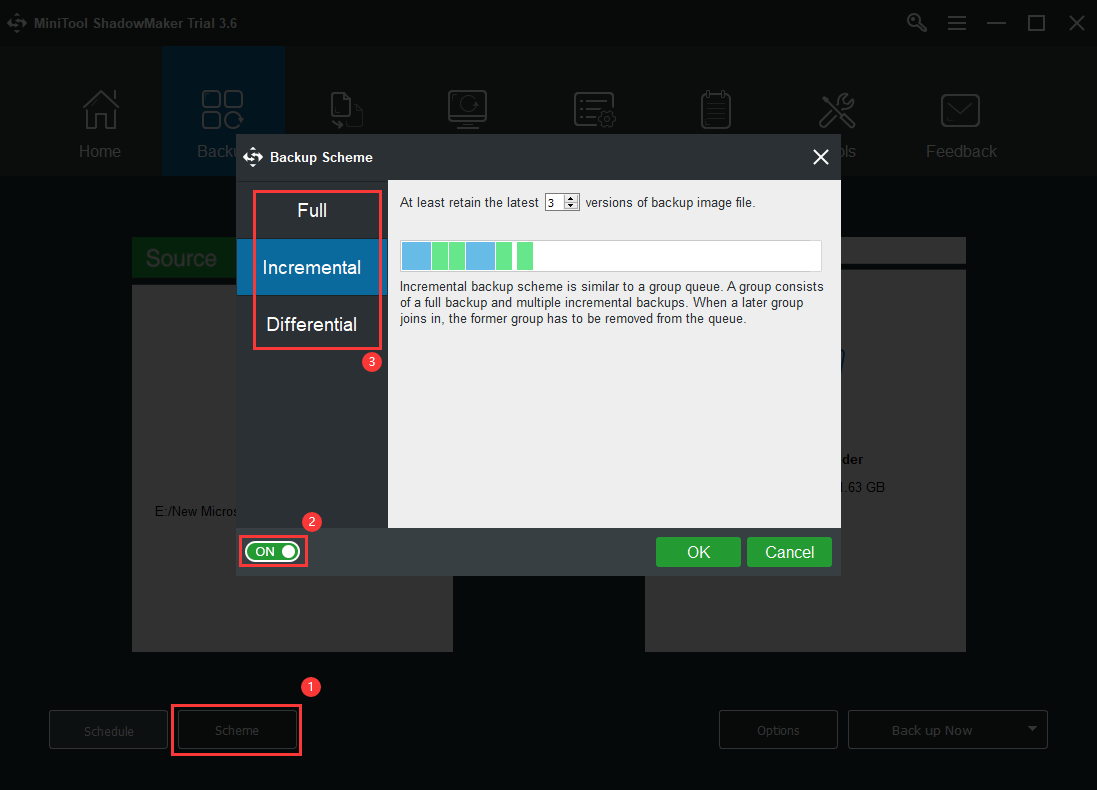
7. Also, you are allowed to define the backup type as full backup, incremental backup, or differential backup using the Scheme button.
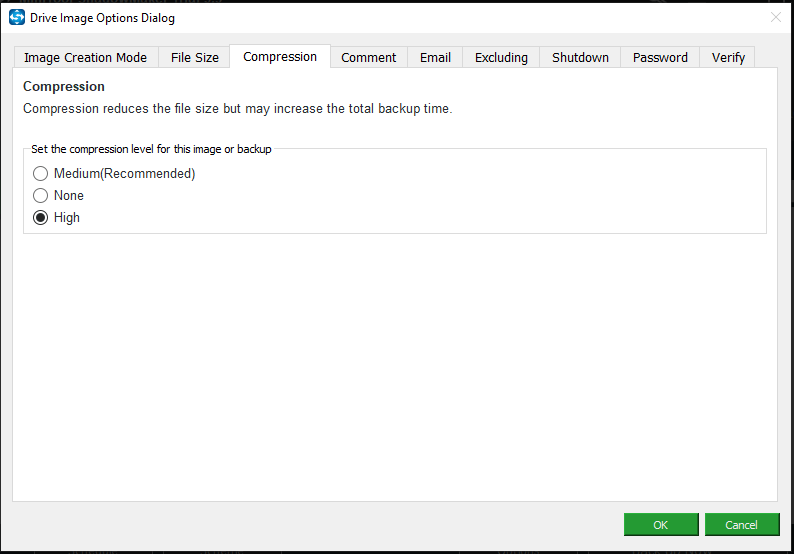
8. Moreover, you can still manage the backup image through the Options button. The management includes image file size, compression level, comment, excluding certain files, encryption, integrity verification, etc.
9. Finally, you can click the Back up Now button in the bottom right in the Backup tab to start the task.
Besides data backup, MiniTool ShadowMaker can also clone all contents including configuration settings from one hard drive to another, create bootable media to boot up crashed machines, boot up PCs with the same network on a host computer, and so on.
Below is a table comparing the features of MiniTool ShadowMaker and Windows 11 File History.
| MiniTool ShadowMaker | Windows 11 File History | |
| Backup Source | Files/folders, partitions, system, or the entire disk. | Only library files/folders. |
| Backup Destination |
|
|
| Backup schedule |
|
|
| Incremental backup | |
| More advanced management | Yes | Limited |
To Wrap Things Up
OK, that is all about Windows 11 File History. Do you have a better understanding of it now? If not, you can write your questions down below the comment zone. If you encounter any problem while using MiniTool ShadowMaker, please contact its support team at [email protected].
About The Author

Position: Columnist
Helen Graduated from university in 2014 and started working as a tech editor in the same year. Her articles focus on video creation, editing, and conversion. She also has a good knowledge of disk management and data backup & recovery. Through an in-depth exploration of computer technology, Helen has successfully helped thousands of users solve their annoying problems.