Why Do You Need to Create a Scheduled Backup?
Due to the increasing awareness of keeping data safe, you might tend to choose to back up crucial data in advance. Once you have a backup, you can recover your data in a very short time when accidental issues like human error, hardware failure, virus attack, power outage, and more occur, which will save much time and money.
However, backing up data manually will be pretty tedious and time-consuming. Why not hand over the highly repetitive backup work to the computer by creating a scheduled backup? A scheduled backup means to set a backup plan at a fixed time and then your computer can back up your data automatically.
In this guide, we will introduce how to create a scheduled backup via inbuilt backup utilities and third-party software on your computer. If you want to back up your data more flexibly and efficiently, scroll down to get more details.
How to Create a Scheduled Backup?
Way 1: Create a Scheduled Backup via MiniTool ShadowMaker
To set a scheduled backup, a third-party program like MiniTool ShadowMaker might streamline the backup process for you. Once a backup schedule is created, it will start the backup task automatically at the specific time you set.
MiniTool ShadowMaker is a piece of all-in-one PC backup software that supports backing up your important files, Windows operating system, selected partitions, and the whole disk in Windows 11/10/8.1/8/7. This free tool is also capable of backing up files even when they are in use.
In addition to data backup, moving Windows to another drive or cloning HDD to SSD for better system performance is also permitted. Now, let’s see how to schedule backups for files with this freeware:
Step 1. Launch MiniTool ShadowMaker on your Windows device and hit Keep Trial to enter its main interface.
MiniTool ShadowMaker TrialClick to Download100%Clean & Safe
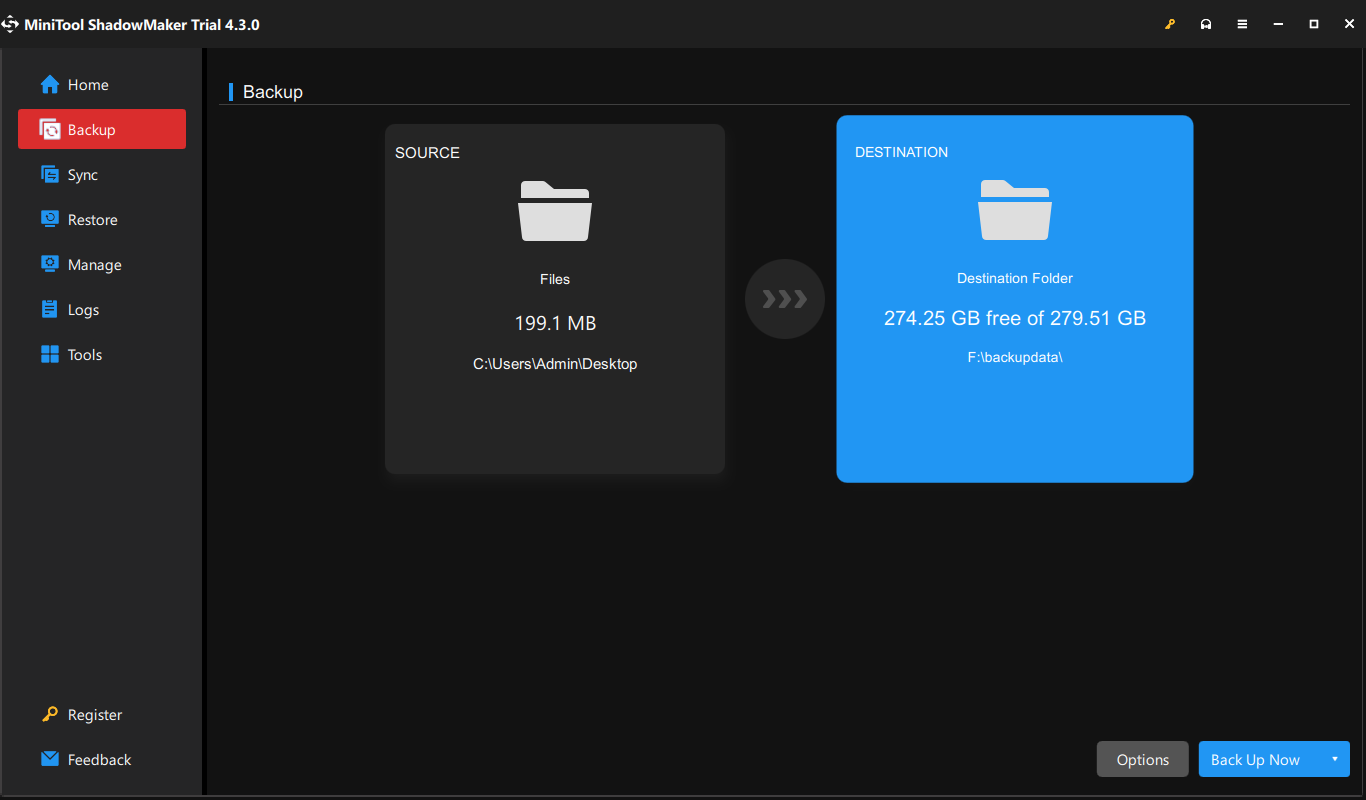
Step 2. In the Backup page, click on SOURCE > Folders and Files to choose the files you want to protect. As for the destination path, go to DESTINATION. Here, an external hard drive or a USB drive is highly recommended.
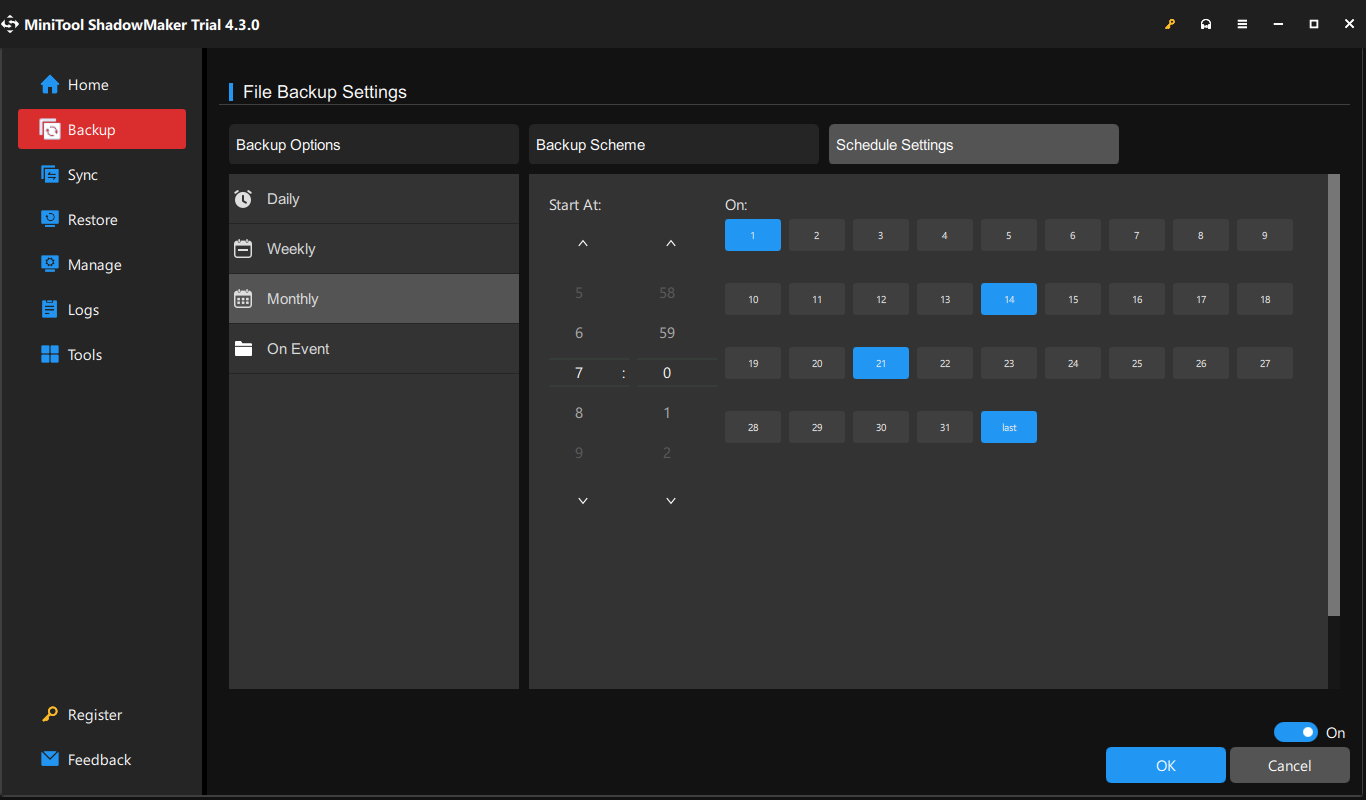
Step 3. To set a scheduled backup, please: hit Options in the lower right corner > toggle on Schedule Settings > pick up a time point to back up your data daily, weekly, monthly, or on events > hit OK.
Step 4. Either hit Back Up Now to perform an instant backup or hit Back Up Later to delay the task. You can check the delayed task in the Manage page.
Way 2: Create a Scheduled Backup via File History
File History is available in Windows 10/11 and it only backs up files from the C:\User\<username> folder (formerly known as Libraries) including Documents, Music, Pictures, Videos, Desktop as well as offline files associated with your OneDrive account. Here’s how to enable File History to create a scheduled backup of files in Libraries:
Step 1. Go to Windows Settings > Update & Security > Backup > Add a drive under Back up using File History.
Step 2. Then the Automatically back up my files option appears on the screen and is toggled on. Next, click on hit More Options.
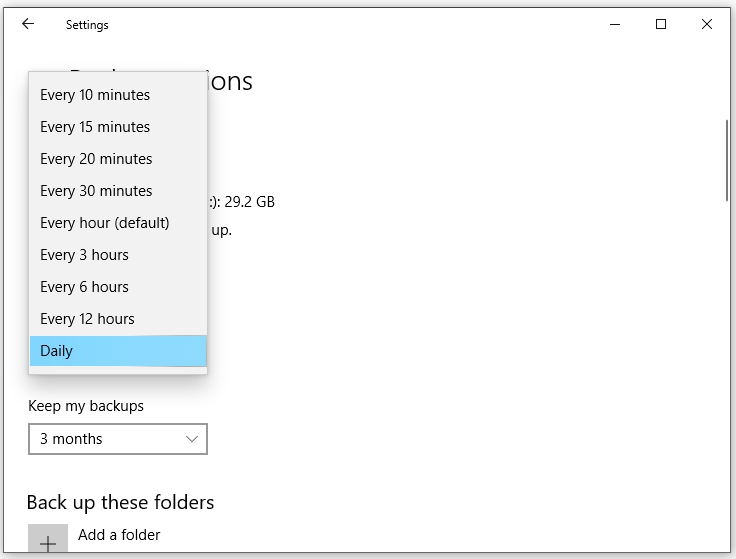
Step 3. Choose how often you want to back up your files and how long you need to keep the backups.
Step 4. Click on Back up now to start the process.
![[Full Review] Windows 10/11 Backup Options of File History](https://images.minitool.com/minitool.com/images/uploads/2021/05/windows-10-backup-options-thumbnail.png)
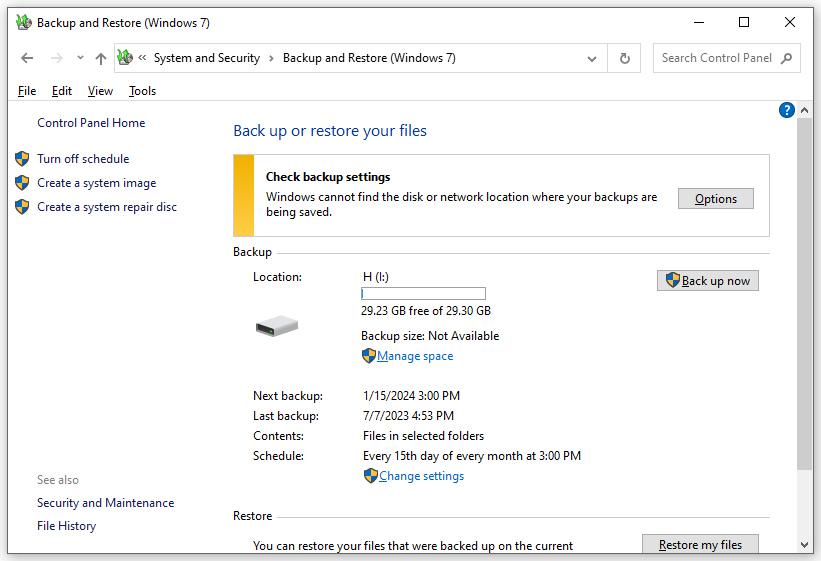
Way 3: Create a Scheduled Backup via Backup and Restore (Windows 7)
Another Windows inbuilt backup utility called Backup and Restore (Windows 7) supports backing up files, system drives, or other non-system partitions. It can be used to back up both internal and external drives. Here’s how to set a scheduled backup via Backup and Restore (Windows 7):
Step 1. Type control panel in the search bar and hit Enter.
Step 2. Under System and Security, click on Backup and Restore (Windows 7).
Step 3. If you have made a backup before, click on Change settings to initiate Set up backup. If not, click on Set up backup.
Step 4. Select where you would like to store your backup > tick Let me choose > choose the items you want to backup.
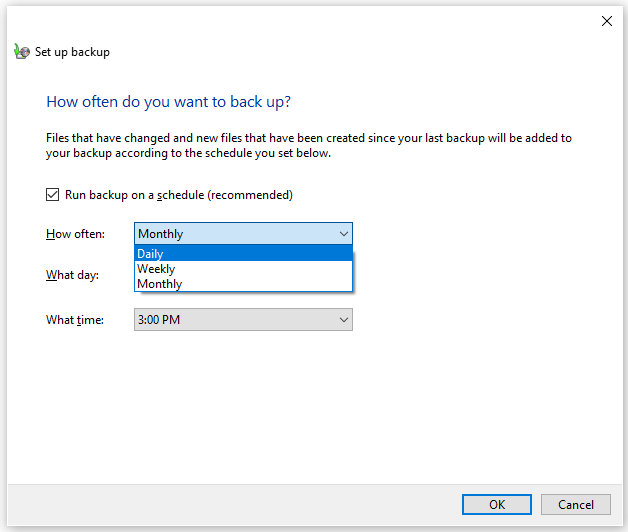
Step 5. To create a scheduled backup, you need to: hit Change schedule > check Run backup on a schedule (recommended) > configure the backup schedule to automatically backup the items you choose at a fixed frequency > hit OK.
Step 6. Finally, click on Save settings and run backups or Save settings and exit.
We Need Your Voice
To increase data security and reliability, you need to create a scheduled backup of the data on your computer. This post explores how to create a scheduled backup in 3 ways. Among them, most Windows users will never hesitate to try MiniTool ShadowMaker due to its convenience and flexibility.
For more ideas about our product, welcome to share with us via [email protected]. We are looking forward to your feedback!
About The Author

Position: Columnist
Aurelie is a passionate soul who always enjoys researching & writing articles and solutions to help others. Her posts mainly cover topics related to games, data backup & recovery, file sync and so on. Apart from writing, her primary interests include reading novels and poems, travelling and listening to country music.