"The drive where Windows is installed is locked" error always happens in Windows 11/10/8/8.1 when you refresh your PC to restore the computer to its normal state. Here, this post from MiniTool shows you several effective solutions to unlock the hard drive.
Error – The Drive Where Windows Is Installed Is Locked
When Windows 8, Windows 10, or Windows 11 won’t boot or run into errors, many users choose to refresh their computers. Because this restores the computer to its normal operating state while maintaining the integrity of personal files.
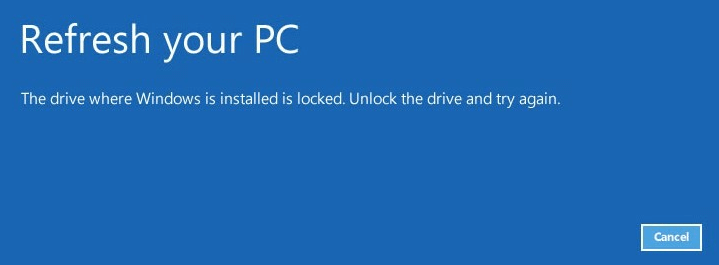
In most cases, the computer can be refreshed successfully, but sometimes they may receive the following error message: “The drive where Windows is installed is locked. Unlock the drive and try again.”
Are you also troubled by such an issue? Why is the hard drive locked?
Possible Causes for the “Hard Drive Locked” Error
It is difficult to say what is the exact culprit for this error, so here we just list the following possible causes:
- MBR (master boot record) is damaged.
- Windows system files are corrupted or damaged.
- BCD (boot configuration data) is damaged (You may be interested in this post: 4 Ways to Fix Boot Configuration Data File Is Missing).
- There are errors on the disk.
- The TPM has been cleared.
After knowing the common causes of this error message, you may be wondering: How to unlock Windows 11/10/8/8.1? Next, let’s see how to unlock a hard drive to fix the “The drive where Windows is installed is locked” issue.
6 Solutions – The Drive Where Windows Is Installed Is Locked
Method 1: Rebuild MBR With MiniTool Partition Wizard
MBR (master boot record) is a special type of boot sector at the very beginning of partitioned computer mass storage devices. It contains a small amount of executable code called the master boot code, the disk signature, and the partition table for the disk.
And the master boot code scans the partition table for the active partition, finds the starting sector of the active partition, loads a copy of the boot sector from the active partition into memory, and transfers control to the executable code in the boot sector.
Once the master boot code is damaged or corrupted, you are likely to receive the “The drive where Windows is installed is locked” error message when booting or refreshing your computer. So, you can try rebuilding MBR to see whether the Windows-locked hard drive error can be fixed.
Now, you might be wondering: How to rebuild MBR effectively to unlock drive Windows 11/10/8/8.1?
Here, MiniTool Partition Wizard, a professional partition manager is recommended. This tool offers you the Bootable Media feature that can help you start the unbootable computer and rebuild MBR.
Tip: The free edition of MiniTool Partition Wizard doesn’t provide Bootable Media Builder since this feature is only included in any paid editions. Here, you can get MiniTool Partition Wizard Pro Edition to rebuild MBR to unlock a hard drive.
MiniTool Partition Wizard DemoClick to Download100%Clean & Safe
Step 1: Launch MiniTool Partition Wizard on a working computer, and then click Bootable Media in the toolbar.
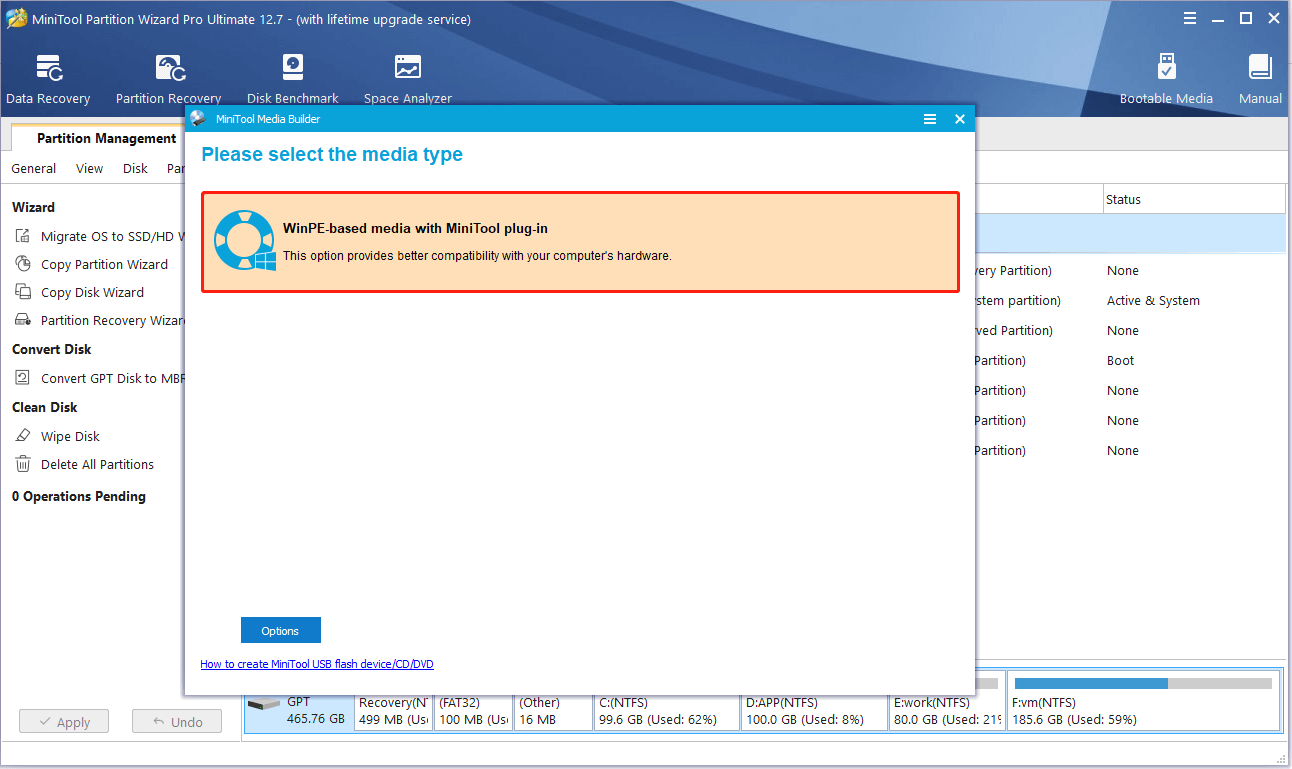
Step 2: Click WinPE-based media with MiniTool plug-in.
Step 3: Create a bootable USB drive or CD/DVD drive.
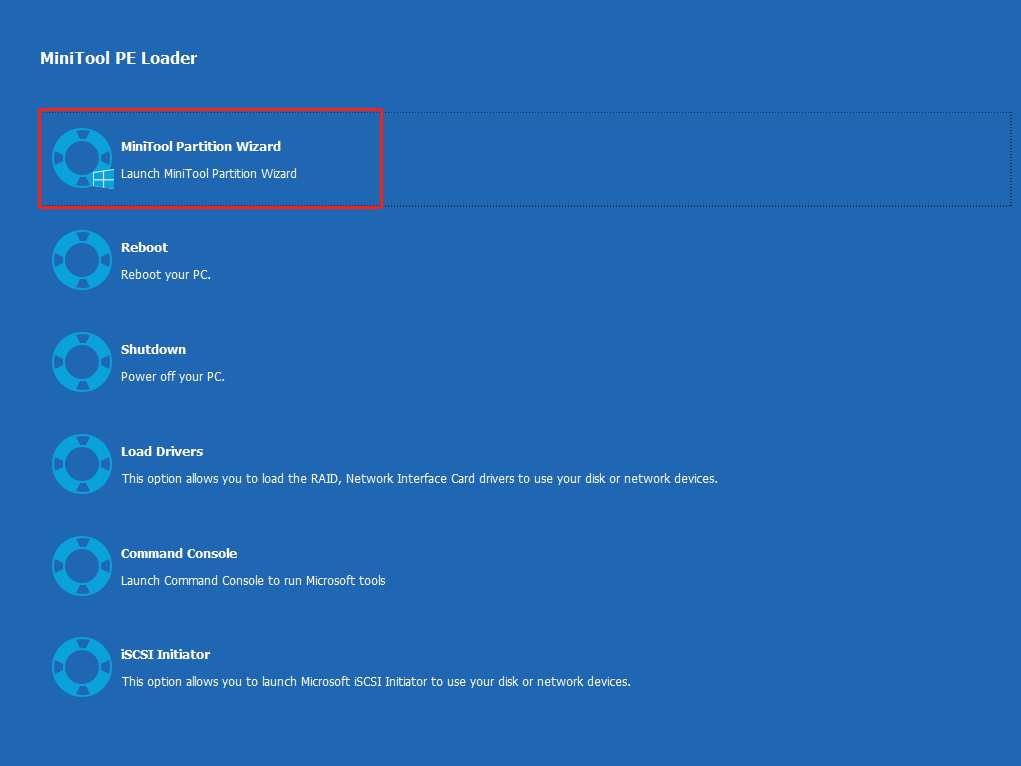
Step 4: Connect the MiniTool bootable hard drive to your PC that reports the Windows system drive is locked, and boot from the burned bootable drive. In the following window, click MiniTool Partition Wizard.
Step 5: Now, select the system disk which is facing MBR damage and click Rebuild MBR from the left panel or the right-click menu.
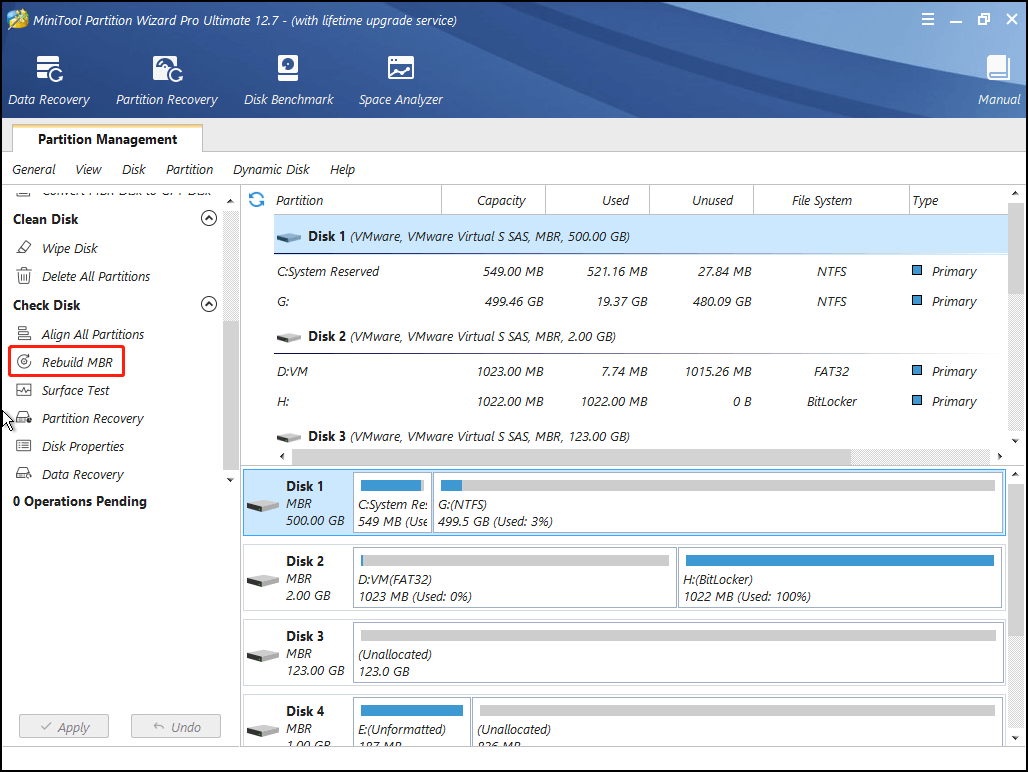
Step 6: Click the Apply button to perform all changes.
TOP RECOMMENDATION
In the main interface of MiniTool Partition Wizard, you can choose to back up data saved on the locked hard drive to keep data 100% safe because any accident during the PC repair process could result in data loss. Here, you can do this with the following steps.
Step 1: Select the current system disk and choose the Copy Disk feature from the left action panel.
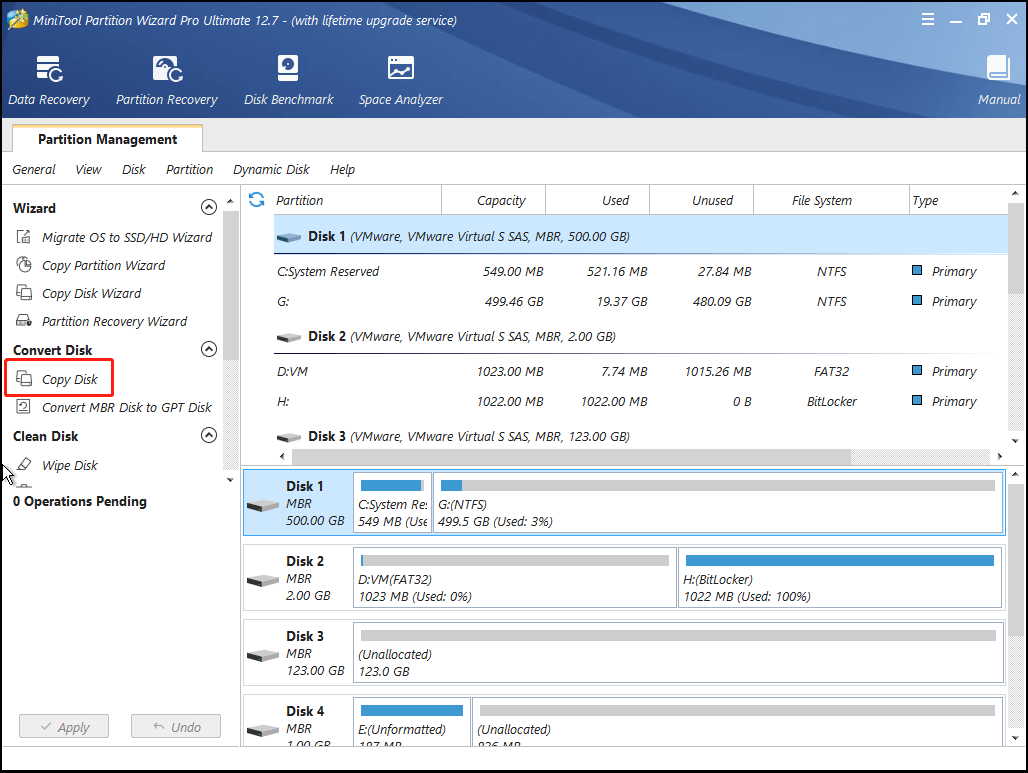
Step 2: Select the target disk that is used to hold the copy of the system disk and click Next.
Note: Please back up all important data on the target disk in advance, because all its data will be deleted.
Step 3: Select a copy option to decide the layout of the target disk, and manually change the partition size.
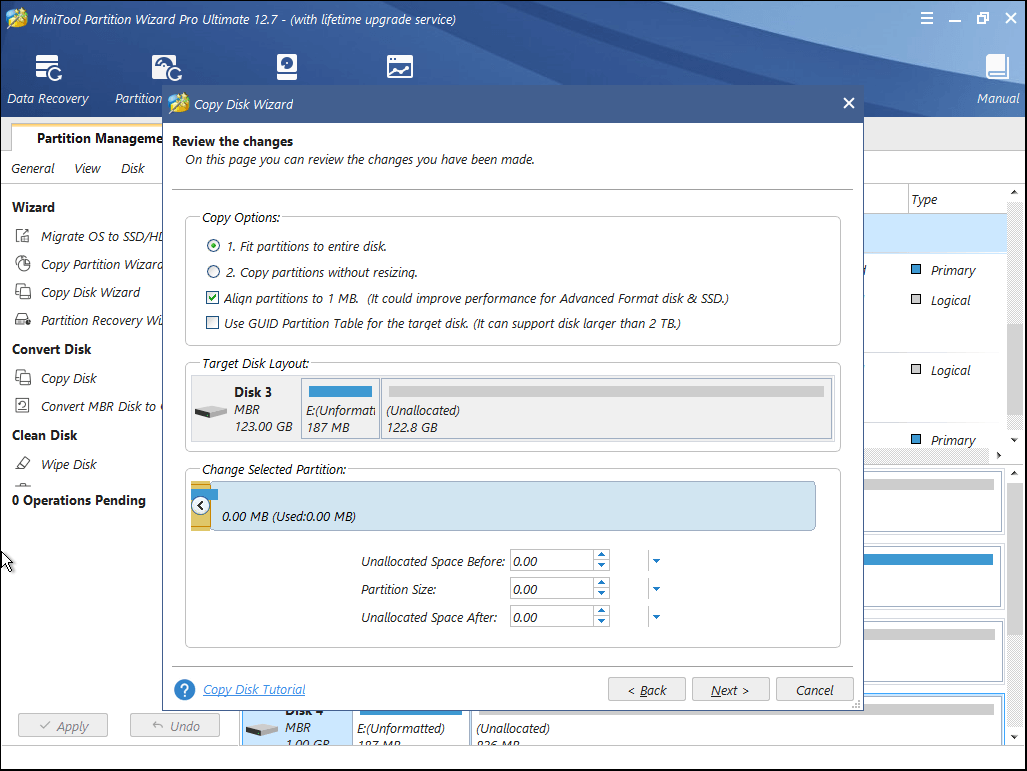
- If you are an SSD or advanced format HD user, you can check the option of Align partitions to 1MB to improve disk performance.
- If the target disk is larger than 2TB, you can check the Use GUID Partition Table for the target disk. Doing this will turn the target disk into a GPT disk, breaking the 2TB limit in MBR disk read & write.
Step 4: Read the pop-up notes carefully, and then click the Finish button to continue.
Step 5: Click the Apply button in the lower left corner to apply all pending operations.
Method 2: Repair Your Computer With Windows Installation Media
The Repair your computer feature in the Windows installation media could fix problems that are preventing Windows from running. After repairing the computer, you may boot your computer without refreshing the computer.
Step 1: Create a Windows installation media or repair disk, either USB or CD/DVD.
Tip: You'd better use the Windows installation media which is to build the same edition of Windows you are trying to repair.
Step 2: Connect the Windows installation media to your computer and boot from it.
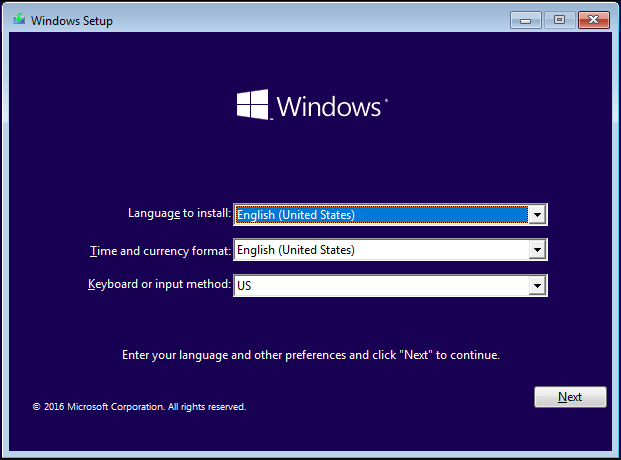
Step 3: Choose the language, the time, the currency format, and the keyboard, then click Next to continue.
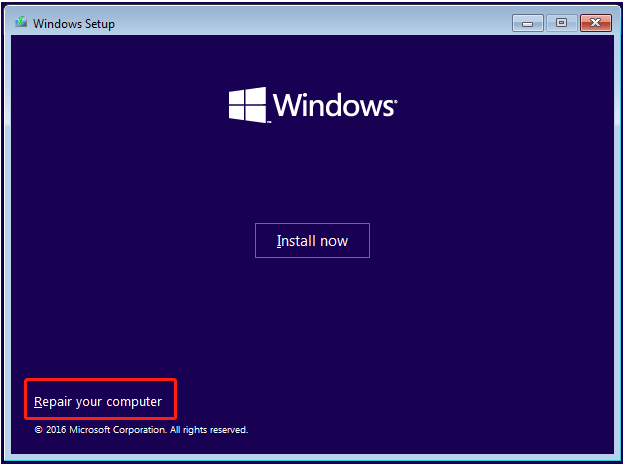
Step 4: Choose Repair your computer.
Step 5: Click on Troubleshoot > Advanced options > Startup Repair to fix problems that keep Windows from loading to unlock the hard drive.
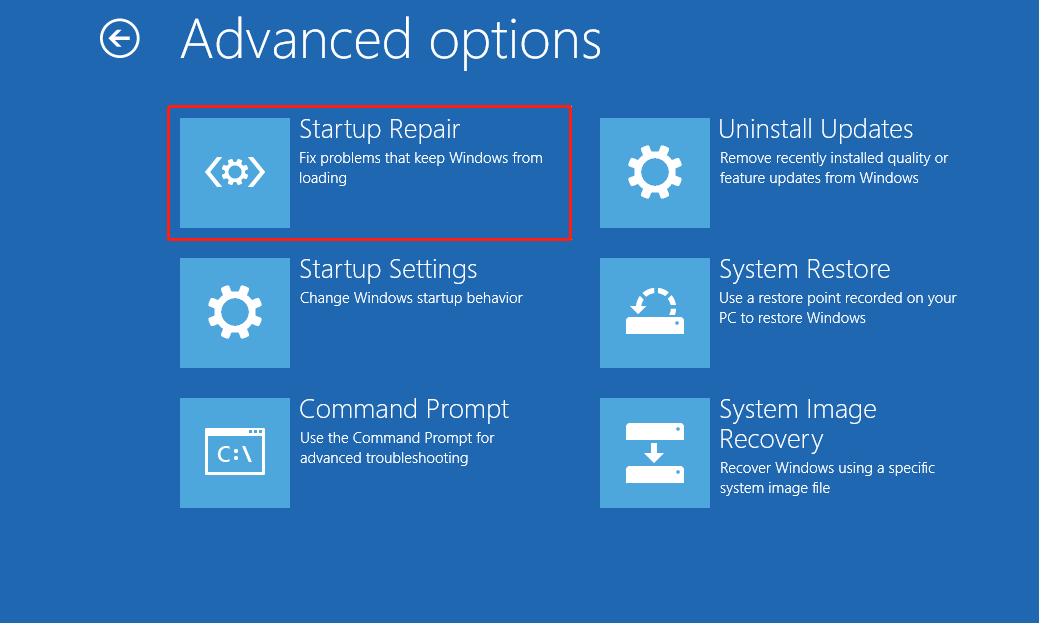
Step 6: Wait for the repair process to complete. Then you should be able to start Windows or refresh your computer.
Method 3: Fix Boot-Related Files With Bootrec.exe Tool
Bootrec.exe is a Windows snap-in tool to troubleshoot startup issues, and it can repair the master boot records, boot sector, and boot configuration data. Here are the steps to fix the “The drive where Windows is installed is locked” problem with this tool.
Step 1: Insert the Windows installation media into your computer and boot from it.
Step 2: Select your language preferences and click Next.
Step 3: After selecting language, press Shift + F10 to open Command Prompt.
Step 4: Type bootrec.exe in the Command Prompt window and press the Enter key.
Step 5: Type the following commands, and each command should end with pressing the Enter key:
- bootrec /fixmbr
- bootrec /fixboot
- bootrec /rebuildbcd
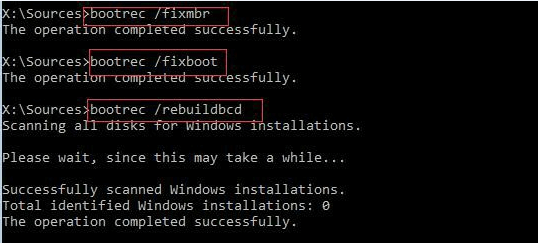
After the repair is completed, you can quit from Command Prompt and try starting Windows or refreshing your computer.
Method 4: Fix Disk Errors With CHKDSK.exe
CHKDSK is a Windows built-in utility to report disk/volume state. If you run it without giving any parameters, it can repair problems related to bad sectors, system errors, cross-linked files, directory errors, and lost file clusters.
If you run CHKDSK by specifying parameters, like /f, and /r, it will examine disks and correct common errors on FAT16, FAT32, and NTFS drives.
So, you can follow the instructions below to fix the “The drive where Windows is installed is locked” error.
Step 1: Insert the Windows installation media into your computer and boot from it.
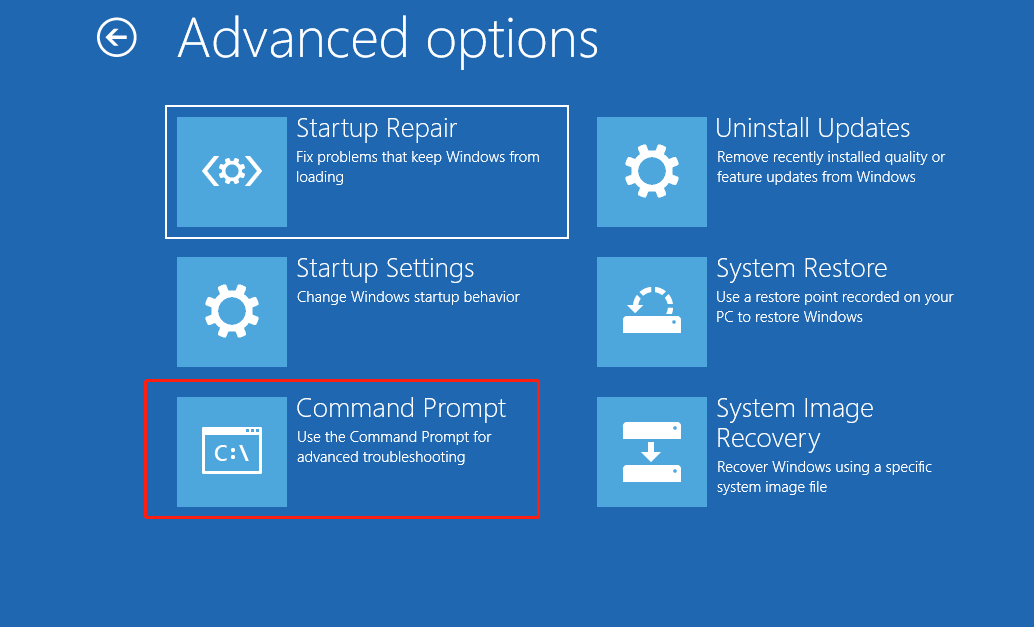
Step 2: Click Repair your computer > Troubleshoot > Advanced Options > Command Prompt.
Step 3: Type the chkdsk C: /r or chkdsk C: /f and press Enter (C is the letter of the drive where Windows is installed. You need to replace C with the actual drive letter. For example, if your Windows is installed on D: drive, replace C with D).
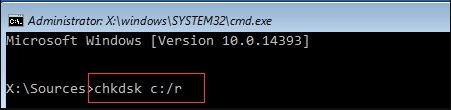
Tip: With the parameter /r, chkdsk.exe will cost much more time to fix errors compared with giving the /f parameter because the former will locate bad sectors and recover readable information, not limited to fixing errors.
Step 4: Type exit and press Enter. After that, you should be able to refresh your computer or start Windows.
Method 5: Use System File Checker to Repair Missing or Corrupted System Files
System File Checker (SFC) is a utility in Windows that allows you to scan for corruptions in Windows system files and restore corrupted files. However, how to use this tool to repair missing or corrupted system files to unlock a hard drive?
Step 1: Open Command Prompt using the same way in Method 3.
Step 2: Type sfc /scannow and then press the Enter key to operate.
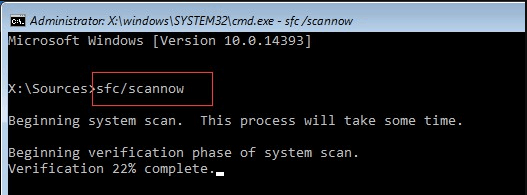
After the process is completed, you can try rebooting Windows or refreshing the computer to see whether the hard drive locked error still exists.
If you still get the locked hard drive error after trying all the solutions above, you can try the last solution to unlock the hard drive Windows 11/10/8/8.1.
Method 6: Restore Windows
Some users reported that they successfully dealt with the “The drive where Windows is installed is locked” error by restoring Windows and the steps are shown below. If you had the System Restore feature turned on before Windows ran into problems, you can give it a try.
Step 1: Boot your computer using the Windows installation media.
Step 2: Select your language preferences, and click Next.
Step 3: Click Repair your computer > Troubleshoot > Advanced options > System Restore.
Step 4: Then, you will see the System Restore interface as follows. Now, click the Next button to continue.
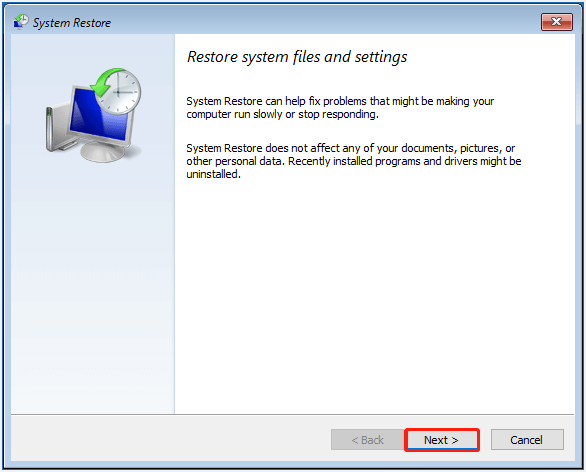
Step 5: After that, you will be given available system restore points as well as detailed operating prompts. Just do as told to restore the operating system to unlock the drive Windows 11/10/8/8.1.
Note: Sometimes you may find this restore operation stuck on restoring files. This post Easily Fix: Windows 10 System Restore Stuck or Hang Up shows you corresponding solutions.
Bottom Line
Now you should know how to unlock a hard drive in Windows 11/10/8/8.1 when receiving the error “The drive where Windows is installed is locked”.
Should you have any other problems with the locked hard drive issue or MiniTool Partition Wizard, just feel free to contact us via [email protected] or leave a message in the comment area below.
The Drive Where Windows Is Installed Is Locked FAQ
- Rebuild MBR with MiniTool Partition Wizard.
- Repair your computer with Windows installation media.
- Fix boot-related files with the Bootrec.exe tool.
- Fix disk errors with CHKDSK.exe.
- Use System File Checker to repair missing or corrupted system files.
- Restore Windows.
- Press Windows + E key combinations to open Windows Explorer.
- Double-click the BitLocker encrypted drive.
- Choose Unlock Drive from the context menu.
- Enter the password to unlock the BitLocker encrypted drive.
- Right-click the Start button and select Disk Management.
- Right-click on the drive or partition to select Format.
- Set up the file system and cluster size.
- Click OK to format the BitLocker encrypted drive.
When you forget the BitLocker password after encrypting your local hard drive or other drives, you can search for the BitLocker recovery key on your computer or USB drive, reset the BitLocker pin recovery key or password, and so on. For a detailed guide to unlock your disks without a password, you can refer to: Forgot BitLocker Password & Recovery Key? Try the 6 Ways Now.
About The Author

Position: Columnist
Shirley graduated from English major and is currently an editor of MiniTool Team. She likes browsing and writing IT-related articles, and is committed to becoming a professional IT problem solver. The topic of her articles are generally about data recovery, data backup, and computer disk management, as well as other IT issues. In spare time, she likes watching movies, hiking and fishing.