Files Get Lost After CHKDSK
Since you are here, it’s likely that you ran CHKDSK recently and finally found your files get lost after CHKDSK. Actually, you are not alone in this issue. Here are some real cases I’ve found on the internet.
Case 1: Files get lost after CHKDSK.
When Vista told me to run CHKDSK for my external hard drive, I foolishly did it. Then I saw a lot of "deleting index..." messages and I knew it was bad news. After CHKDSK, a whole lot of files, including personal backups, photos, videos, and some other files, got lost. Is there a good way to get these deleted data back? – MackoGetData forum
Case 2: All files disappeared on my secondary HD.
On my computer with Win7, after only one execution of CHKDSK, all files disappeared on my secondary HD (around 500 GB of very important data). I read the CHKDSK log file and it has found many mistakes on the HD including on the MFT. Is it possible to recover missing files as well as MTF? – GuukSuperuser
Then, I’d like to show you three methods about how to restore CHKDSK deleted files. Please keep reading.
3 Ways to Recover Data after CHKDSK
Recover CHKDSK Deleted Data with MiniTool Power Data Recovery
MiniTool Power Data Recovery is a reliable file recovery software. You can use this software to recover types of files, such as photos, documents, archives, and so on. Besides, it can be used to recover deleted files under various situations, including mistaken deletion, OS crash, virus attack, etc. Even if your data gets lost accidentally after you have tried to resolve computer problems, you can use MiniTool Power Data Recovery to find them.
Additionally, this software provides some excellent features. For example, you can choose to scan Desktop, Recycle Bin, or a selected folder to save your scan time. You can set Scan Settings before beginning to scan. File systems and file types can be set in advance so as to filter the displayed file list.
MiniTool Power Data Recovery provides the free edition for you. You can use the free edition first to make a deep scan and recover your wanted files.
MiniTool Power Data Recovery FreeClick to Download100%Clean & Safe
Recovery steps:
Step 1: Download and install MiniTool Power Data Recovery.
MiniTool Power Data Recovery FreeClick to Download100%Clean & Safe
Step 2: Launch the software. In the Logical Drives section, you need to choose the partition in which you have performed CHKDSK commands and contains the deleted/lost files, then click on the Scan button.

Step 3: It will take some time to finish the scanning process. You can browse the found files during the process but due to the best recovery result, please do not interrupt the scan process.
Step 4: You will find different paths on the left of the result page. You can expand different file paths to find your wanted files. Here are some useful functions that can help you locate files effectively.
- Filter: to filter files by setting file types, file size, file category, and date modified.
- Type: to sort files based on their different types. You can expand different classifications to find a certain type of file.
- Search: to find files by inputting the full or part of the name of the wanted files. After hitting Enter, you can find a list of matched files.
- Preview: to verify that the chosen file is what you want. You can use this function to preview photos, videos, audio, and documents. Please note that the previewed videos and audio files should be smaller than 2GB in size.
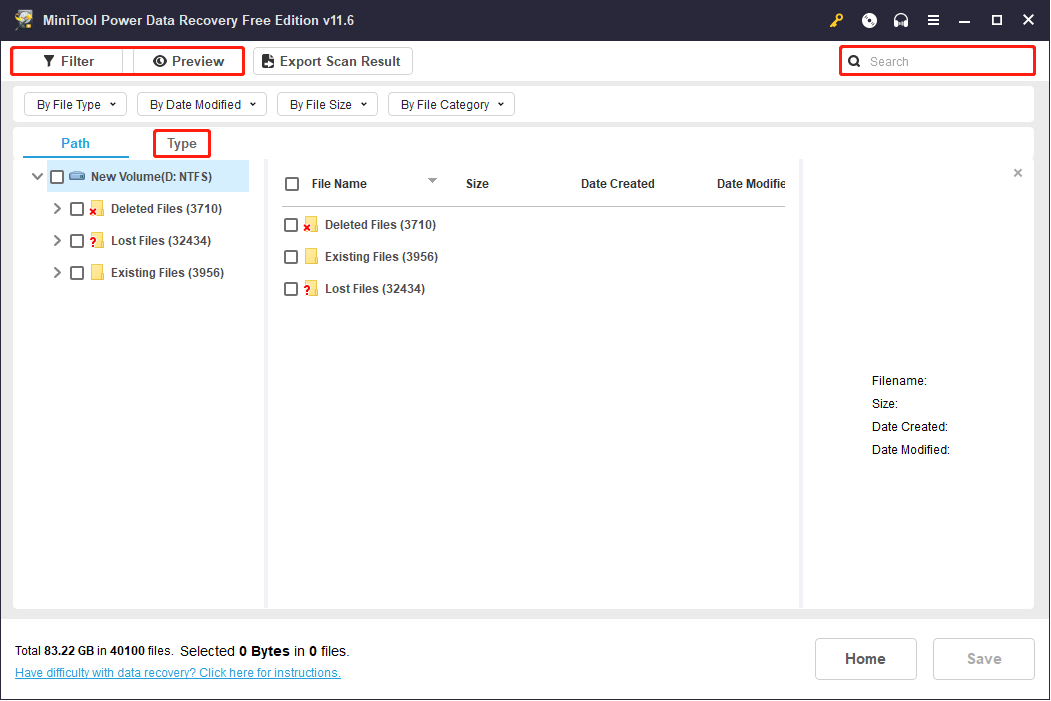
Step 5: Check the files you need and click on the Save button.
Step 6: Choose a proper path to save the files and click OK to confirm. You’re suggested to save the files to another path instead of the original partition. Otherwise, the CHKDSK deleted files may be overwritten and become unrecoverable.

Recover CHKDSK Deleted Data Using File History
File History is a backup tool included in the Windows operating system. It backs up files stored in Desktop, Documents, Downloads, Music, OneDrive, Pictures, and other standard Windows libraries.
If you have enabled File History before your data is lost, it is a good choice to restore data deleted by CHKDSK with it.
Step 1: Press Win + S and type Control Panel into the search box.
Step 2: Hit Enter to open the Control Panel window.
Step 3: Navigate to System and Security > File History > Restore personal files.
Step 4: Select the wanted file and click on the Restore button.
Recover CHKDSK Deleted Data from FOUND.000 Folder
FOUND.000 is a system folder that stores fragmented files recovered by CHKDSK. This folder often appears when you run the CHKDSK command to fix the disk error, like an incorrect system shutdown. You can recover files from the FOUND.000 folder but not a large amount of data. If you want to try this method to recover data deleted by CHKDSK, please follow the next steps.
Step 1: Press Win + E to open File Explorer.
Step 2: Select View on the top toolbar and check Hidden items to show the hidden folders.

Step 3: Then, you can find and double-click on the FOUND.000 folder.
Step 4: You will find lots of files with .chk extensions. To recover files from the folder, you can change the extension to the original extension of the file. For instance, if the file you want to restore is a PNG image, you can change the .chk to .png to achieve the goal.
However, there are numerous CHK files and it’s difficult for you to recognize the original format of every lost file. If you just need to recover a few files, you can try this method. If not, I heartily suggest you use MiniTool Power Data Recovery to retrieve files.
MiniTool Power Data Recovery FreeClick to Download100%Clean & Safe
Get a Better Understanding of CHKDSK
Although performing the CHKDSK command has the risk of losing data, it is useful for scanning and fixing file system errors. After you know how to restore CHKDSK deleted files, you can obtain more information about the CHKDSK command in the following part.
What Is CHKDSK
CHKDSK is a command to verify the logical integrity of the file system. It is a Windows built-in tool to report disk/volume state if you run it without giving any parameters. This tool can repair problems caused by or related to bad sectors, system errors, cross-linked files, directory errors, and lost file clusters.

When and How to Run CHKDSK Properly
When to run?
Case 1:
After a system crash or improper shutdown, Windows might force a CHKDSK the next time you restart the computer, which is to fix any disk-related issues that may have resulted from the crash or shutdown. At this time, you’d better do as the system suggests.

Case 2:
When you open a file, you might receive an error message saying the file is corrupted and asking you to run the CHKDSK utility. Of course, such an error message might pop up from the lower right corner even if you are doing nothing. To deal with this issue, you can choose to delete the corrupted file or run CHKDSK to fix it. As long as the corrupted data is not that important, just delete it. On the contrary, run the CHKDSK utility to fix the problem.
MiniTool ShadowMaker TrialClick to Download100%Clean & Safe
How to run?
Method 1:
Step 1: Press Win + E to open the File Explorer.
Step 2: Right-click on the drive you want to check and choose Properties.
Step 3: Shift to the Tools tab.
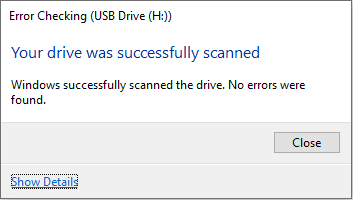
Step 4: Click on Check.
Step 5: Click on Scan and repair drive in the following window.

Wait for the process to complete. You can click on Show Details to see more error information, or click on Close to exit the window.
Method 2:
You can also run CHKDSK using Command Prompt.
Step 1: Press Win + S and type Command Prompt into the search box.
Step 2: Choose Run as administrator in the right pane.
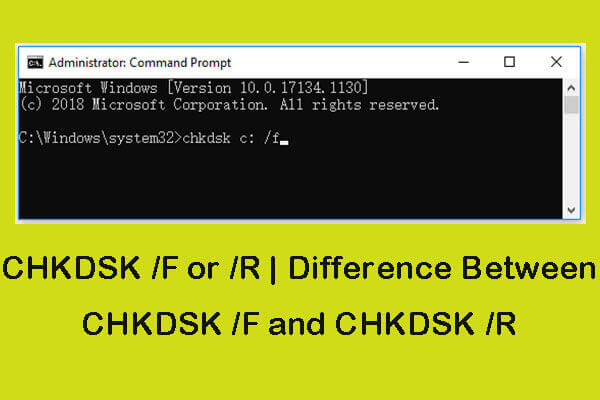
Step 3: Type CHKDSK x: /f and hit Enter. (x stands for the drive letter of the target partition).
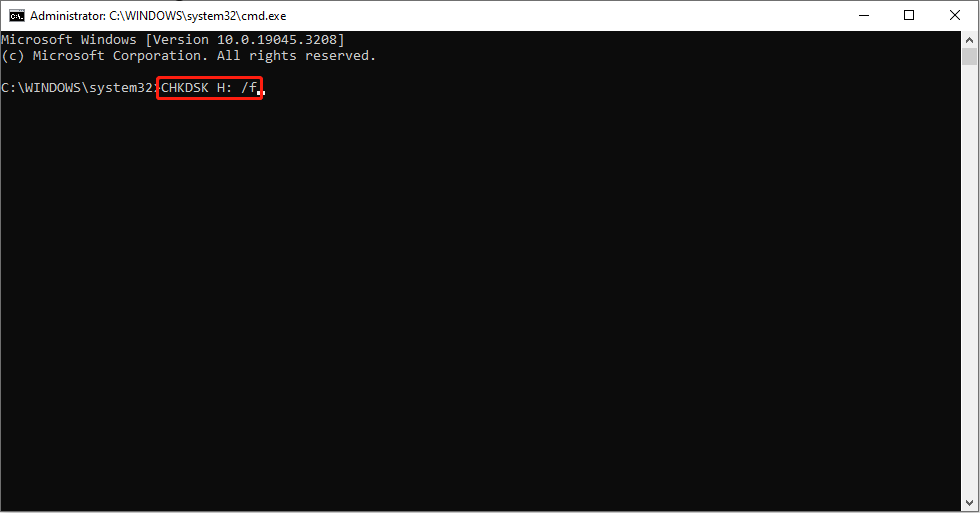
Please note: CHKDSK will delete files holding invalid file names in the directory or delete corrupted index entries and attribute records.
Common CHKDSK Parameters
Functions of commonly used CHKDSK parameters are as follows:
- /F: Fix errors on the disk. The disk must be locked. If CHKDSK cannot lock the drive, a message appears that asks you if you want to check the drive the next time you restart the computer.
- /R: Locate bad sectors and recover readable information. The disk must be locked, too. In addition, /r does things /f does, but it is more multifunctional and powerful, and the only defect is that it costs much more time.
- /I: Use with NTFS only. Performs a less vigorous check of index entries, reducing the amount of time needed to run CHKDSK.
For more parameters, please see Microsoft’s introduction to CHKDSK.
Conclusion
Data might be lost due to various reasons. If your files get lost after CHKDSK, you can try the methods mentioned in this post. Honestly, for a secure and effective recovery, MiniTool Power Data Recovery is highly advised.
MiniTool Power Data Recovery FreeClick to Download100%Clean & Safe
Please feel free to share your problems with us via [email protected].
Recover Data after CHKDSK FAQ
1.Click on the search icon/box on the taskbar.
2.Type cmd and choose Command Prompt.
3.Select Run as administrator.
4.Click Yes in the User Account Control window.
5.Type CHKDSK /f.
6.Press Enter on the keyboard.
About The Author

Position: Columnist
Andrea graduated in English and has a keen interest in the IT industry and questions that arise when computers are used. She is passionate about new things and challenging things and has a wide range of interests like playing guitar, gaming, and crafting.