The CPU (central processing unit) is your computer’s brain, which is also known as the processor. If it is bombarded by too many processes, or if a task consumes too much attention, it will become overwhelming and the usage of it will become very high.
CPU 100%
If the CPU usage is about 100%, it means that your computer is trying to perform more work than it can. Then, the speed of your computer will become slower. When computers perform computationally intensive tasks such as running games, they tend to use close to 100% of the CPU.
MiniTool System Booster TrialClick to Download100%Clean & Safe
Why is CPU usage high? Here are 5 main reasons for this situation.
Reasons for High CPU Usage
1. Too Many Background Processes
A background process is a program that runs on a PC including those not opened in the window. Since Windows itself needs some background processes to run, many background processes will run on the computer at the same time. As you install the programs constantly, there will be more and more programs on your PC and it will cause high CPU usage.
2. Svchost.exe (netscvs) Process
When you open the Task Manager, you might have noticed that the svchost.exe (netscvs) process causes high memory or CPU usage. Sometimes this process is associated with malware, but it is a legal system-critical Windows process.
3. WMI Provider Host (WmiPrvSE.EXE)
The WMI Provider Host process is part of Windows, which helps organize monitor and troubleshoot large numbers of systems on the network. However, sometimes it will go out of control.
4. There Is an Annoying Antivirus or a Virus
On the one hand, an annoying antivirus will cause high CPU usage. On the other hand, a virus also can cause high CPU usage.
5. System Idle Process
In fact, the system idle process is just a thread that consumes CPU cycles, and it will not be used. Thus, it’s a reason for high CPU usage.

Solutions to Fix the High CPU Usage
In general, you can stay away from demanding applications to avoid high CPU usage. But sometimes it will go out of control since there is a bug in the process like the notorious WmiPrvSE.exe. You don’t need to worry about that because then I will introduce 8 solutions to help you lower the high CPU usage.
Solution 1: Restart the WMI Provider Host
If the CPU usage is very high, and you’re not running any program that would impact it, it’s not normal. You can open Task Manager to check it.
Recently Microsoft has pulled its official fix, the only thing you can do is to restart the service manually. Here is how to fix the CPU 100%:
Step 1: Search for Services and open it.
Step 2: In the window, find Application Management and right-click it. Then select Restart.

After you do this operation, the high CPU usage will become lower. If not, you can try the next solution.
Solution 2: Use the Event Viewer to Identify the Issues
If the issue with WmiPrvSE.exe still exists, you can identify its cause by using the Windows Event Viewer. Maybe there is another system process that makes WMI provider host keep busy, resulting in high CPU usage. Here is how to fix CPU 100%.
Step 1: Right-click the Start button and select Event Viewer to open it.
Step 2: Choose Applications and Service Logs in the left and choose Microsoft. Then click Windows, WMI-Activity, and Operational successively to open them.
Step 3: Now you should find recent Error entries by scrolling through the list of operational events. For each Error, identify the ClientProcessId.
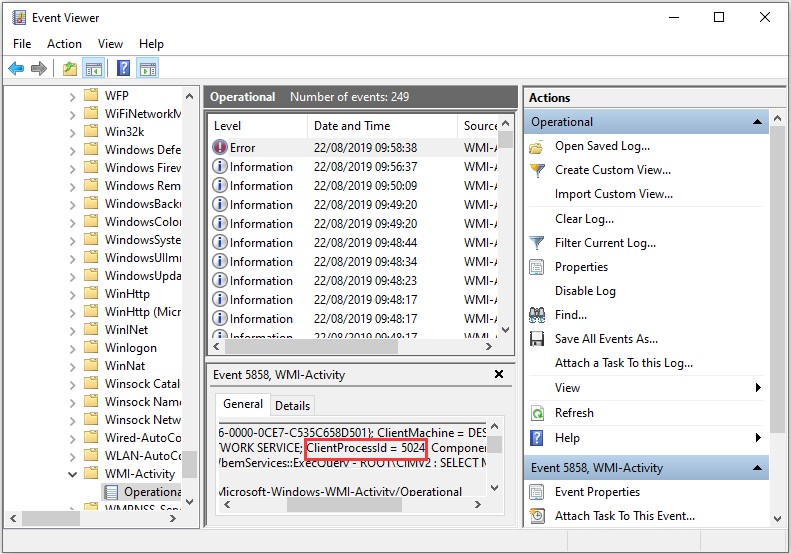
If you suspect that one of these processes is causing the high CPU usage, you can use its ID to find it in the Task Manager and identify the faulty process to fix the high CPU usage.
Solution 3: End the Processes that Cause High CPU Usage
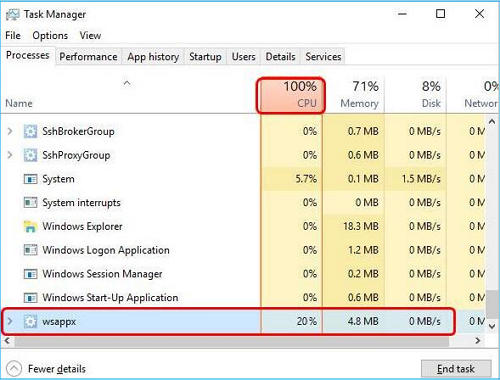
When you notice that the PC is getting slower than usual and the CPU 100%, you can try the Task Manager to find which processes are causing high CPU usage. Here is how to fix the 100% CPU usage issue.
Step 1: Search for Task Manager and open it.
Step 2: Click the CPU column header to sort the processes by CPU usage and check which processes cause your CPU becoming higher.
Step 3: Right-click the process that consumes lots of your CPU and then you should click End task to finish this process.
Now, see if the CPU usage is still at 100% after you do the above operations. If not, this issue has been resolved. If the issue persists, try the next solution.
Solution 4: Disable Third-Party Antivirus Software or Run an Antivirus Scan
Windows Defender is enough for you to use in your daily life. So please uninstall the third-party antivirus software if it does harm to your CPU.

Additionally, the viruses on your PC can cause the 100% CPU usage issue. So you can try to run an antivirus scan to check if there are viruses, spywares or Trojans on your computer. If you find viruses after scanning your PC, you need to delete them immediately.
If you don’t find viruses, you can try the next solution.
Solution 5: Reset Your Power Plan
Power Options has a significant impact on your PC’s performance. If your computer is on Power saver, especially you have changed its’ plan settings, it will cause your CPU becoming higher. The steps to fix high CPU usage are as follows.
Step 1: Choose Hardware and Sound after you launch Control Panel, and click Power Options.
Step 2: Then choose Balanced if your computer is on Power saver.
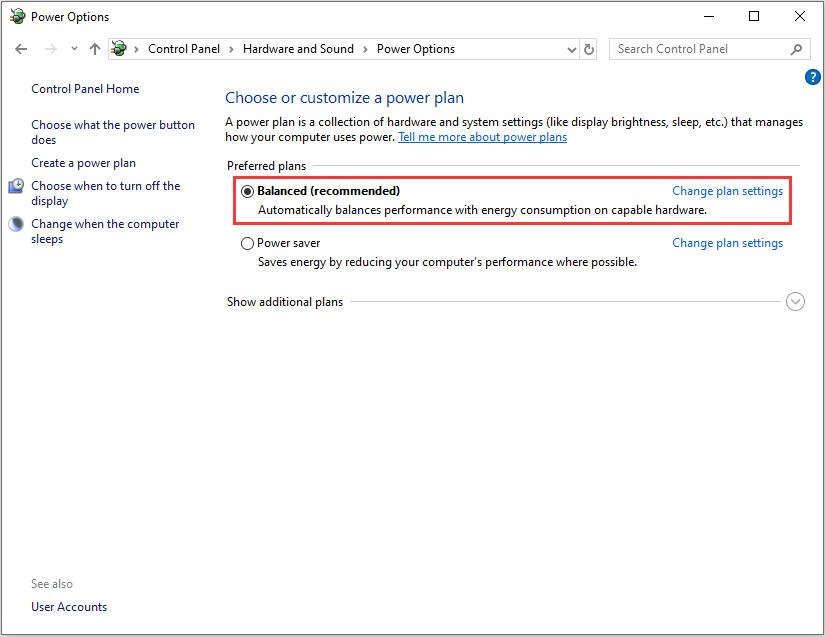
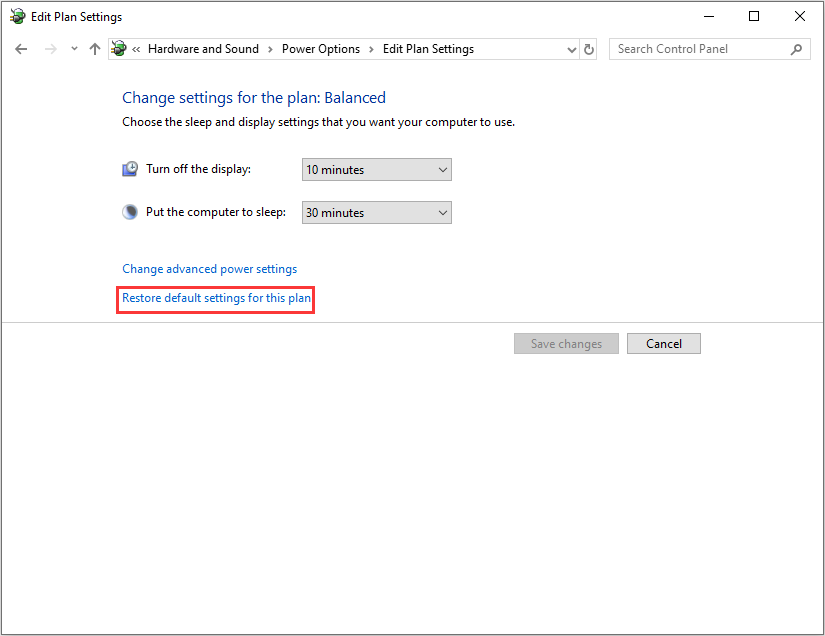
Step 3: Then click Change plan settings that is next to the Balanced.
Step 4: Now, you just need to click Restore default settings for this plan and click OK to make the changes.
Solution 6: Modify Settings in Registry Editor
This issue may be caused by Cortana in Windows 10/11. Thus, if you enabled Cortana, you may encounter the situation that CPU 100%. If you seldom use Cortana, try modifying settings in Registry Editor to see if you can fix this issue. Here is how to lower the high CPU usage:
Step 1: Press the Windows logo key and the R key at the same time to open the Run dialog.
Step 2: Type regedit and then press Enter to open Registry Editor. You’ll be prompted for permission and please click Yes to open it.>
Step 3: Follow the path to locate the correct system files: HKEY_LOCAL_MACHINE\SYSTEM\CurrentControlSet\Services\TokenBroker.
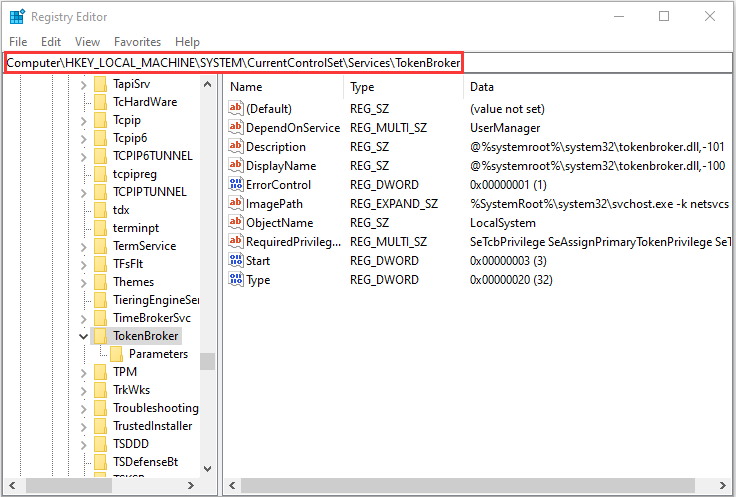
Step 4: Right-click the Start entry on the right side of the pane and select Modify…..
Step 5: Then change the Value data to 4 and click OK to save the change.
After the change, some features of your Cortana will be affected. If you often use it, this option might not be suitable for you.
Then you can check if this annoying issue remains. If not, you have resolved this issue successfully. If this problem still remains, there is the last solution for you, you can try it.
Solution 7: Turn Windows Notification Settings Off
Windows notification settings on Windows 10/11 PCs may trigger CPU 100%. You can follow the steps below to modify the Windows notification settings to fix the issue:
Step 1: You should click the Start button and click Settings to open the Windows Setting.
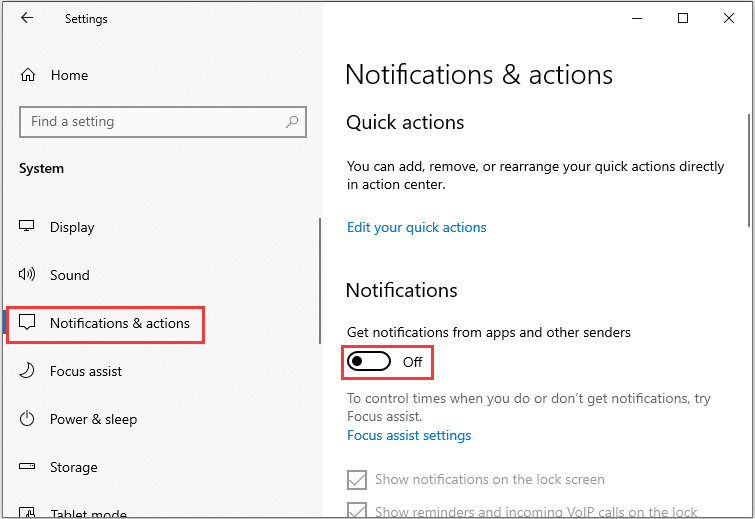
Step 2: Then choose System and click Notifications & actions on the left side of the pane.
Step 3: At last, you just need to turn off the feature Get notifications from apps and other senders.
Solution 8: Reset Your Computer
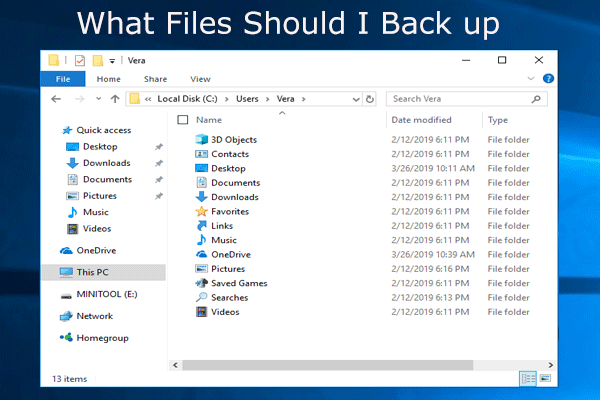
If all of these solutions are not working, you can only reset your computer. But resetting your computer may cause your important files and data loss. Thus, you had better back up your important files in advance. Next I will introduce software for you to back up files.
Use MiniTool ShadowMaker to Back Up Your Data
The free backup software – MiniTool ShadowMaker is an all-in-one data protection and disaster recovery solution for PCs. It allows you to back up your systems, important files, folders, partitions, and even the whole disk. Once a disaster occurs, you are able to restore data with a copy of the backup.
MiniTool ShadowMaker also lets you create bootable media to restore your system to a normal state when your computer fails to boot. It’s easy to use MiniTool Media Builder and MiniTool PXE Boot Tool to maintain hard drives. And it is compatible with Windows 7/8/8.1/10 and Windows Servers.
You can download MiniTool ShadowMaker Trial to back up files and keep them safe. It can be used for free within 30 days or you can choose to purchase an advanced one.
MiniTool ShadowMaker TrialClick to Download100%Clean & Safe
Here is how to back up files:
Step 1: Decide a Backup Mode
- Launch MiniTool ShadowMaker.
- Continue to use the trial edition by pressing Keep Trial.
Step 2: Choose Backup Source
- Go to the Backup page.
- Choose Folders and Files to continue and choose the files you want to back up, then click OK.

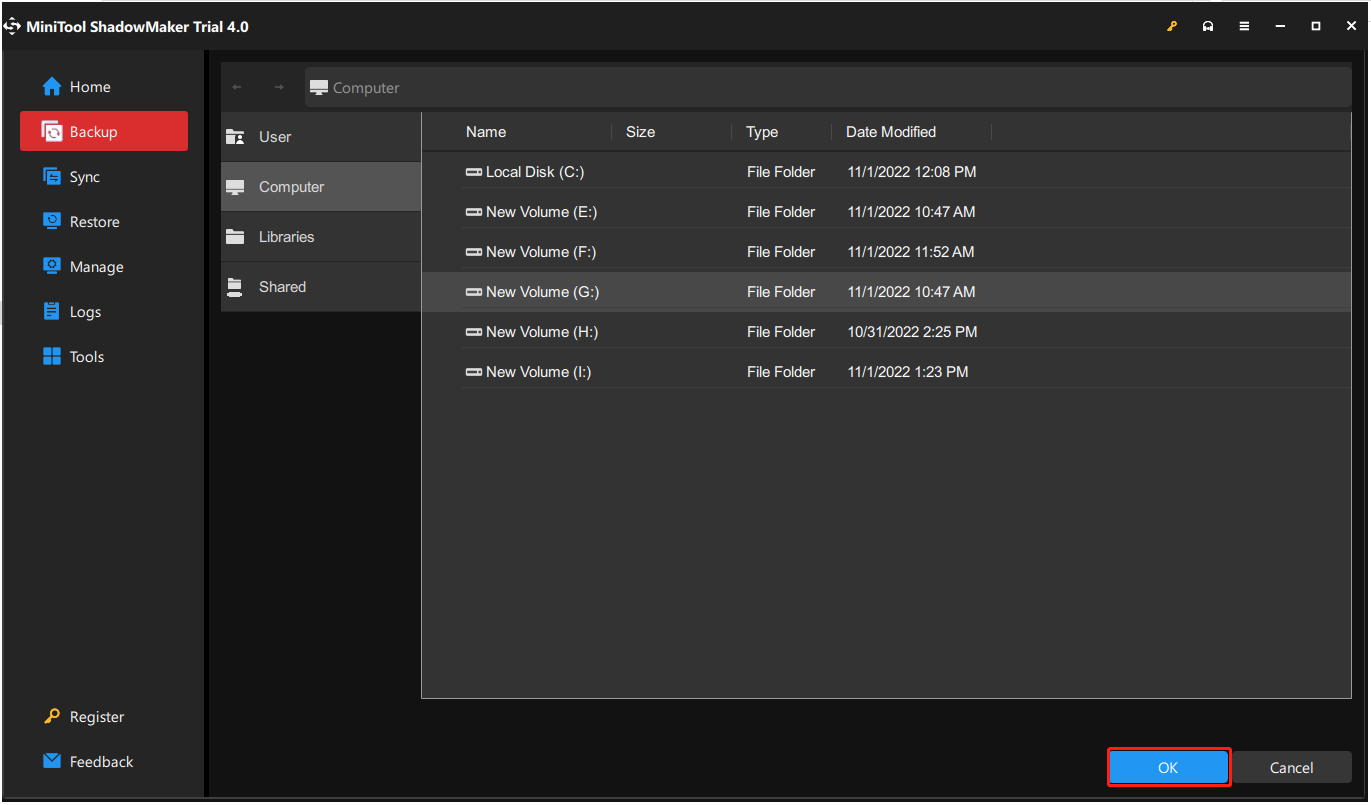
Step 3: Choose a Destination Path
Go to the following interface and choose one partition to store your files based on your needs and click OK.
Step 4: Start to Back Up
Go back to the following interface and click Back Up Now to start the process immediately.
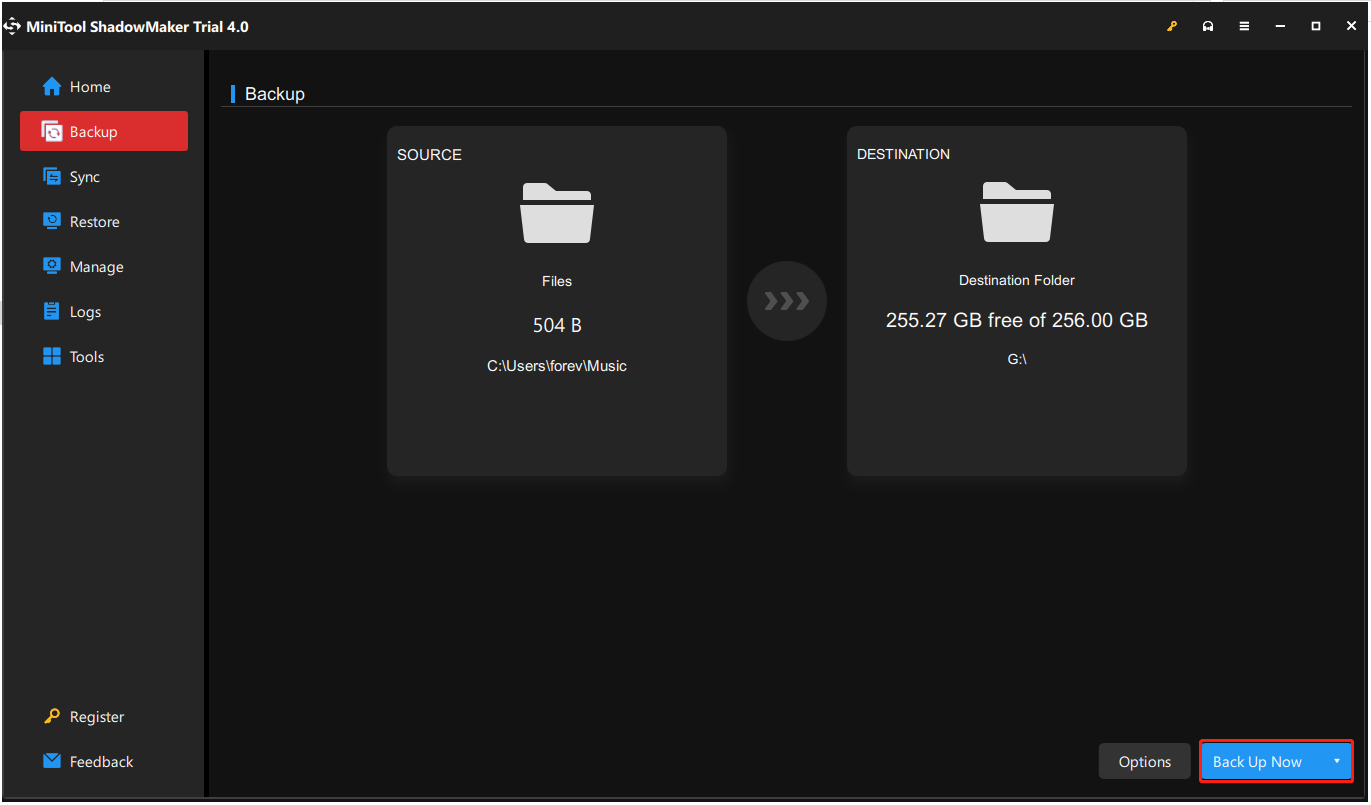
When the process is finished, you have successfully backed up files so as to have provided protection for the data.
Bottom Line
Although the exact reasons for high CPU usage are difficult to find, there are listing the most commons and the corresponding solutions. In addition, there is a backup software – MiniTool ShadowMaker for you to back up files. If you have any questions and suggestions, please contact us via [email protected] or leave a comment.
About The Author

Position: Columnist
Having been an editor at MiniTool since graduating college as an English major, Daisy specializes in writing about data backups, disk cloning, and file syncing as well as general computer knowledge and issues. In her free time, Daisy enjoys running and going with friends to the amusement park.