Have you ever encountered a black screen after Windows update? What measures can you take to get rid of the black screen of death? Here in this post on MiniTool, we have collected several solutions that are proven to be effective in resolving this issue.
Issue – Black Screen With Cursor After Windows Update
Microsoft regularly releases Windows updates to fix user-reported bugs and add new features to the system. However, many problems also occur after updating Windows. What we are going to discuss today is a black screen after updating Windows 11/10/8/7. Here a user describes his problem as follows:
My PC recently updated Windows and is now on startup after login. I get a black screen. I still have a cursor and can even open Task Manager, but the desktop doesn’t load, so I can’t access any of the apps on my computer. I had this problem previously, probably about 2 months ago. I was forced to roll back to the most recent update and set it to not auto-update, but it forced an update on me.answers.microsoft.com
What causes a black screen with cursor after Windows update? Listed below are several possible reasons for this black screen of death issue.
- Cables such as the monitor cables are not connected correctly.
- The display driver is corrupted.
- The system files are corrupted.
- The computer hardware is damaged.
- Some third-party apps conflict with Windows.
- …
If Windows fails to start normally and displays a black screen, you cannot enter the operation interface and cannot access data. The first thing you need to do is to rescue the files on the computer in case of data loss during the black screen repair process.

Recover Data Before Black Screen Repair
When it comes to recovering data from a black-screen computer, you might be wondering:
“How can I regain access to my files when the screen shows black with only a cursor displayed?”
Here MiniTool Power Data Recovery is highly recommended for you to accomplish this task. It provides you with a Bootable Media Builder that can help to create a recovery media and then you can recover data from the unbootable computer.
This data restore tool also serves as a data extract tool that is capable of identifying and extracting deleted, lost, and existing files on your computer’s internal hard drives, external hard drives, USB drives, SD cards, and other file storage devices.
· The Bootable Media Builder is only available in registered editions. You can click the button below to download the free edition of MiniTool Power Data Recovery on a functioning computer, then you will be able to upgrade the free edition to a Personal Edition that provides you the ability to create a bootable recovery media.
MiniTool Power Data Recovery FreeClick to Download100%Clean & Safe
Major steps to recover data from a black screen computer:
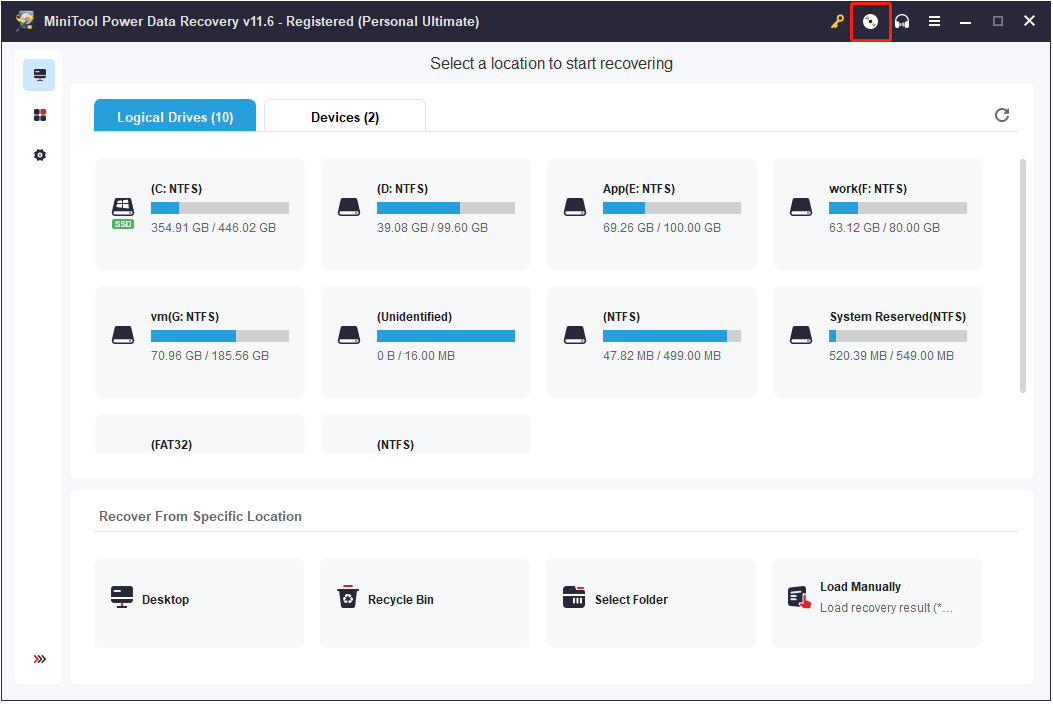
Step 1. Launch the registered MiniTool Power Data Recovery to get its main interface. On its home page, click the Bootable Media Builder icon to create a bootable media.
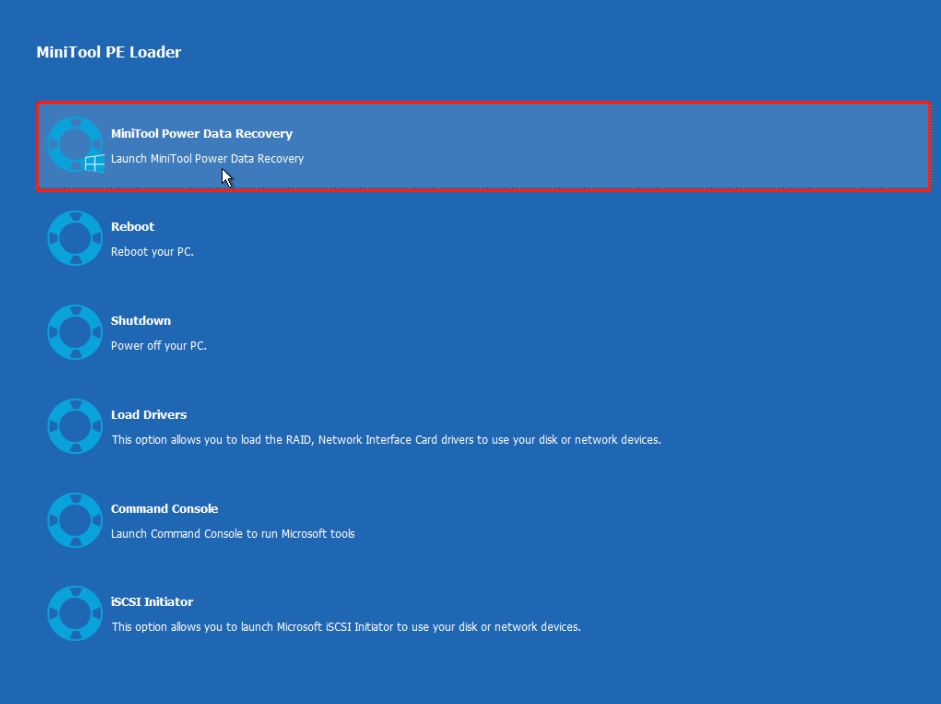
Step 2. Wait for the recovery drive creation process to complete, then insert the bootable USB drive into the computer that displays a black screen. After that, follow the instructions on this page to boot your computer.
On the following page, select the MiniTool Power Data Recovery option.
Step 3. Next, on the home page of MiniTool Power Data Recovery, you will see all the partitions on your computer are listed under the Logical Drives section. You need to select the partition where you want to recover data from and click the Scan button.
Since system crashes usually affect files on the C drive, here we choose the C drive to scan.
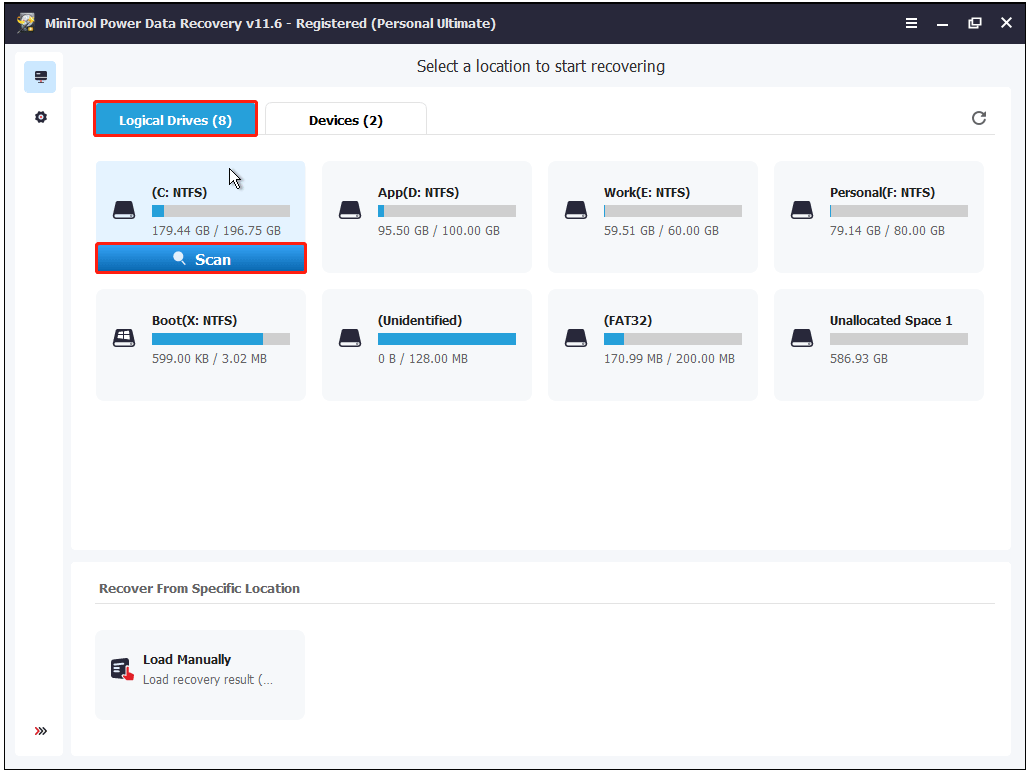
The scan duration mainly depends on how many files are in the C drive. It is recommended that you wait patiently for the scan to complete to get the best scan results.
Step 4. After scanning, this secure data recovery service will list all found files on the scanned drive, including deleted files, lost files, and existing files. Now you can take advantage of the Filter and Search features to quickly locate the desired files.
Filter: By clicking the Filter button, you are allowed to filter all listed files by file type, file size, file modification date, and file category. For example, if you want to extract all picture files from the black screen computer, you can select the Picture option individually from the By File Type category list.
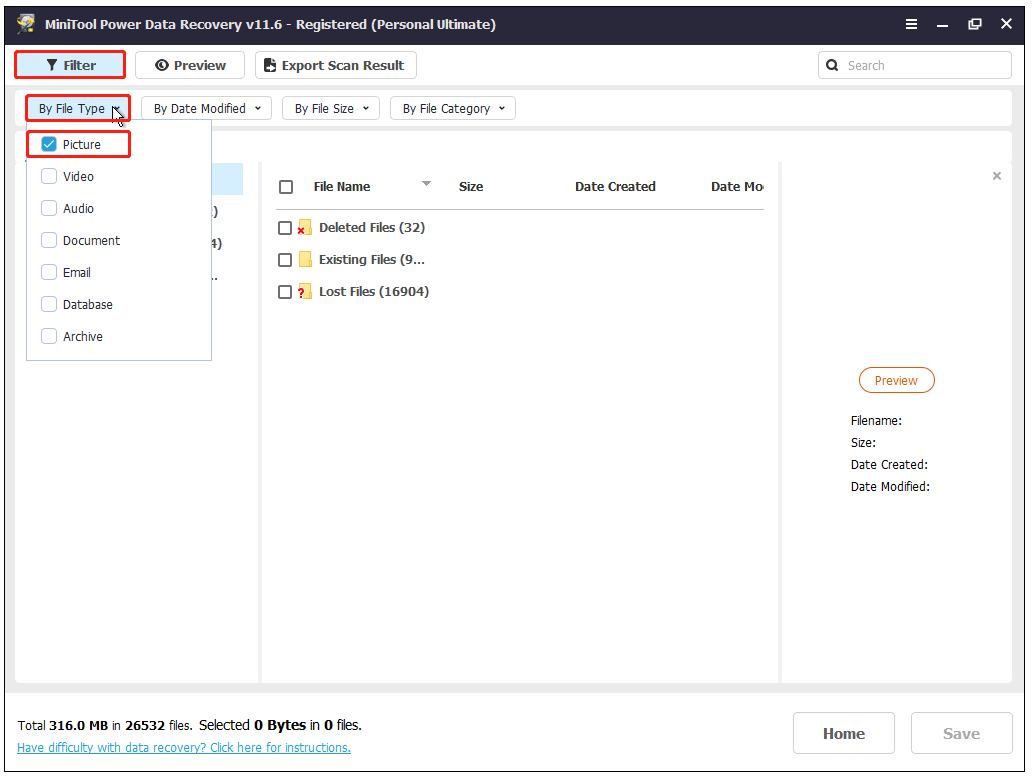
Search: The search box is designed to help you locate a specific file/folder. You just need to type the file/folder name (partial or complete names are both supported) in the search box and press Enter, then the search result will be listed.
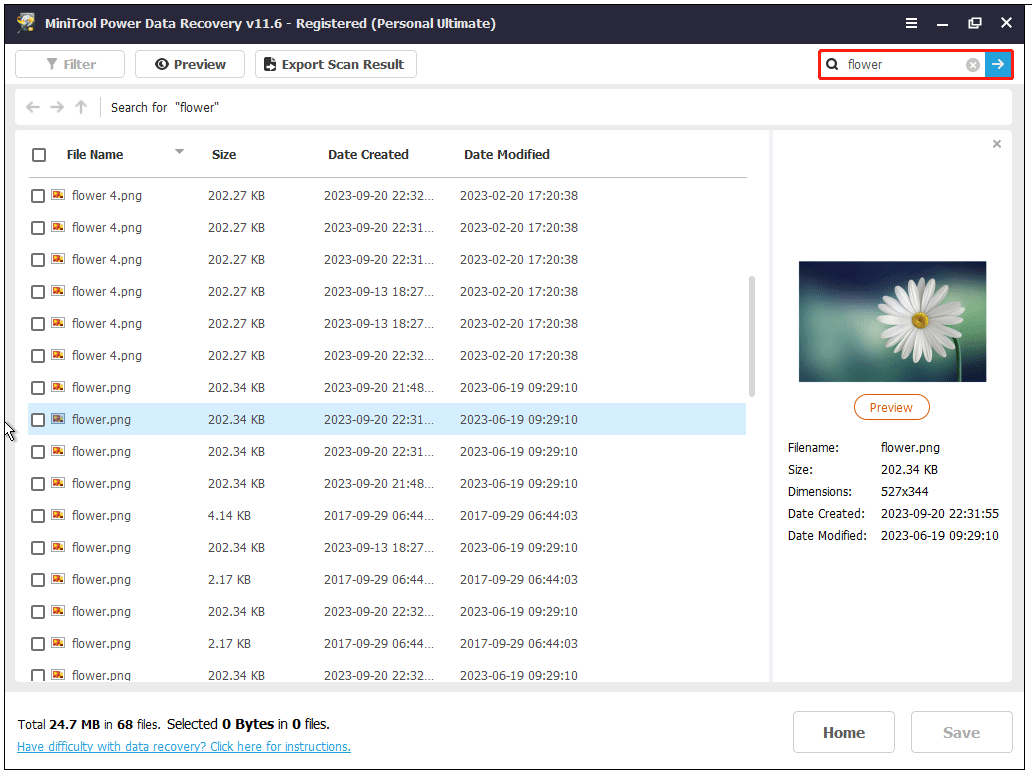
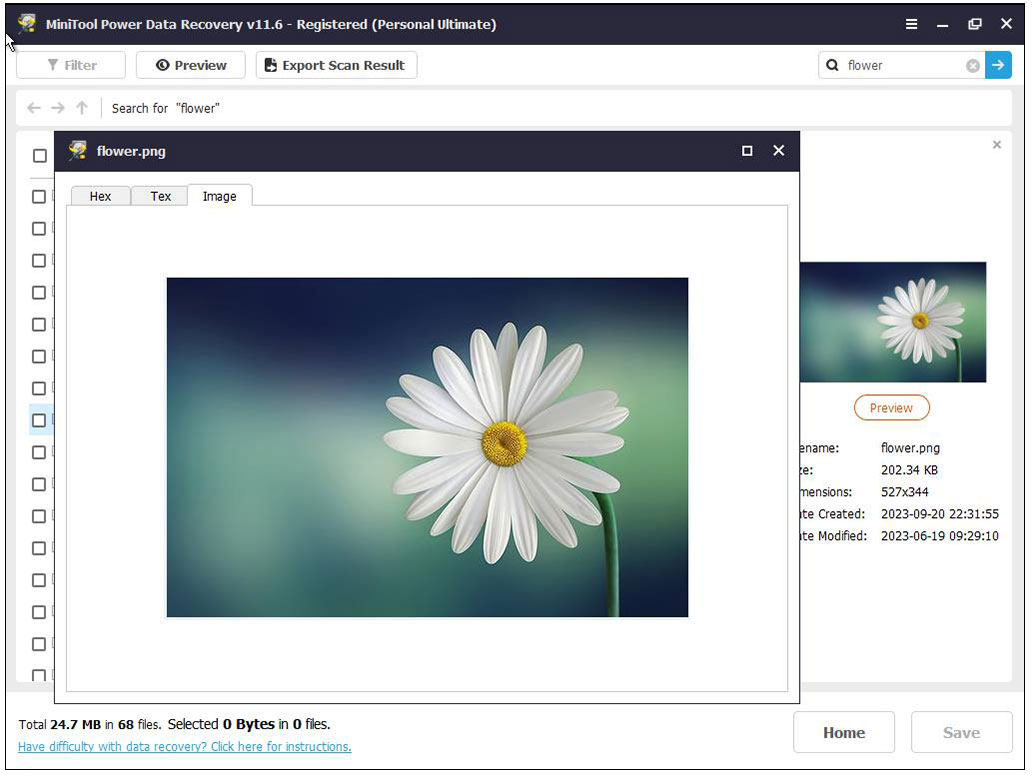
After locating the target files, you can double-click on each of them or click the Preview button to preview them. Supported file types to preview include PNG, JPG, JPEG, DOC, DOCX, XLS, XLSX, PPT, PDF, and more.
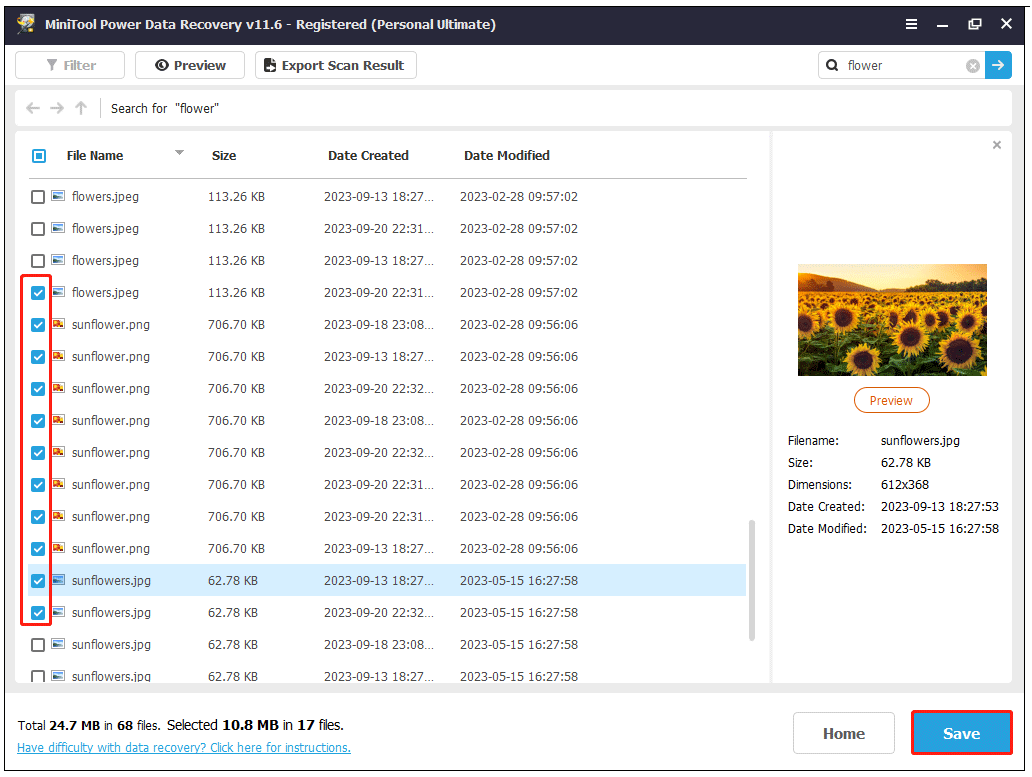
Step 5. Finally, check all the desired files and click the Save button. In the new pop-up window, select a storage location to store the recovered files. Since your computer is not functioning, you can save the files to an external hard drive.
Additional Information:
If your computer only has a black screen for a short time, but the data disappears after waking up the computer, you can use MiniTool Power Data Recovery Free to perform HDD data recovery or SSD data recovery.
MiniTool Power Data Recovery FreeClick to Download100%Clean & Safe
How to Fix Black Screen After Windows Update
Once all important files are extracted, you can take measures to resolve the black screen issue without worrying. We have collected a couple of efficient solutions that you can try one by one until the issue is fixed.
Fix 1. Restart the Graphics Driver
In Windows, you can wake the computer from a black screen by refreshing the graphics driver using the keyboard combination Win + Ctrl + Shift + B. After pressing this keyboard shortcut, your computer screen may flicker for a few seconds, and then everything will return to normal.
Fix 2. Check Cable Connections
An incorrectly connected monitor cable or faulty hardware connected to the computer can also cause the black screen issue. You need to disconnect all cables and make sure you plug them back into the correct ports. Also, you can remove any external devices such as USB drives or printers, and then restart the computer and check if the screen is still black.
Fix 3. Restart Windows Explorer
Another easy way to rescue your computer from a black screen with cursor after Windows update is to restart the Windows Explorer.
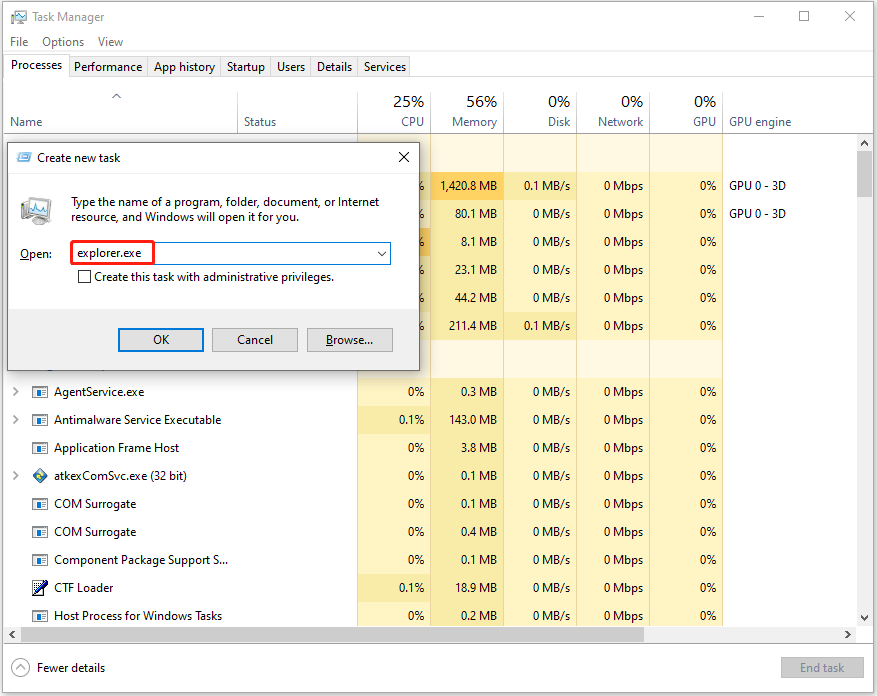
First, press the Ctrl + Alt + Delete key combination, then select the Task Manager option.
Second, in Task Manager, click File > Run new task. Then type explorer.exe in the text box and press Enter.
If none of the above basic troubleshooting methods wakes up your computer from the black screen, you need to try the advanced methods listed below.
Fix 4. Disable the App Readiness Service
After a Windows update, third-party applications may conflict with the new settings, causing the black screen issue. The App Readiness service is primarily used to prepare apps when you log in to this computer for the first time or when you add new apps. To fix the black screen, you need to disable the App Readiness service.
Step 1. Hold down the Shift key on your keyboard and then click the Restart button to boot into Windows Recovery Mode.
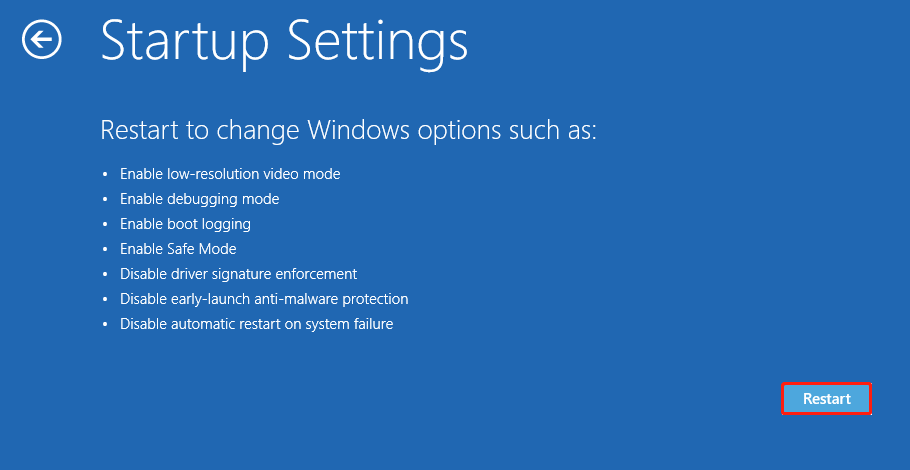
Step 2. Click Troubleshoot > Advanced options > Startup Settings. On the following page, click the Restart button.
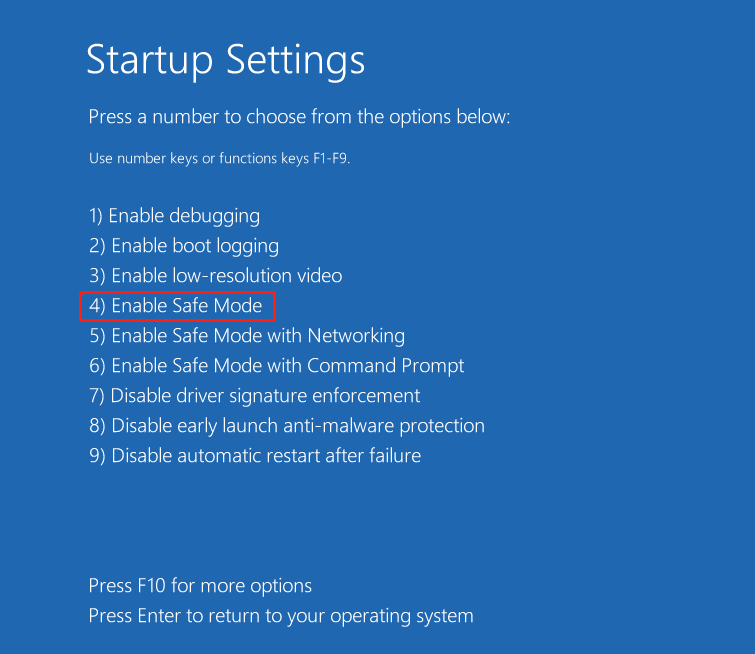
Step 3. When the following window appears, press the F4 key to choose the Enable Safe Mode option.
Step 4. Type service in the Windows search box and click Services from the best match result.
Step 5. Find and double-click App Readiness. In the pop-up window, choose the Disabled option from the Startup type drop-down menu.

Step 6. Click Apply and OK sequentially to make this change take effect.
Step 7. Restart your device and verify that the computer boots normally. If yes, it means that the black screen issue is indeed caused by a malfunctioning third-party application. Please check and uninstall the software that may cause conflicts.
Fix 5. Update Graphics Driver
Although Windows updates usually come with graphics card driver updates, sometimes this update doesn’t work as expected. So, you can try to update the display driver manually.
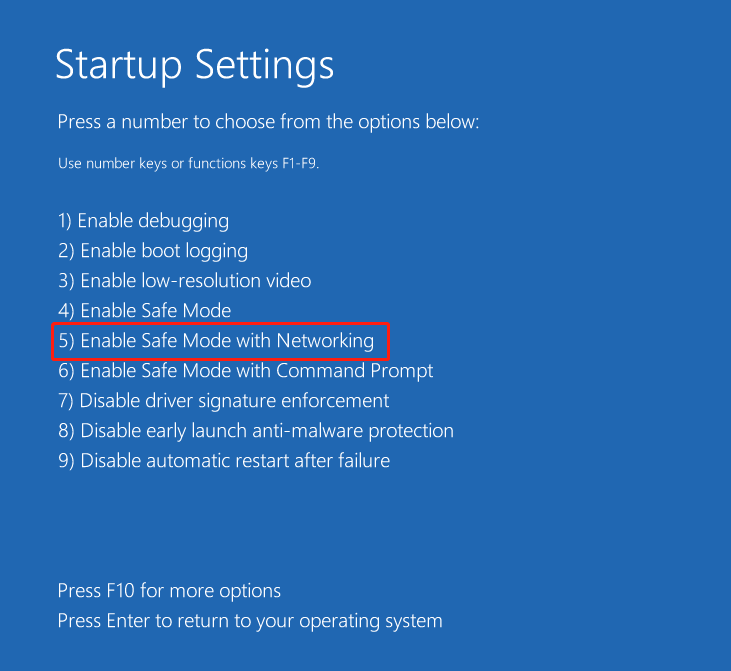
Step 1. Boot into Safe Mode by applying the steps in Fix 4. On the following page, you need to press F5 to choose this option: Enable Safe Mode with Networking.
Step 2. Right-click on the Windows logo button to select Device Manager.
Step 3. Expand the Display adapters option, then right-click the target graphics device to select Update driver.
Step 4. Follow the on-screen instructions to complete the update.
Fix 6. Run DISM and SFC Scan
Corrupted system files can also cause a black screen after Windows update. You can use Deployment Image Servicing and Management (DISM) and System File Checker (SFC) to repair system files.
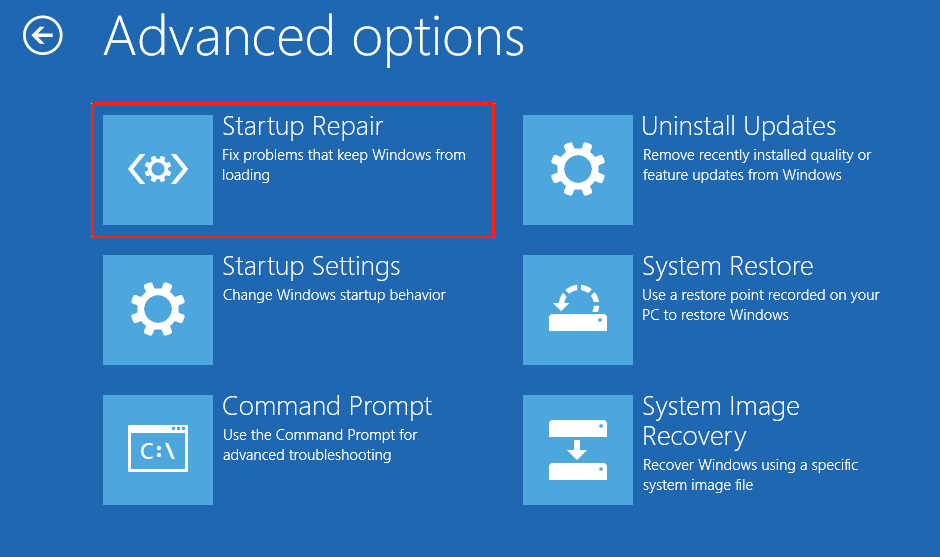
Step 1. Boot into the Windows Recovery Environment. Then select Troubleshoot > Advanced options > Command Prompt.
Step 2. In the command line window, input DISM.exe /Online /Cleanup-image /Restorehealth and press Enter.
Step 3. Next, input sfc /scannow and press Enter.
Step 4. Wait for the process to complete. Then restart your computer and check if the black screen has gone.
Fix 7. Run Startup Repair
Windows Startup Repair feature can help you diagnose and fix Windows boot issues. You can boot into the Recovery Environment and run Startup Repair by selecting Troubleshoot > Advanced options > Startup Repair.

Fix 8. Perform System Restore
System Restore is a built-in tool in Windows computers that can help you restore the computer to a previous working state. When your computer faces problems such as a black screen after Windows update, a black screen after installing a graphics driver, or a blue screen, you can perform a System Restore.
In the Windows Recovery Environment, click Troubleshoot > Advanced options > System Restore. Then follow the instructions on your screen to complete the necessary actions.
Fix 9. Factory Reset the PC
The last way to address the black screen after Windows update is to factory reset the PC. During this process, you have the option to keep or remove your personal files, but the installed apps and Windows settings will be removed.
MiniTool ShadowMaker TrialClick to Download100%Clean & Safe
First, boot into the WinRE. Second, click Troubleshoot > Reset this PC. Then you can choose whether you want to keep your personal files. After that, follow the screen instructions to reset the PC.
Final Words
To sum up, this article explains why you encounter a black screen after Windows update and how to get rid of it. It is worth emphasizing that before repairing the black screen, you are advised to use MiniTool Power Data Recovery to recover data to prevent permanent data loss.
MiniTool Power Data Recovery FreeClick to Download100%Clean & Safe
If you have any questions about the approaches mentioned above or MiniTool software, feel free to contact us via [email protected].
About The Author

Position: Columnist
Shirley graduated from English major and is currently an editor of MiniTool Team. She likes browsing and writing IT-related articles, and is committed to becoming a professional IT problem solver. The topic of her articles are generally about data recovery, data backup, and computer disk management, as well as other IT issues. In spare time, she likes watching movies, hiking and fishing.