When performing system restore in Windows 10/8/7, you may find there is an error message, saying “you must enable system protection on this drive”. In this case, what should you do to solve this issue? Here are two useful ways for you, and a better way to restore your PC to a previous state without enabling system protection.
System Restore You Must Enable System Protection on This Drive
You may create system restore points for system backup before performing some other system related operations like changing Windows registry, upgrading Windows, etc. Once the Windows operating system goes wrong, you can restore your computer to a previous state by the created restore points.
However, one user recently told us that he wanted a system restore after upgrading Windows 7 to Windows 10 since the new OS ran quite slowly. But he got into the System Restore from the Troubleshoot option, an error message stopped him:
“You must always restore the drive that contains Windows. Restoring other drives is optional.
You must enable system protection on this drive.”
In general, this issue is very common and many users report that in forums like Reddit. If you are also bothered by this issue, although Windows says there are multiple restore points to restore, you still get the same message when restoring C drive.
What Is System Protection
Simply speaking, it refers to a Windows feature to regularly create and save information about the system files and registry of your computer. Also, it saves previous versions of files you have changed and also saves these files in restore points before significant system events.
For the drive that includes installed Windows operating system, System Protection is on by default. And System Protection can only be turned on for NTFS drives.
However, when the above issue occurs, this means the feature is turned off. To restore the system successfully, you should ensure System Protection is enabled.
How to Enable System Protection on C Drive
How do I enable System Protection on my hard drive Windows 10/8/7? For this issue, we will show you two ways to turn it on in this part.
Enable System Protection CMD
The recommended method by users is to use Command Prompt. How to enable System Protection on C drive from Command Prompt in Windows 10/8/7 to fix “you must enable system protection on this drive”
Follow these steps now (take Win10 as an example):
Step 1: Open Command Prompt
If your Windows operating system can boot:
- Type cmd in the Search box.
- Right-click on this tool to choose Run as administrator.
If you couldn’t enter Windows desktop
- Restart your PC several times on the Windows log screen to enter Windows Recovery Environment (WinRE). Of course, if not, you can use a recovery disc to enter WinRE.
- Click Troubleshoot > Advanced options > Command Prompt to open this tool.
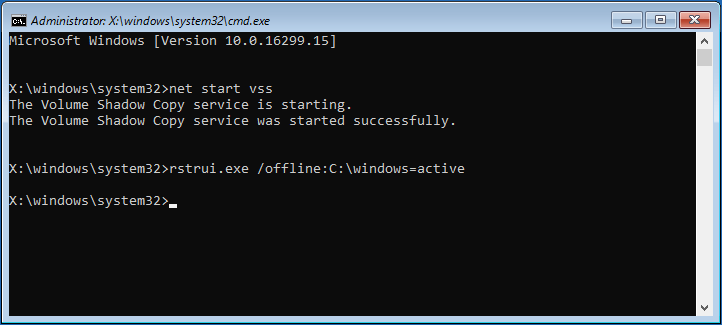
Step 2: Input the Following Command Lines
- Type net start vss and hit Enter. Then, the Volume Shadow Copy service will be started successfully.
- Input rstrui.exe /offline:C:\windows=activeand press Enter.
Step 3: Reboot PC
After restoring the restoration, restart your computer to see if you could go back to the previous state.
Furthering tip:
According to a user from the Superuser forum, he also encountered the same error “you must enable system protection on this drive”. After trying the above commands, Rstrui.exe opened up the System Restore windows but it didn’t fix the problem – the System Restore failed.
The error message implied that it had something to do with the registry. Then, this user used Command Prompt and went into C:\Windows\System32\config, and renamed two of the registry files:
ren SYSTEM system.001
ren SOFTWARE software.001
After that, he ran the System Restore again and it worked. And he could log back into his computer. If you also fail to do a restoration after trying these commands, you can also do as the user does.
Enable System Protection via Control Panel
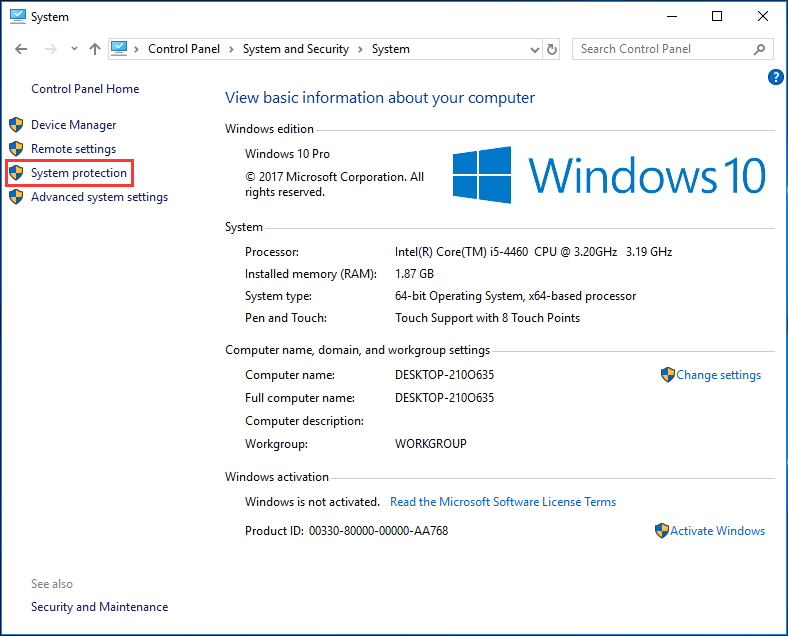
Step 1: Open System Protection Tab
- Type control panel in the Search box, click the result to open this desktop app.
- Click System and Security > System > System protection.
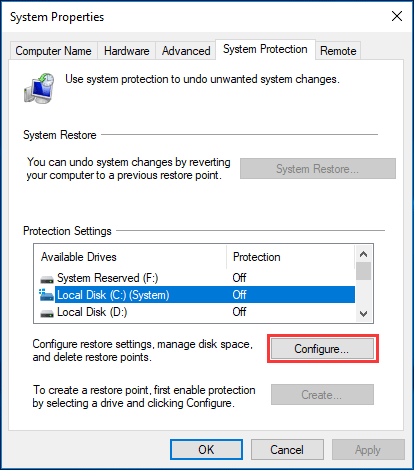
Step 2: Configure Restore Settings
- Under the System Protection tab, choose the target drive.
- Click the Configure button.
Step 3: Enable Windows 7/8/10 System Protection
- Tick the option Turn on system protection.
- Click the Apply and OK button.
Then, you can try to perform restoration and see if you have solved the issue – you must enable system protection on this drive.
Now, the fixes for system restore error are told to you. It is simple to turn on System Protection in Windows 10/8/7.
But this option may be grayed out or missing in some cases. Besides, you may fail to enable System Protection although you do that work through Command Prompt, let alone restoring system points to the previous state. Luckily, you can protect your Windows in another easy way.
Suggestion: Use MiniTool ShadowMaker to Back up and Restore Windows 10/8/7
MiniTool offers you a fairly simple way to back up your Windows operating system and quickly restore it, without enabling System Protection. Here, the professional Windows backup software, MiniTool ShadowMaker is recommended to you.
It can help you back up not only Windows OS but also your important files, certain partitions or the entire hard drive with compressing mode to an image file.
If you have made a system image backup, you can restore your PC to the previous version of Windows when you find it doesn’t work as expectation after upgrading to Windows 10.
Right now, get MiniTool ShadowMaker Trial Edition (only for a 30-day free trial) from the following button for Windows backup and restore to avoid the issue “you must enable system protection on this drive”. Of course, if you want to enjoy this software all the time after the expiration date, upgrade it to Pro Edition.
MiniTool ShadowMaker TrialClick to Download100%Clean & Safe
See how to back up OS in Windows 10/8/7.
Step 1: Run MiniTool ShadowMaker
- Double click this tool on your computer to launch it.
- Click the Keep Trial button to continue using the Trial Edition.
Step 2: Choose Destination Folder
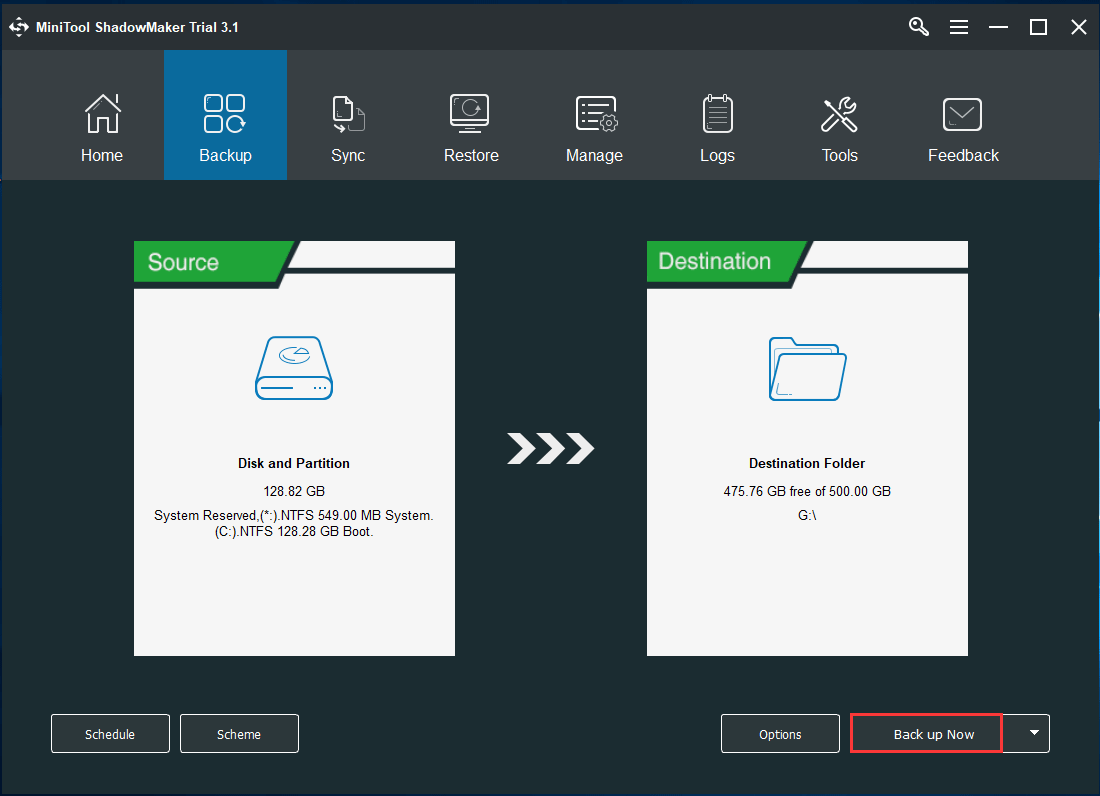
- After going to the Backup page, you see system required partitions for running are chosen by default. Here, you won’t choose them again.
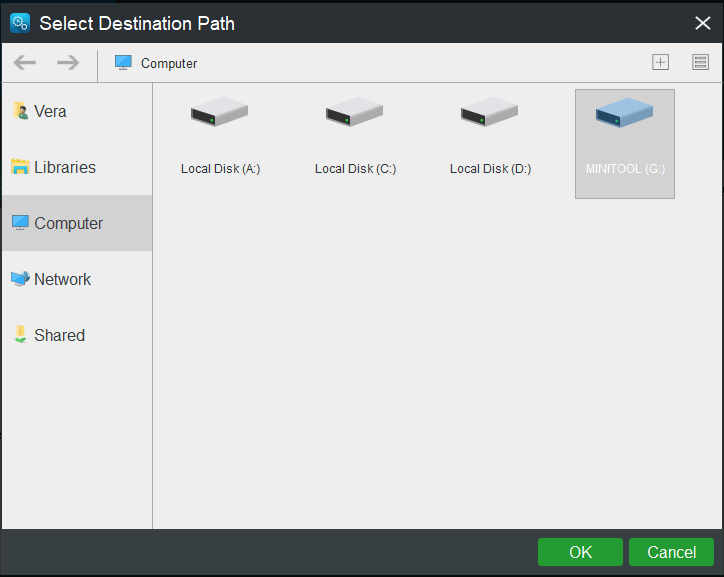
- Sometimes, the target path is also selected. If you don’t want that, just go to the Destination section and choose a path which can be an external hard drive, USB flash drive, NAS, etc.
Step 3: Start System Backup
Finally, hit the Back up Now button to execute the system backup.

Now, you have finished the Windows backup. Here we suggest using Media Builder to create a bootable disc or USB drive/disk so that you can perform a fast recovery in the event of system breakdown, any system issues after Windows update, etc.
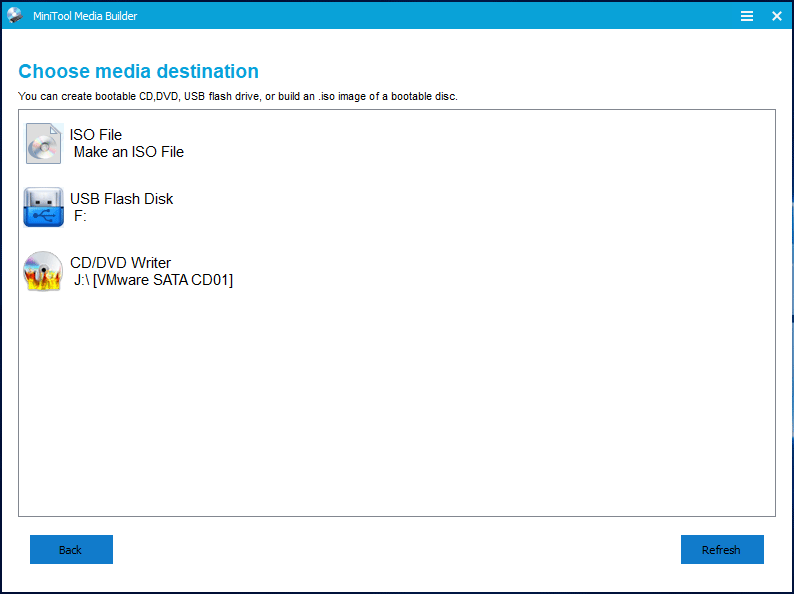
Related article: How to Build Boot CD/DVD Discs and Boot Flash Drive with Bootable Media Builder?
See how to restore the PC without the error “you must enable system protection on this drive”.
If your Windows goes wrong, for example, running slowly, system crash, etc, now start to perform a system recovery.
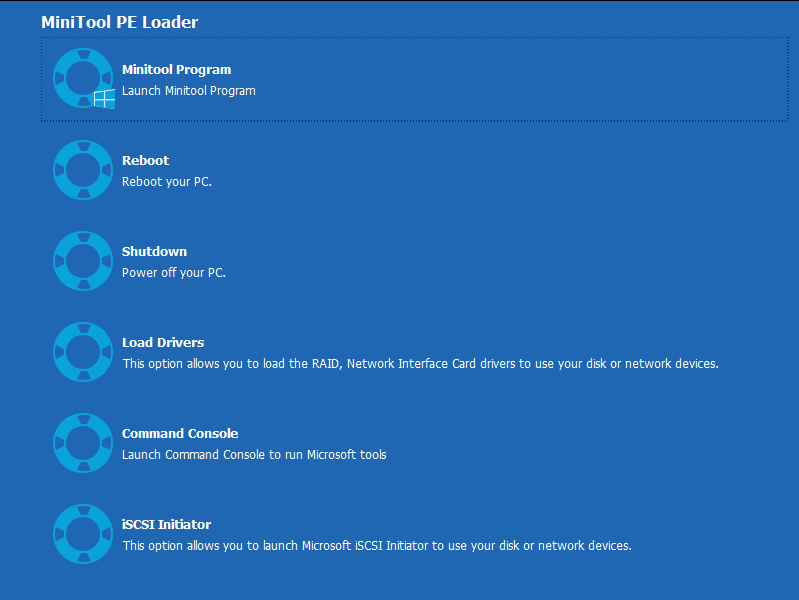
Step 1: Boot the PC from Created Media and Open MiniTool ShadowMaker
- Go to BIOS to make a setting to ensure the PC boots from the created media.
- Go to the MiniTool PE Loader interface, and run MiniTool ShadowMaker.
Related article: How to Boot from Burned MiniTool Bootable CD/DVD Discs or USB Flash Drive?
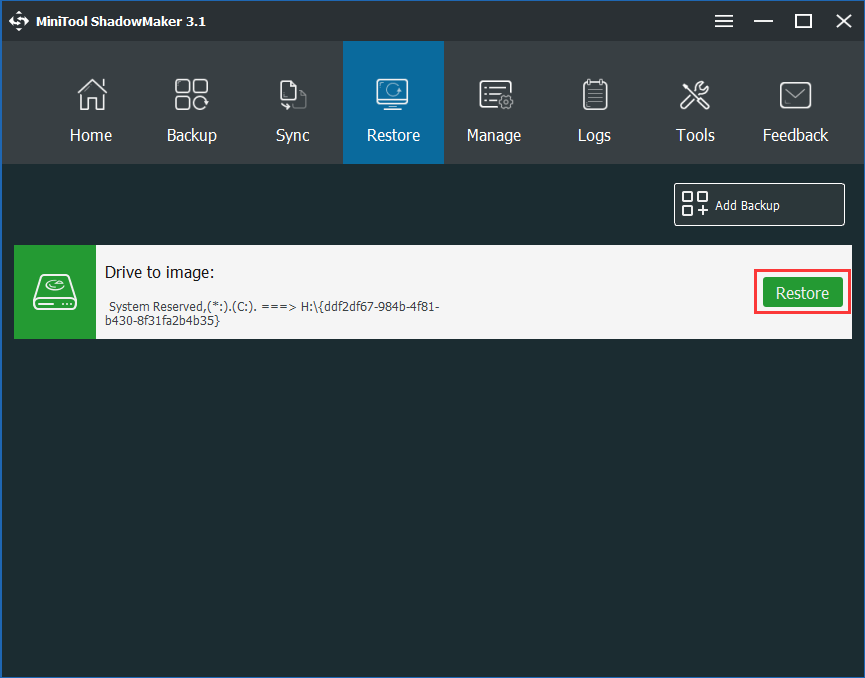
Step 2: Choose a Backup for System Recovery
- Under the Restore window, choose a system image. If your target image backup isn’t displayed here, add it by clicking the Add Backup button.
- Click the Restore button to continue.
Step 3: Select a Backup Version
There may be some different backup versions, so choose a proper one.
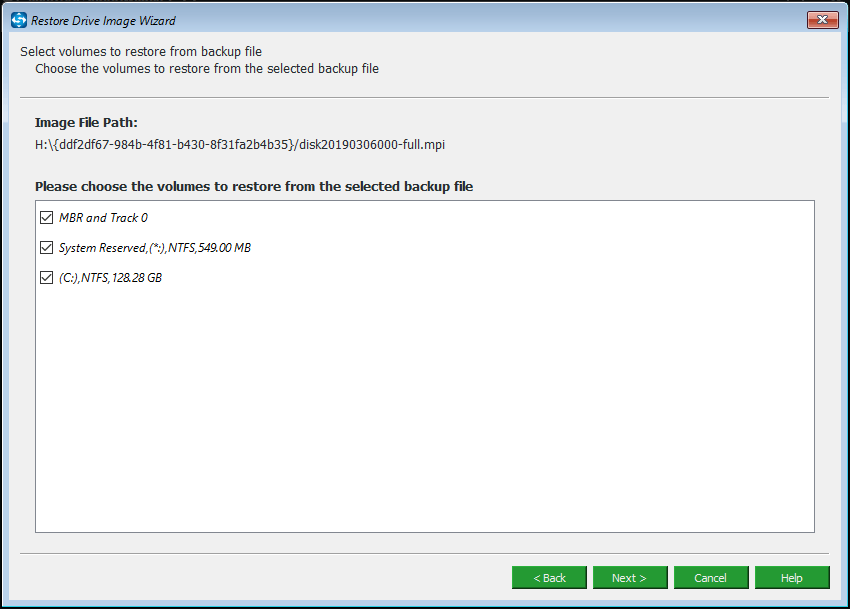
Step 4: Choose Volumes to Restore from Backup File
- Here you can see all the system required partitions included in the system image are listed. Select all of them.
- For a successful restoration, ensure MBR and Track 0 is ticked.
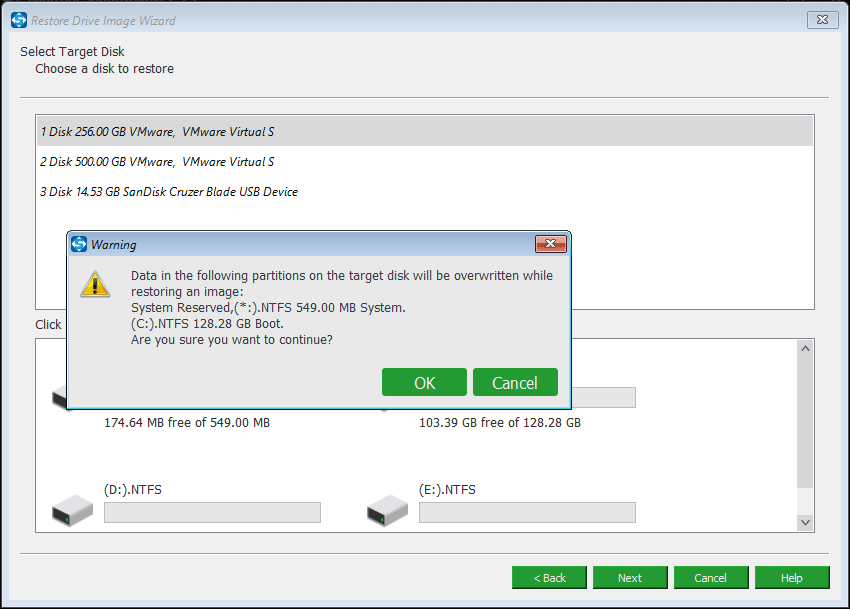
Step 5: Specify a Target Disk
- Choose a disk to restore your system image to.
- Click OK and Next.
Step 6: Perform Restoration Process
Then, this free backup & restore software will start to perform system recovery process without any error like “you must enable system protection on this drive” on Windows 10/8/7.
System Restore VS MiniTool ShadowMaker
As mentioned above, to create a success restore point, you need to turn on System Protection. Similarly, you also need to ensure System Protection is enabled when you perform system restore. Otherwise, the issue – System Restore you must enable system protection on this drive Windows 10/8/7 always happens.
When the issue occurs, it may be a little troublesome to fix it since you need to enable System Protection CMD in WinRE or Control Panel in desktop. If you are not lucky, you may still fail to restore the system with other errors.
Compared to System Restore, MiniTool ShadowMaker can be your good assistant since it can let you easily back up and restore the Windows operating system, no need for enabling System Protection. This is a distinct difference. Besides, this program is more powerful and flexible with full protection solutions.
To avoid encountering the above issue, get MiniTool ShadowMaker now for backup and restore.
MiniTool ShadowMaker TrialClick to Download100%Clean & Safe
The End
Have you experienced system restore error – Windows 10 you must enable system protection on this device? Just try to turn it on and start the system restore. As a suggestion for PC backup & restore, MiniTool ShadowMaker is a good choice.
For the question regarding MiniTool software, please tell us by contacting [email protected] or leaving a comment below. Of course, any idea is also appreciated.
About The Author

Position: Columnist
Vera is an editor of the MiniTool Team since 2016 who has more than 7 years’ writing experiences in the field of technical articles. Her articles mainly focus on disk & partition management, PC data recovery, video conversion, as well as PC backup & restore, helping users to solve some errors and issues when using their computers. In her spare times, she likes shopping, playing games and reading some articles.