What is SupportAssist OS Recovery? How to use the Dell SupportAssist OS Recovery to back up files and restore the operating system? This post from MiniTool will elaborate on these questions. In addition, MiniTool ShadowMaker will be introduced to safeguard your PC.
What Is Dell SupportAssist OS Recovery?
Dell SupportAssist OS Recovery is a piece of software and provides a recovery environment that consists of tools to diagnose and fix issues occurring on your computer when you boot into the operating system.
When your computer is unable to boot into the operating system normally or after repeated attempts, the Dell SupportAssist OS Recovery will be started automatically and you will enter the recovery environment. In the recovery environment, you can diagnose hardware problems, repair your computer, back up files, or restore your computer to its factory state.
The Dell SupportAssist OS Recovery is only available on certain Dell systems that run a Dell factory-installed Microsoft Windows 10 operating system.
Main Features of SupportAssist OS Recovery
Apart from the file backup and system restore features, this SupportAssist OS Recovery tool also comes with other features. Here, we introduce the main features of Dell SupportAssist OS Recovery.
System Repair: it allows you to roll back your computer to a previous point in time to resolve boot issues or any other performance problems.
Scan Hardware: it enables you to run diagnostic tests on your computer so as to detect any hardware problem.
Startup Repair: it is used to fix some common issues that may occur on your computer before booting into the operating system. This option avoids the need to reset your computer to factory state.
Back up Files: it allows you to back up your personal files on a local hard drive or on an external hard drive.
Reset: it downloads and installs the factory operating system or upgrade to the latest operating system.
How to Use Dell SupportAssist OS Recovery?
After generally knowing the SupportAssist OS Recovery, this part will show you how to use this Dell OS Recovery tool.
If your computer fails to boot into the operating system or after several repeated attempts, the SupportAssist OS Recovery will start automatically. Of course, you can choose to manually start it. Follow the below steps to continue.
- Turn on your computer.
- Press F12 immediately once the Dell logo appears to access the boot menu.
- Then the available boot options are displayed.
- Next, select SupportAssist OS Recovery and hit Enter to continue.
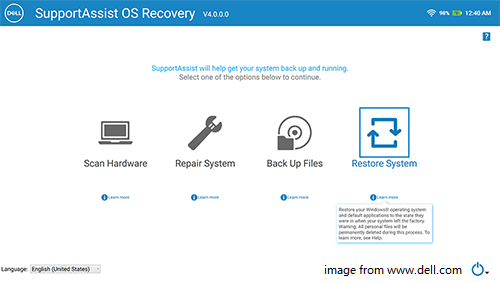
After that, you will enter the main interface of Dell SupportAssist OS Recovery. In the next part, we will show you how to run the main features of SupportAssist OS Recovery.
How to Run Scan Hardware
Here, we will show you how to run scan hardware on SupportAssist OS Recovery. To use this feature, your computer must be connected to a power outlet. It allows you to scan the battery, hard drive, keyboard, USB drives, fan and memory to detect any issues.
Now, here is the tutorial.
- Enter the main interface of the Dell SupportAssist OS Recovery tool.
- Then click Scan Hardware
- Click Start Scan to continue.
- The hardware scanning process will begin. If no hardware issue is found, you will see a message ‘Everything looks good’. If a hardware issue is found, a page with detailed information will be displayed. Click the link on the page to access the Dell support website and follow the instructions to submit a trouble ticket. You can also choose to scan the QR code to request support on your device.
- Last, click Done to continue.
Once all steps are finished, you have scanned the hardware.
How to Run Startup Repair
Here, we will show you how to use the Startup Repair feature on Dell SupportAssist OS Recovery.
Now, here is the tutorial.
- Launch SupportAssit OS Recovery.
- Click Repair on the Startup Software titile.
- Then click Startup Repair.
- The startup repair process will begin. If the issue is fixed successfully, you will see the message ‘Everything is back to normal state’. Then click Done to continue.
- If the issue cannot be fixed or the repair is unsuccessful, you will see an error message. Then click Reset options to reset your computer to the factory state.
Once all steps are finished, you have known how to run Startup Repair on the SupportAssist OS Recovery tool.
How to Back up Files via SupportAssist OS Recovery
As mentioned in the above part, the Dell SupportAssist OS Recovery allows you to back up personal files on a local hard drive or on an external storage device.
Hence, here, we will show you how to use the Back up Files feature on the SupportAssist OS Recovery.
Now, here is the tutorial.
- Launch SupportAssist OS Recovery.
- Click the Back up Files feature on the main interface of Dell SupportAssist OS Recovery.
- Then click Start Backup. The files and folders on your computer are analyzed and the file count and the file size of the default Windows libraries are displayed.
- Select the files and folders you want to back up and click Next. You can also choose to include or exclude files by clicking the Advanced Settings link.
- Then the free space that is required to back up the selected files is displayed. You can choose to connect a storage device to your computer.
- Then click Next to continue.
- After that, the file backup process will begin and it will take some time to complete.
When the backup process is finished, you will see a message. Then the SupportAssist_Backups is created in the external storage device. Within this folder, you will see another folder that includes the backup date and time.
With this feature, you are able to recover files from the unbootable computer.
How to Reset Your Computer
In this part, we will show you how to restore your system with Dell SupportAssist OS Recovery.
Now, here is the tutorial.
1. Launch Dell SupportAssist OS Recovery.
2. In the main interface, click System Restore.
3. Then choose Reset to Factory Setting or Reset and update.
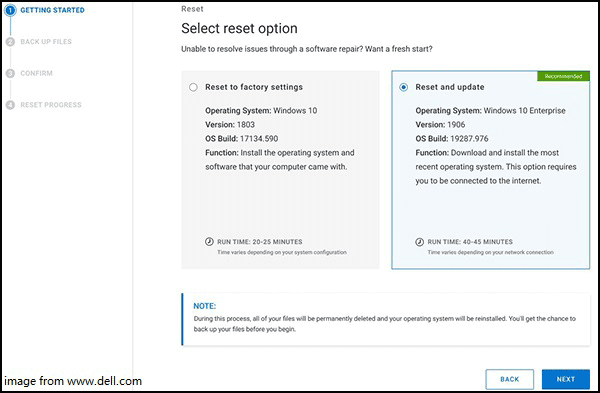
Reset to Factory Settings: Install the operating system and software that your computer had installed from the factory. This is a local image on consumer platforms and does not require a USB key, but the version of the operating system will be the one installed at the factory.
Reset and update: This is the cloud restore option. It downloads and installed the most recent operating system, but it requires an Internet connection.
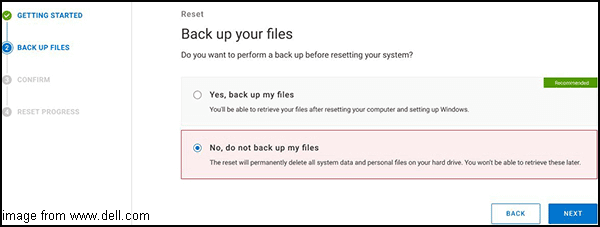
4. Next, Dell SupportAssist OS Recovery recommended you to back up the files before starting Factory Image Restore. You can choose the option ‘Yes, back up my files’ or ‘No, do not back up my files’. The former one enables you to retrieve files after resetting your computer and the latter one will permanently delete all system data and personal files on your hard drive.
5. Then follow the on-screen wizard to continue.
6. Next, you need to confirm your reset. As for why you need to reset your computer, select a reason from the drop-down menu. Check the option that indicates that you already know that resetting will delete all of your computer’s data and files. Then click Next to continue.
7. Next, the resetting process will begin and you will see a progress bar indicating the different stages and remaining time.
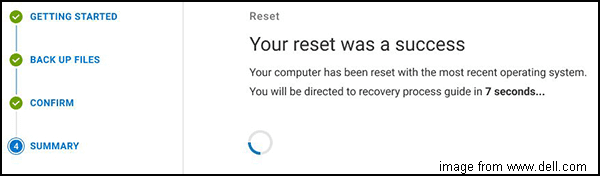
8. After a while, you can see the resetting is successful.
Once all steps are finished, this Dell SupportAssist OS Recovery tool has helped you to restore your system to the factory state. If your computer fails to boot due to some errors, you can try this way to restore your system so as to solve problems.
Another Way to Safeguard Your PC
From the above part, you can find that SupportAssist OS Recovery is a built-in tool of Dell Computer. In other ways, this Dell SupportAssist OS recovery tool can be available in a Dell computer. If you are using another brand computer, how can you back up files or restore the system?
In this situation, you can use another third-party software to back up files or restore system image when the computer fails to boot. Hence, the professional Windows 10 backup software – MiniTool ShadowMaker is recommended. This software also plays an important role when the SupportAssist OS Recovery backup failed.
MiniTool ShadowMaker is designed to back up files, folders, partitions, disks and the operating system. With the backup image, it can also allow you to restore your computer to an earlier date.
Now, we will show you how to use it to back up the operating system.
1. Download MiniTool ShadowMaker from the following button, install it and launch it.
MiniTool ShadowMaker TrialClick to Download100%Clean & Safe
2. Click Keep Trial.
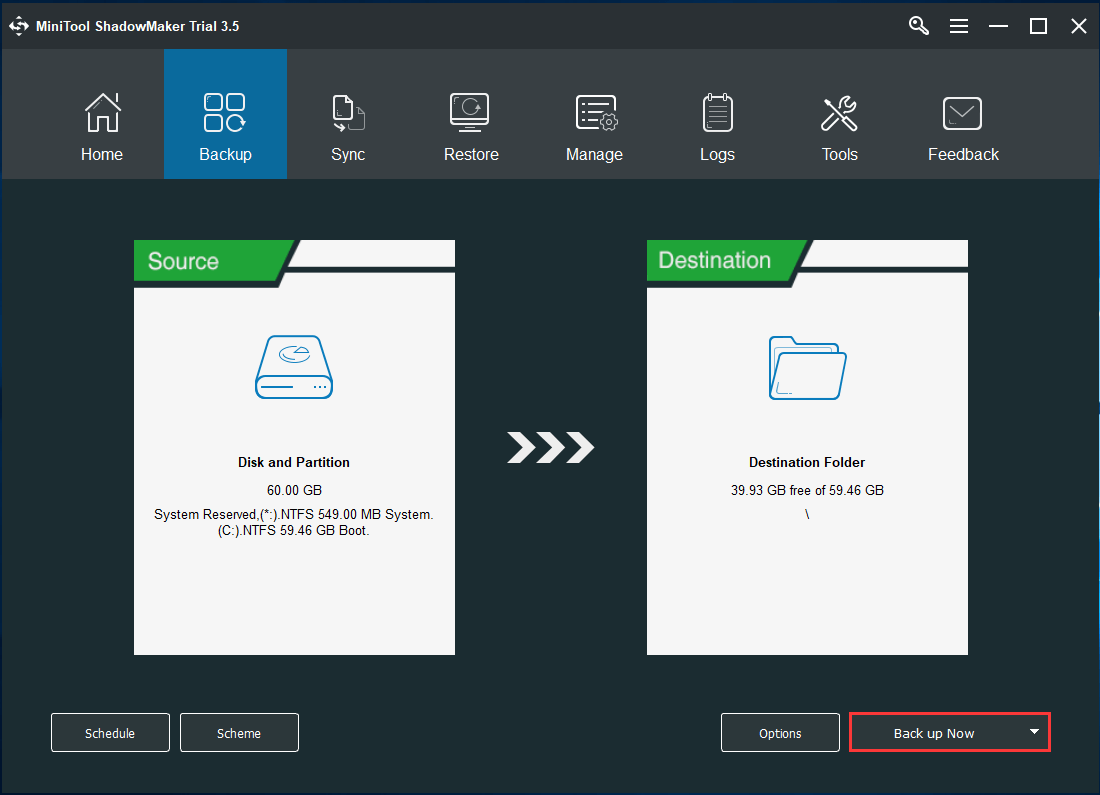
3. After entering its main interface, go to the Backup page.
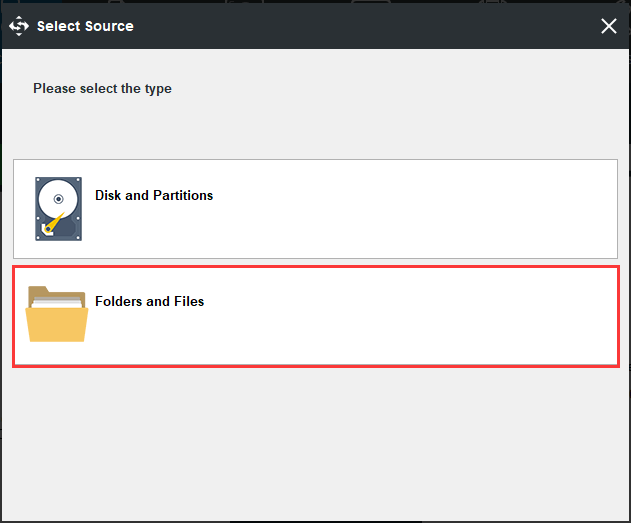
4. MiniTool ShadowMaker selects the operating system by default. If you want to back up files and folders, click the Source module and choose the Folders and Files. Then check the files you want to back up to continue.
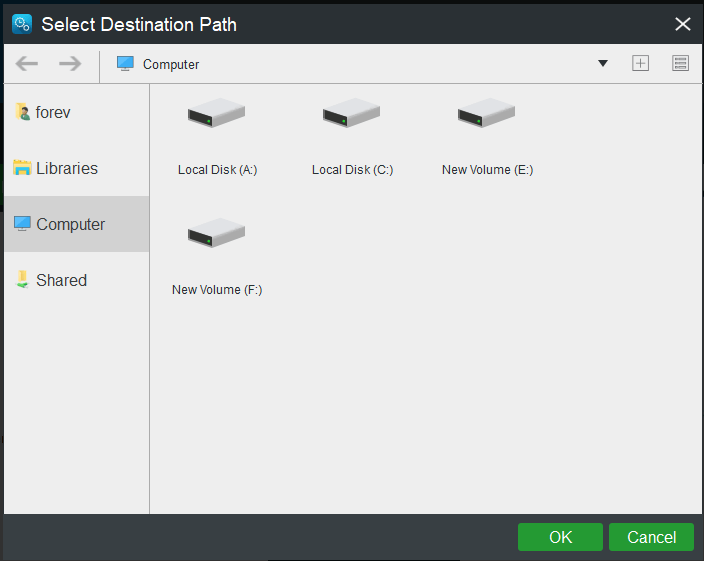
5. Next, click the Destination module to choose a target disk. It is recommended to choose an external hard drive. Then click OK.
6. After selecting the backup source and destinaton, click Back up Now to start the backup process.
Once all steps are finished, you have created the system image successfully. With this system image, you can restore your computer to a normal state when some issues happen. For more restore instructions, click here to know more.
After that, you had better go to the Tools page to create a bootable drive which can be used to boot the unbootable computer that is caused by system crashes or other errors.
Bottom Line
To sum up, this post has shown what the SupportAssist OS Recovery is and how to use it to repair system, back up files and restore system.
In addition, this post has introduced MiniTool ShadowMaker to safeguard your PC. If you have any different ideas for Dell SupportAssist OS Recovery, you can leave a message in the comment zone. If you have any problem with MiniTool ShadowMaker, please feel free to contact us via the email [email protected] and we will reply to you as soon as possible.
SupportAssist OS Recovery FAQ
To get out of SupportAssist OS Recovery, please do the following things:
- Turn on your computer.
- Press F2 to enter System Setup.
- In the left pane, expand SupportAssist System Resolution and select Auto OS Recovery Threshold.
- Then choose OFF to disable the automatic start of SupportAssist System Resolutions and the SupportAssist OS Recovery.
To fix Dell SupportAssist not responding issue, you can try the following methods:
- Rename Dell file.
- Update to the latest Windows system.
- Reinstall Dell SupportAssist.
- Check for virus or malware.
For more detailed instructions, you can read the post: Full Guide to Fix the “Dell SupportAssist Not Working” Issue.