How to Disable OneDrive in Windows 10? How to uninstall or remove OneDrive in Windows 10? This article shows you the best solutions to disable or remove OneDrive in Windows 10 as well as shows an alternative to OneDrive.
What Is OneDrive?
OneDrive is a storage platform based on the Internet with a chunk of space provided for you with a Microsoft account.
The OneDrive was first launched in August 2007. It allows you to save files and data to the Cloud. In addition, the OneDrive also allows you to share files, and sync files across Android, IOS mobile devices, Windows or MacOS computers.
OneDrive offers 5GB of storage space to users for free. However, if you need more space, you need to pay for it.
The OneDrive also has some powerful features. For example:
- OneDrive enables you to sync pictures automatically. OneDrive automatically uploads pictures from the device to the cloud and saves them without manual intervention. In this way, you can also get and view pictures from the Cloud even if the device fails.
- Microsoft has added the Office Online feature to the OneDrive. In this way, it allows you to upload, create, edit and share Word, Excel, PowerPoint and OneNote documents directly within a web browser. Online edited files are saved in real time so as to provide better protection for data.
- You can share the files and folders in OneDrive by sending the link to anyone.
OneDrive has already existed in Windows 10, so there is no necessary for you to download and install it. If it is turned on, it can help you sync files or folders so as to keep data safe.
OneDrive is a piece of two-way sync software. And the synchronized files are saved on the OneDrive folder in File Explorer by default. In addition, you can choose to change the location.
How to Disable OneDrive Windows 10?
Although the OneDrive is useful to some extent, there are situations where you want to disable or remove it from your computer.
Therefore, do you know how to disable OneDrive or remove OneDrive in Windows 10?
If no, please go on your reading and the following part will show you the solutions. Thus, we will show you how to turn off OneDrive Windows 10 with three different ways.
Quick Video Guide:
Way 1. Disable OneDrive Through Settings
Step 1: Open OneDrive
- Select the OneDrive icon in the taskbar.
- Right-click it to open the OneDrive.
Step 2: Disable OneDrive
- In the context menu, choose More to continue.
- Then click Settings.
- In the popup window, please go to the Settings Then uncheck the option Start OneDrive automatically when I sign into Windows.
- Then go to Account tab, click Unlink this PC.
- Click Unlink account to continue.
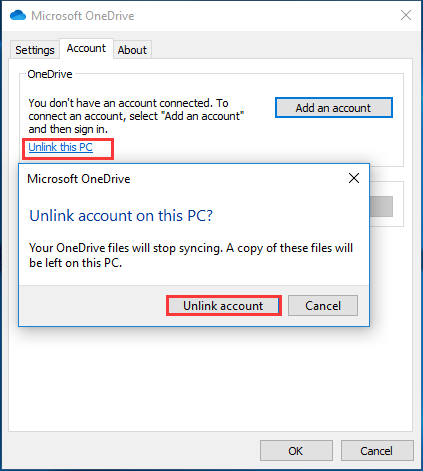
After that, you can see a popup window which requires you to enter your email address. And you need to enter the required information and wait the disable process is completed. After a while, you will completely log out OneDrive from your computer. After that, you have stopped OneDrive sync Windows 10.
Way 2. Disable OneDrive Through Group Policy
And now, we will show you the second method to disable the OneDrive. You can stop OneDrive sync Windows 10 through group policy.
And now, we will show you the detailed tutorials.
Step 1: Open Group Policy
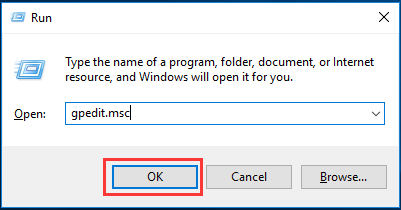
- Press Windows key and R key together to open Run dialog.
- Type gpedit.msc in the box and click OK to continue.
Step 2: Disable OneDrive
1. In the Local Group Policy Editor window, navigate to the OneDrive folder according to the path: Computer Configuration > Administrative Templates > Windows Components > OneDrive
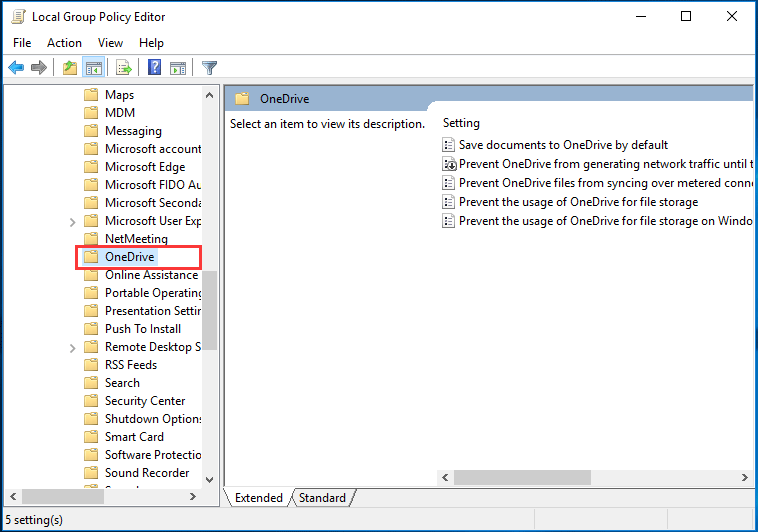
2. Then select the item Prevent the usage of OneDrive for file storage and double-click it.
3. In the popup window, choose Enabled and click Apply and OK to confirm the changes.
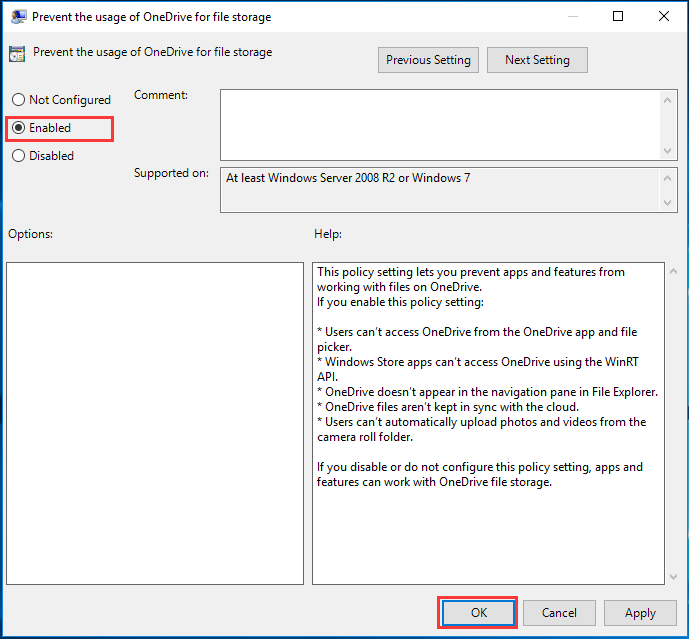
When you have finished all steps, you can restart your computer. After that, you can find that the OneDrive is still on the File Explorer, but it is not available now.
And if you want to re-enable the OneDrive again, you can change the status of Prevent the usage of OneDrive for file storage to Not Configured.
Way 3. Disable OneDrive Through Registry Editor
Now, we will show you the third method to turn off OneDrive Windows 10. You can use the Registry editor to disable OneDrive Windows 10.
The registry editor is a very powerful tool and editing on it is pretty risky since changing keys and values may lead to your computer useless. So, before going ahead, you had better back up the registry. Thus, you can try the professional Windows backup software – MiniTool ShadowMaker.
MiniTool ShadowMaker TrialClick to Download100%Clean & Safe
How to Back up Windows to Safeguard Your Computer? Try MiniTool!
After you have backed up the registry editor or the computer, you can proceed to disable OneDrive Windows 10.
Step 1: Open Registry Editor
- Press Windows key and R key together to open Run dialog.
- Type regedit in the box and click OK to continue.
Step 2: Disable OneDrive
1. In the Registry Editor window, navigate to the following key:
HKEY_LOCAL_MACHINE\SOFTWARE\Policies\Microsoft\Windows
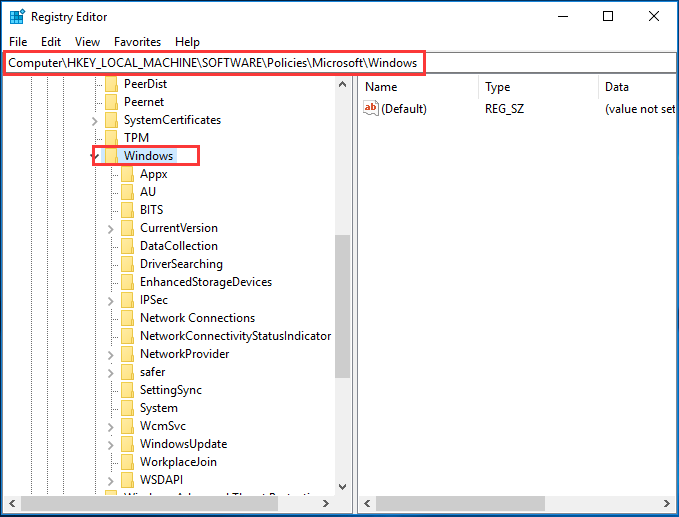
2. Right-click Windows key and choose New > Key to continue.
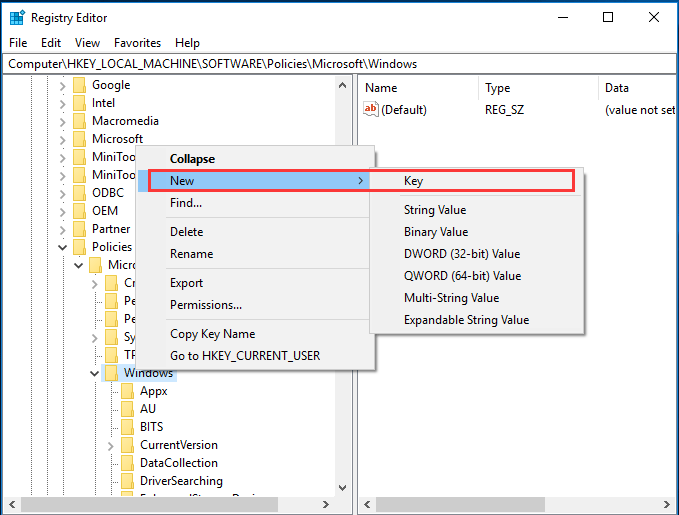
3. Name the new key as OneDrive.
4. Select OneDrive key and right-click on right white area. Then choose New > DWORD(32-bit) Value to continue.
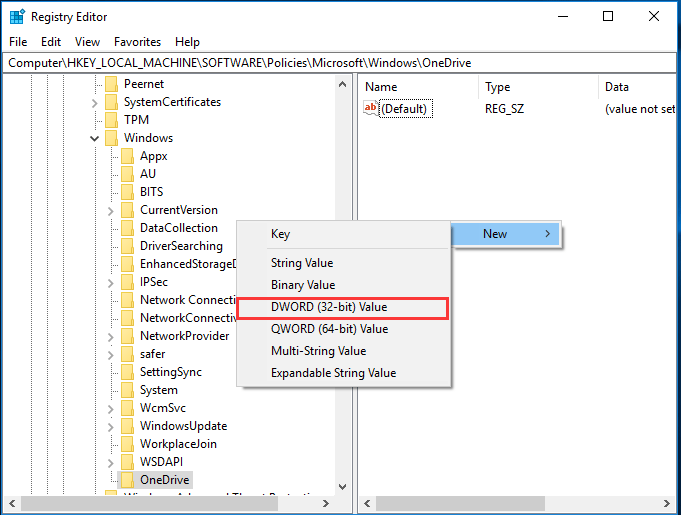
5. Name the new key as DisableFileSyncNGSC.
6. Then double-click new key and change the Value Data to 1.
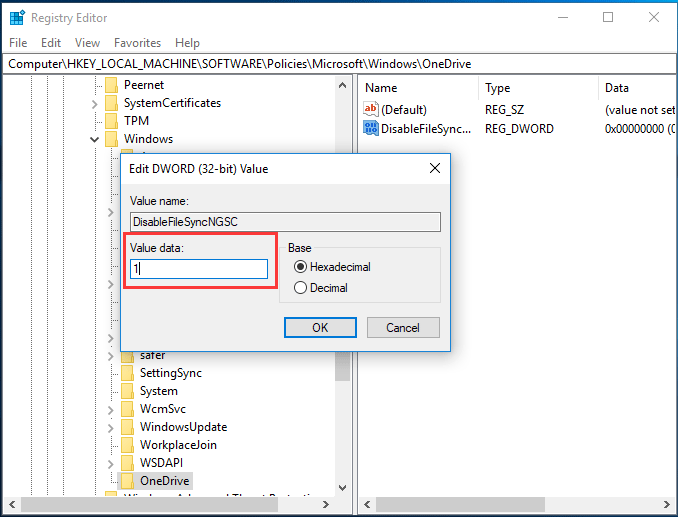
When you have finished all steps, you can close the Registry Editor window and reboot your computer. After that, the OneDrive of your computer will be disabled.
If you need to use OneDrive again or want to sync files to OneDrive, you can re-enable it.
However, some people also ask whether there is any way to uninstall or remove OneDrive permanently since they don’t want to use it any more.
Of course, the answer is positive. If you don’t need it any longer, you can choose to remove it. And in the following part, we will show you how to remove OneDrive Windows 10 permanently.
How to Uninstall or Remove OneDrive Windows 10?
As a matter of fact, to uninstall or remove OneDrive Windows 10, you can refer to the following contents.
Step 1: Open Control Panel
- Type Control Panel in the search box of Windows
- Choose the best-matched one to continue.
Step 2: Uninstall OneDrive
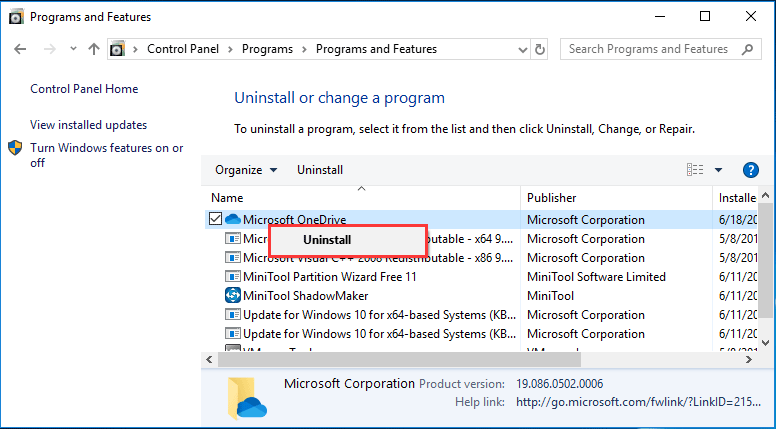
1. In the popup window, click Uninstall a program under Program to continue.
2. Then you will see all programs of your computer are listed here. Select Microsoft OneDrive and choose Uninstall from the context menu to remove it.
After you have finished the above steps, you have successfully uninstalled or removed OneDrive from your computer.
Besides this method, you can also try to uninstall OneDrive through commands. Thus, just run Command Prompt as Administrator. Then type the following commands to continue:
- taskkill /f /im OneDrive.exe
- %SystemRoot%\System32\OneDriveSetup.exe /uninstall (for 32-bit Windows 10)
- %SystemRoot%\SysWOW64\OneDriveSetup.exe /uninstall (for 64-bit Windows 10)
And please hit Enter after each command.
When you have finished the above steps, you have successfully uninstalled or removed OneDrive from your computer.
Alternative to OneDrive in Windows 10/8/7
In this part, we will show you an alternative to OneDrive in Windows 10/8/7 which plays an important role when you have removed OneDrive. Not only can the alternative to OneDrive sync files, but also it can back up the OS to keep computer safe.
The alternative to OneDrive in Windows 10/8/7 is MiniTool ShadowMaker. It is a piece of file sync software which enables you to sync files or folders to two or more locations so as to keep your data safe.
In addition, MiniTool ShadowMaker is also a piece of backup software that is designed to back up files, folders, disks, partitions, and even the operating system. So if you want to keep data safe, besides file synchronization, you can also choose to create an image.

With so many powerful features, you can download MiniTool ShadowMaker Trial from the following button or choose to purchase an advanced edition.
MiniTool ShadowMaker TrialClick to Download100%Clean & Safe
And now, we will show you how to use MiniTool ShadowMaker to sync files so as to keep data safe.
Step 1: Launch MiniTool ShadowMaker
- Download MiniTool ShadowMaker and install it.
- Launch it.
- Click Keep Trail.
Step 2: Select the synchronization source
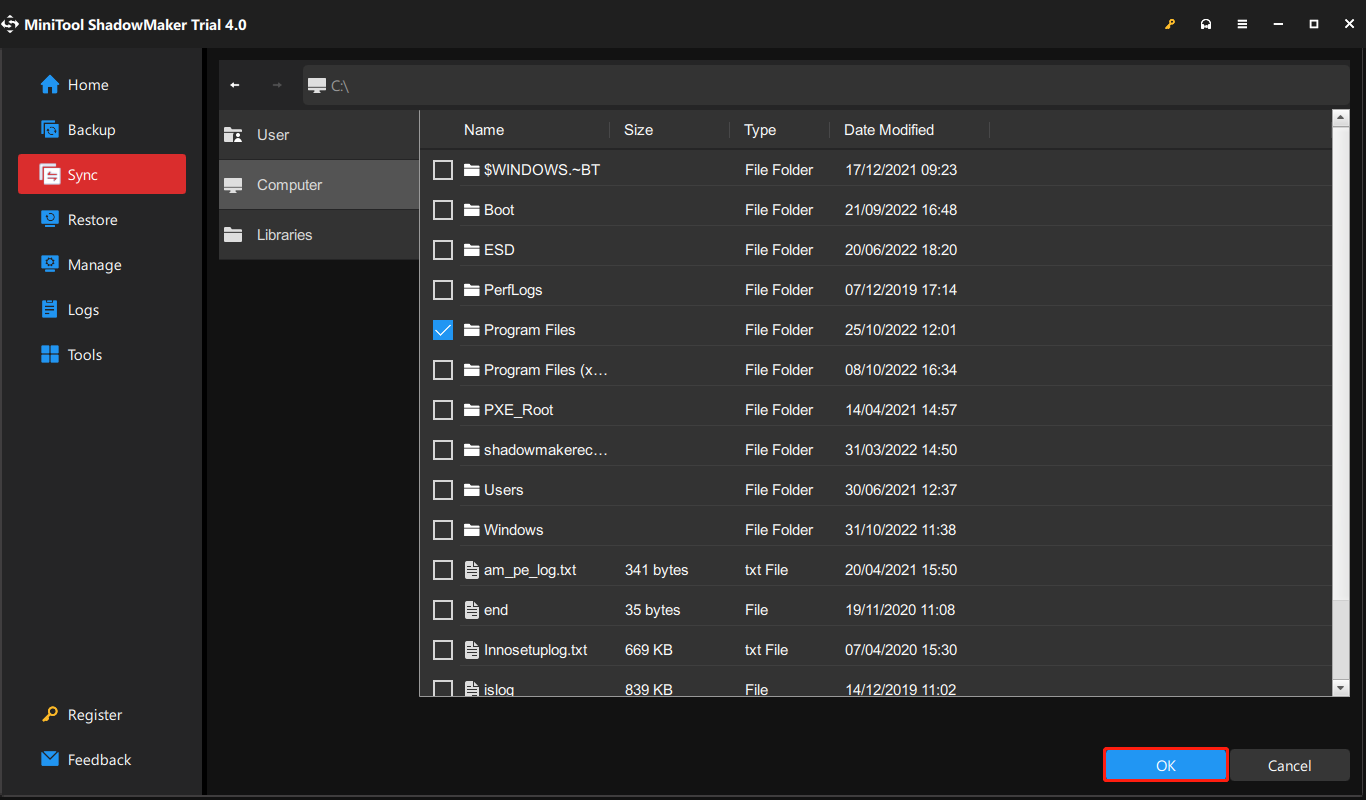
1. After entering its main interface, please go to the Sync page.
2. Click the SOURCE module to choose the synchronization source and click OK.
Step 3: Choose a target disk
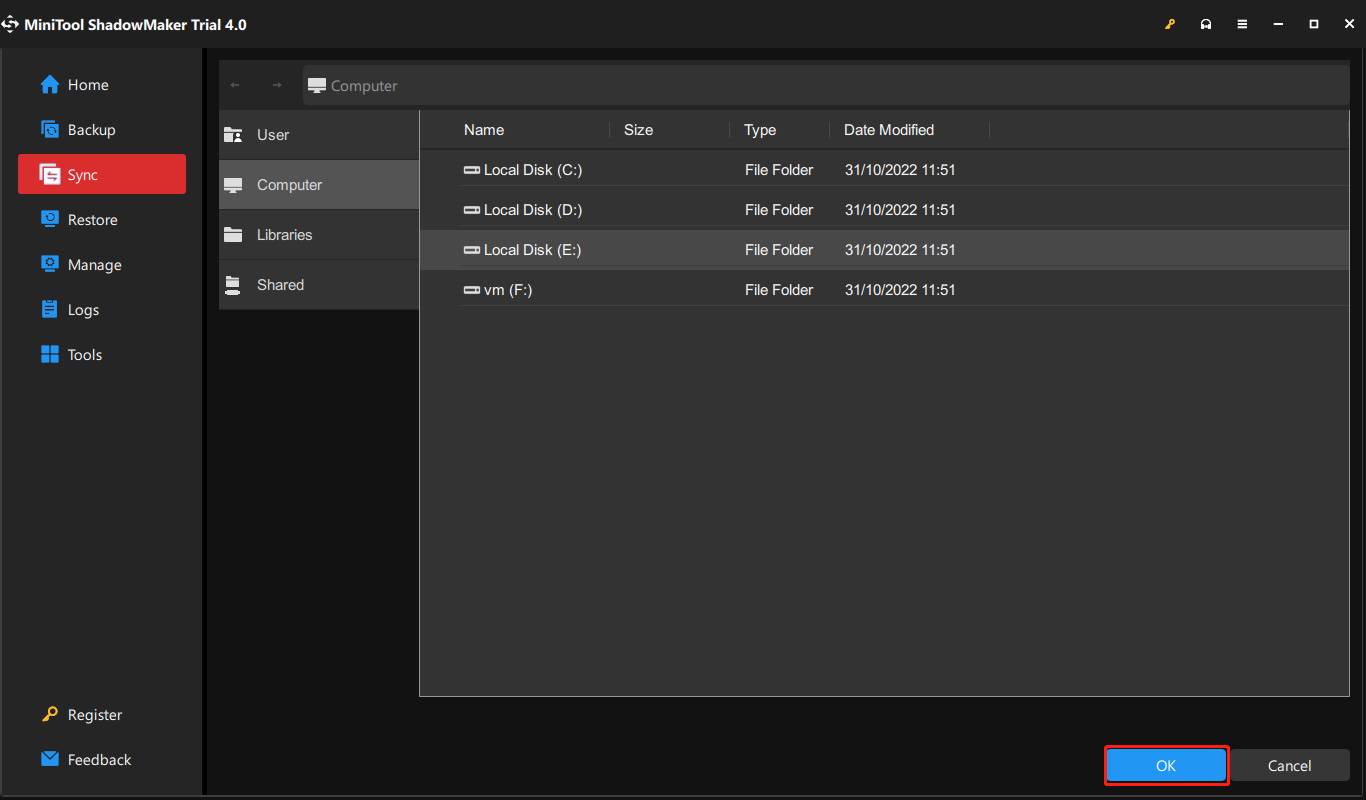
- Click the DESTINATION module to continue.
- Choose a target disk to save the synchronized files. Here are five destination paths to be chosen. It is recommended to choose an external hard drive.
- Click OK.
Further reading:
- MiniTool ShadowMaker enables you to sync files automatically. You just go to Options > Schedule Settings to activate this feature.
- You can also set some advanced file sync parameters. Just click Options > File Sync Options to go on.
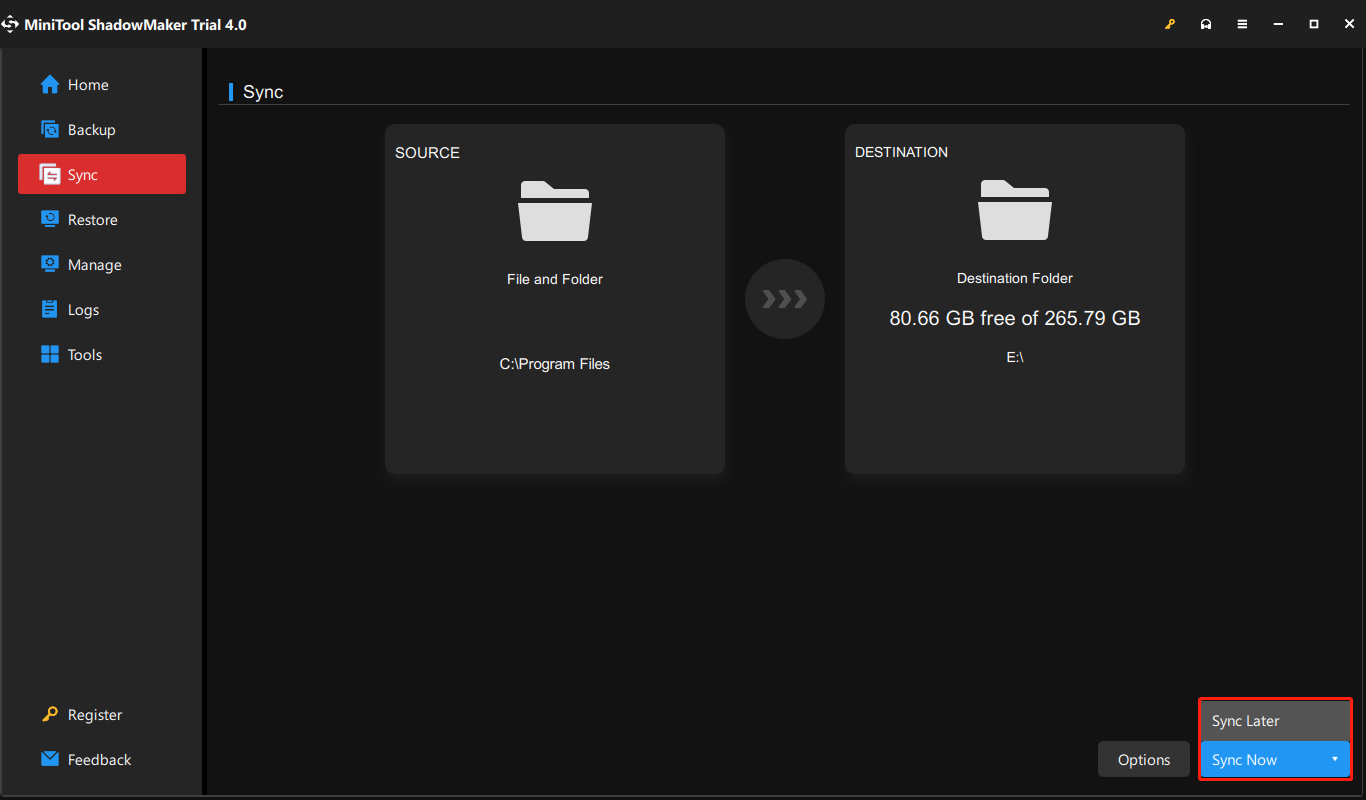
Step 4: Start to sync files
- After you have selected the synchronization source and destination, you can click Sync Now to start the task immediately.
- Or you can click Sync Later to delay the task. But you need to restart it on the Manage page.
When all steps are finished, you have successfully synchronized files to another location. And you can see that MiniTool ShadowMaker also enables you to create a system image.
And when you don’t want to sync files, you don’t have to disable it because it will not start automatically.
From the above information, you can find that MiniTool ShadowMaker plays an essential role when you have disabled or removed OneDrive Windows 10.
MiniTool ShadowMaker TrialClick to Download100%Clean & Safe
Bottom Line
To sum up, this post has introduced what the OneDrive is and also showed you how to disable OneDrive with three methods. In addition, this post has introduced how to remove or uninstall OneDrive Windows 10.
If you have any better method on how to disable OneDrive or how to remove OneDrive, you can share it on the comment zone.
At the same time, if you have any problem with MiniTool ShadowMaker, please don’t hesitate to email us to [email protected] and we will reply to you as soon as possible.
How to Disable OneDrive FAQ
You can disable Microsoft OneDrive with three different methods.
- Disable OneDrive through Settings.
- Disable OneDrive through Group Policy.
- Disable OneDrive through Registry Editor.
You can find more detailed operations through the above part.
- Press Windows key and I key together to open Settings.
- Click System, then click Storage.
- Under Save locations, expand the drop down list and change a file saving location.
If you want to disable OneDrive, you can choose to disable it on startup.
- Right-click on the Taskbar and choose Task Manager.
- In the pop-up window, go to the Startup tab.
- Then select Microsoft OneDrive and choose Disable.
- After that, restart your computer and the OneDrive will no longer start with Windows.
To remove or uninstall OneDrive from your computer, you can choose to remove or uninstall it through the Control Panel.
- Open Control Panel.
- Choose Uninstall a program under Programs section.
- On the next page, select the Microsoft OneDrive and right-click it.
- Then choose Uninstall to continue.
- After that, you will successfully remove OneDrive from the computer.