One of the biggest advantages of an external hard drive, when compared to an internal hard drive, lies in its portability. When you enjoy the portability and easy access brought by external hard drives, you must understand that they also increase the possibility of hard drive damage. How to recover files from a dead external hard drive would be the thing when you are in the face of a dead external hard drive.
In the following content, I will tell you how to recover data from a damaged external hard disk without formatting and how to repair the external hard disk not detected.
How to Recover Files from a Dead External Hard Drive
I’d like to introduce you to a wonderful data recovery software, MiniTool Power Data Recovery. This is an ideal free file recovery software to make an HDD file recovery.
MiniTool Power Data Recovery is capable of restoring files from various data storage devices, including dead external hard drives, formatted USB flash drives, corrupted computers, and so on. Furthermore, this software can find all the existing, lost, and deleted files when scanning the device. You don’t need to worry about missing crucial files.
Here are the actionable steps telling you how to recover data from a damaged external hard drive.
Step 1: Get MiniTool Power Data Recovery and install it properly.
MiniTool Power Data Recovery FreeClick to Download100%Clean & Safe
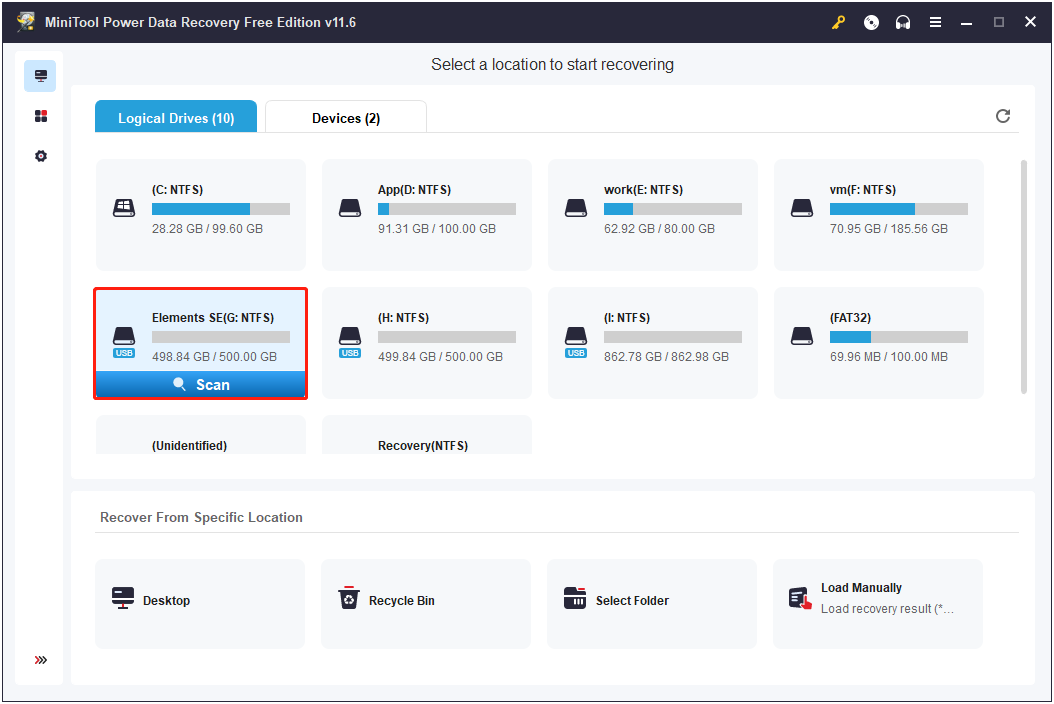
Step 2: After installation, connect your dead external hard drive to the computer, then launch the software to see its main interface. If your external hard drive doesn’t display in the software, you can click the Refresh button or re-plug it.
Step 3: Select a partition where you want to recover files from and click on the Scan button. If you want to recover files from the whole external hard drive at once, you can go to the Devices section to select the whole drive. Correspondingly, the scan time will be longer when you decide to scan the entire disk.
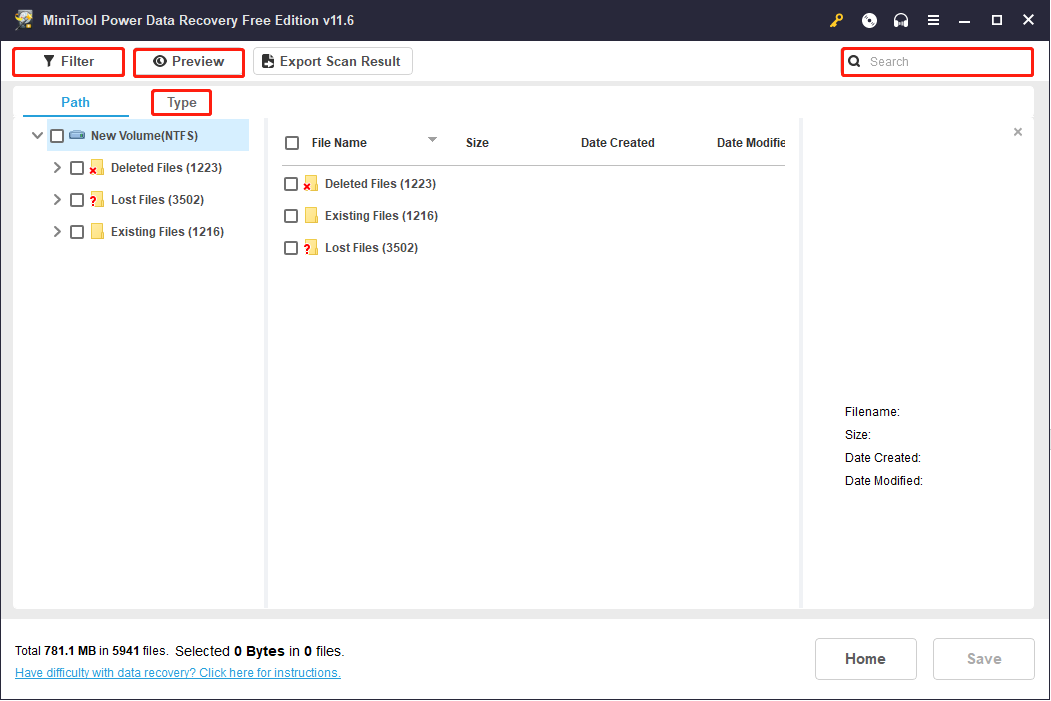
Step 4: You can browse the files shown during the scan process. When the process is completed, pick up the files you need to restore them.
Considering that there should be plenty of files that may increase the difficulty of locating wanted files, you can use the Filter and Type features to set filter criteria to narrow down the file list. Additionally, if you remember the partial or full name of a file, you can input it into the search box to locate the file quickly. You can also preview the chosen file to confirm it is the one you want, but the previewed video and audio files should be smaller than 2GB.
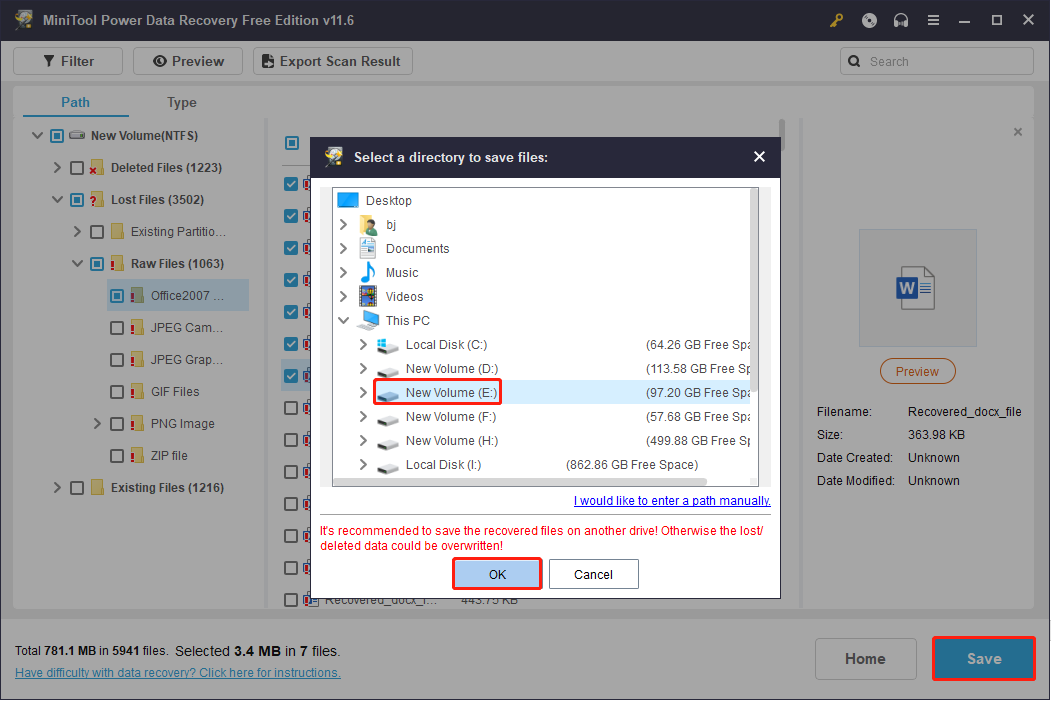
Step 5: Click on the Save button to choose a proper storage path, then click OK to start the data recovery process.
How to Recover Data from a Hard Disk Which Is Not Detecting
You might also encounter a problem in that you can’t find the external hard drive in the computer after connecting it. That is to say, the external disk is not recognized by the computer. To recover data from an external hard drive not recognized, making it appear on the computer should be the first thing.
Fix by Checking the Drive Letter
Sometimes, an external hard drive doesn’t show up due to a missing drive letter or drive letter conflict. Drive letter conflict means the driver letter that belongs to an external hard drive has already been taken by one of the computer’s local drives.
You can check the drive letter in Windows Disk Management and use it to change the letter of the external hard drive if necessary.
Step 1: Press Win + X and select Disk Management from the WinX menu.
Step 2: Right-click on the target drive and choose Change Drive Letter and Paths.
Step 3: Choose Add in the popup window, then choose one letter to assign it to the external hard drive.
Step 4: Click OK to save the change.
Then, you can see whether your external hard drive is detected now. If the problem persists, learn more methods from this article: Fix: External Hard Drive Not Showing Up or Recognized.
4 Other Causes for External Hard Drive Not Showing up
It is a common case that you can’t see your external hard drive. In the following content, I’ll show you the possible causes and tips in different situations that may be able to help you fix the problem.
Cause 1: Power Shortage Problem
An unstable or insufficient power supply is also a possible cause. If the external power supply is not enough for normal working of the external hard drive, it may easily become inaccessible in the computer due to power shortage.
Cause 2: USB Data Line Failure
- USB data line failure is a commonly seen problem. If the USB data line used to connect the external hard drive to a computer is broken inside, there’s no way you can access it on the computer.
- Besides, if the standard of the computer USB interface is different from that of the external hard drive interface, the drive also can’t be recognized.
So please try to replace the failed data line with a new one to fix this problem permanently.
Cause 3: Improper CMOS Parameter Settings
CMOS parameter settings may need to be changed on your computer. If you have never used USB external devices, the problem, the system does not detect the USB hard drive, may also appear even after you have properly installed the driver.
The direct reason for causing this problem is that the motherboard’s CMOS default port is closed. To fix it, you can follow the next steps.
Step 1: Restart your computer and press and hold the F2 key to enter BIOS/CMOS setup.
Step 2: Set Assign IRQ For USB as Enabled in the PNP / PCI CONFIGURATION column by using arrow keys.
Step 3: Press F10 to save the change and hit Enter to exit the setup window.
Cause 4: System or System Built-In Drivers Went Wrong
Problems within the system or its built-in drivers may be the reason why the removable drive is not shown in the computer after connection. If you encounter this problem, please try the following methods to resolve it.
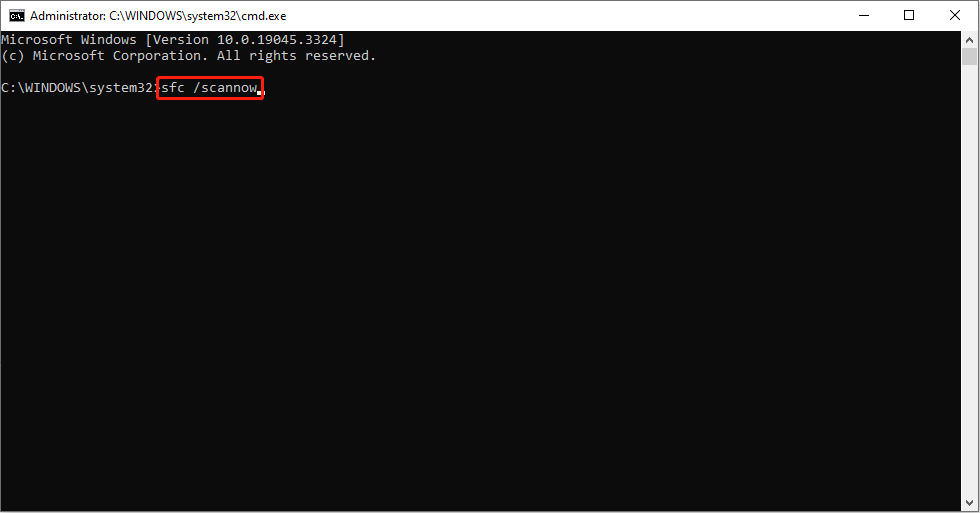
>>Method 1: Run System File Checker
System File Checker can scan and fix corrupted system files. When you run the sfc /scannow command, it will replace the problematic system file with the good one from the backup.
Step 1: Press Win + S and type Command Prompt into the search box.
Step 2: Choose Run as administrator from the right pane.
Step 3: Type sfc /scannow and hit Enter to execute this command.
>>Method 2: Use System Restore
Performing System Restore is a good choice for repairing system errors. But this method requires you to create system restore points before the problem occurs.
Step 1: Press Win + S and type Control Panel into the search box.
Step 2: Hit Enter to open the Control Panel window.
Step 3: Choose Recovery > Open System Restore.

Step 4: Click Next to choose an appropriate system restore point, then click Next again.
Step 5: Click Finish to confirm the information.
The system restore process will reverse your computer to its previous status. Then, you can try to reconnect your external hard drive to see whether it is recognized or not.
>>Method 3: Use Windows Recovery Disc
The recovery disc can make your computer’s operating system back to its original state or normal state. You can create a recovery disc to wipe things on your computer and reinstall the operating system.
Step 1: Insert the recovery disc into the computer.
Step 2: Press the Shift key and restart your computer to enter Windows Recovery Environment.
Step 3: Select Troubleshoot > Advanced Options > UEFI Firmware Settings/Startup Settings to enter the BIOS.
Step 4: Change the boot order by using the arrow keys. You need to move CD-ROM Drive to the first option in the list.
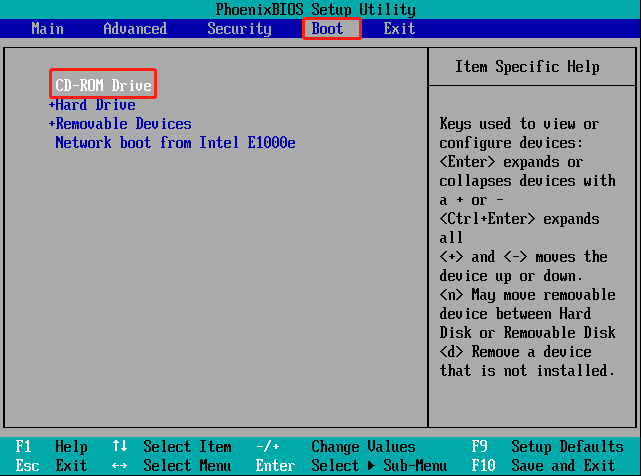
Step 5: Press F10 and hit Enter to save the change and exit the BIOS menu.
If you successfully boot your computer by using the recovery disc, you can repair or reinstall the Windows system.
In addition to the cases mentioned above, there are also possibilities for an external hard drive to become dead. For instance: physical damage like a bad sector or scratch is detected. Of course, you may find many other factors that can make an external hard drive crash, failing to work normally.
Conclusion
It is inevitable to meet problems during using an external hard drive. In the worst situation, you need to recover files from a broken external hard drive. Just follow the steps above to restore files with MiniTool Power Data Recovery.
MiniTool Power Data Recovery FreeClick to Download100%Clean & Safe
If you have any problem with using MiniTool software, please feel free to contact us via [email protected].
Recover Files from Dead External Hard Drive FAQ
It’s hard to say exactly how long an external drive can be used. However, the average lifespan is around 3-5 years according to search. The service life is affected by many factors: the make, model & conditions it is stored in, and how people use it.
2. Make it show up in at least Disk Management.
3. Run MiniTool Power Data Recovery and select Hard Disk Drive.
4. Scan the Seagate drive and choose the needed files to recover.
5. Wait for the Seagate drive recovery to complete.
About The Author

Position: Columnist
Andrea graduated in English and has a keen interest in the IT industry and questions that arise when computers are used. She is passionate about new things and challenging things and has a wide range of interests like playing guitar, gaming, and crafting.