When trying to reset Windows 10/11, there are two options for you - cloud download and local reinstall. What are the differences between them? Which one is better? This post from MiniTool provides details about cloud download vs local reinstall.
The Reset this PC feature will reinstall the Windows operating system on your computer. You can choose to keep or delete your files, or even erase the entire drive. Then, your system files will be replaced with new files. After that, you will have a system like a new system, and you need to reconfigure it and reinstall your programs.
When you use this feature, there are 2 ways for you to reinstall your Windows 10/11 – cloud download and local reinstall.
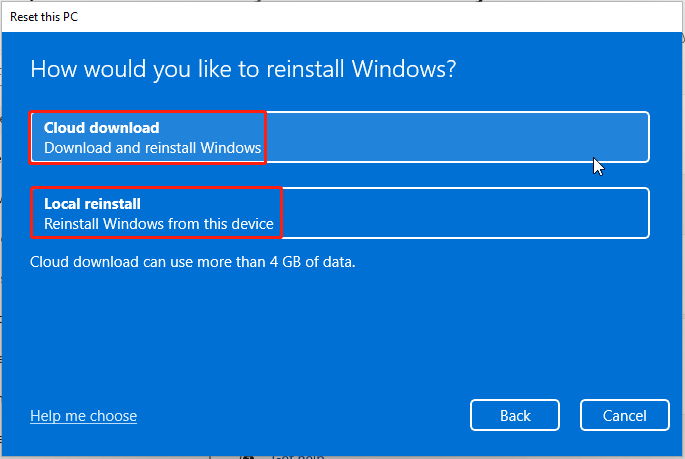
How to find Cloud Download and Local Reinstall on Windows 10/11?
Windows 10
1. Press the Windows + I keys together to open Settings.
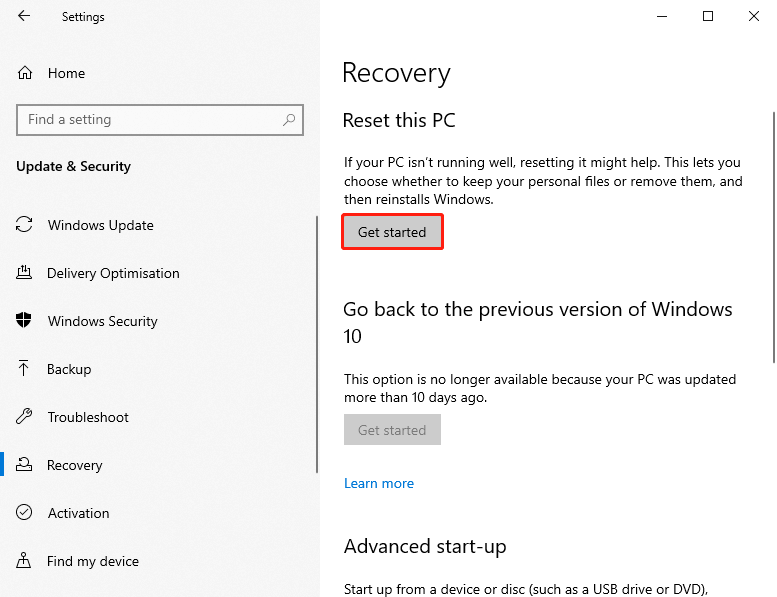
2. Click Update & Security > Recovery.
3. Under the Reset this PC part, click the Get Started option.
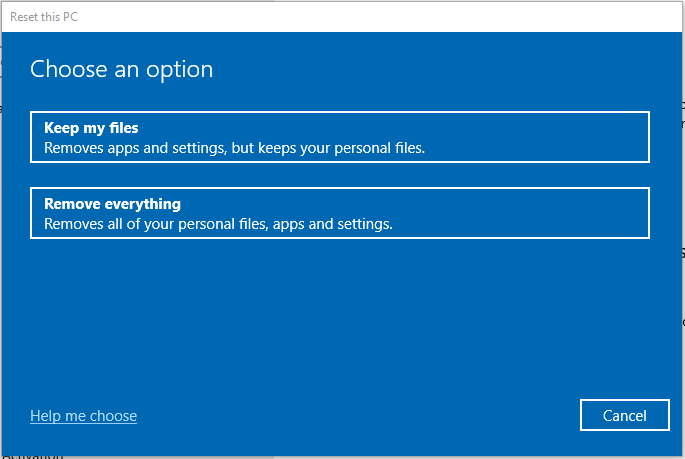
4. Then, you need to choose Keep your files or Remove everything.
5. In the next interface, you will see the cloud download and local reinstall options.
This post will show you how to use Windows 10 cloud download to reset your computer to factory settings in two different situations.
Windows 11
1. Open Settings in the same way.
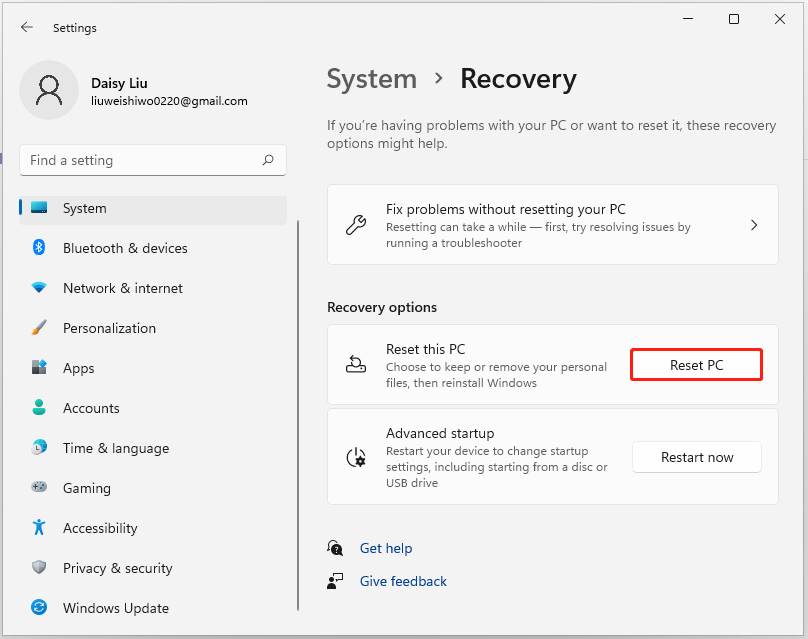
2. Click System > Recovery.
3. Under the Recovey options part, click Reset PC in the Reset this PC section.
4. Then, you will see the cloud download and local reinstall options on the next screen.
Cloud Download vs Local Reinstall
Now, let’s see cloud download vs local reinstall on Windows 11/10.
Cloud Download
If you select cloud download, Windows will download new system files from Microsoft’s servers and use them to reinstall Windows on your computer. If your PC’s system files are damaged, you can choose this option. However, as pointed out in the Reset This PC interface, the size of cloud download may exceed 4GB. If you have Internet data restrictions or a slow connection speed, this may be a problem.
How long does it take to reset Windows from the cloud donwload? It depends on the strength of your Internet connection, the type of operating system you install, processor speed, RAM, and whether you are using an HDD or SSD drive.
Local Reinstall
If you select local reinstall, Windows will use the existing system files on your PC to reinstall Windows. Windows will check its files, find the original files, and then reassemble them into a new Windows system. For this reason, local reinstall can actually be slower than cloud download, especially when you have a fast Internet connection. If the Windows system files on the PC are damaged, the local reinstallation may not be completed.
Which One to Choose
Local reinstall vs cloud download which one to choose? You should choose different solutions based on different situations.
- If you have a fast Internet connection and enough data, it’s recommended to choose cloud download. It can help you save some time.
- If your connection speed is slow or you want to avoid additional downloads, please choose local reinstall. It can help you avoid unnecessary downloads.
- If your PC is not working properly, or you have tried to reinstall Windows locally but failed, you had better use the cloud download.
Back up Your Data Before Resetting Windows 11/10
The Reset this PC feature may erase all personal files. Therefore, in order to ensure that no data gets lost, it is essential to back up the important files you want to keep. To create a backup, you can ask professional free backup software for help. Which program is worth recommending? MiniTool ShadowMaker may be a good choice.
This backup software can be used on Windows 11/10/8/7. With it, you can create system image backups, back up your key files and folders, synchronize files and folders to other locations, clone your disk to another drive, etc. to ensure the safety of your PC.
Here is how to use MiniTool ShadoaMakwer on Windows 10/11.
Step 1: Download, Install and Launch MiniTool ShadowMaker
1. Download, install and launch MiniTool ShadowMaker.
MiniTool ShadowMaker TrialClick to Download100%Clean & Safe
2. Continue to use the Trial edition by pressing Keep Trial.
Step 2: Choose Backup Source
1. Under the Backup page, click SOURCE to choose the backup type – Folders and Files.
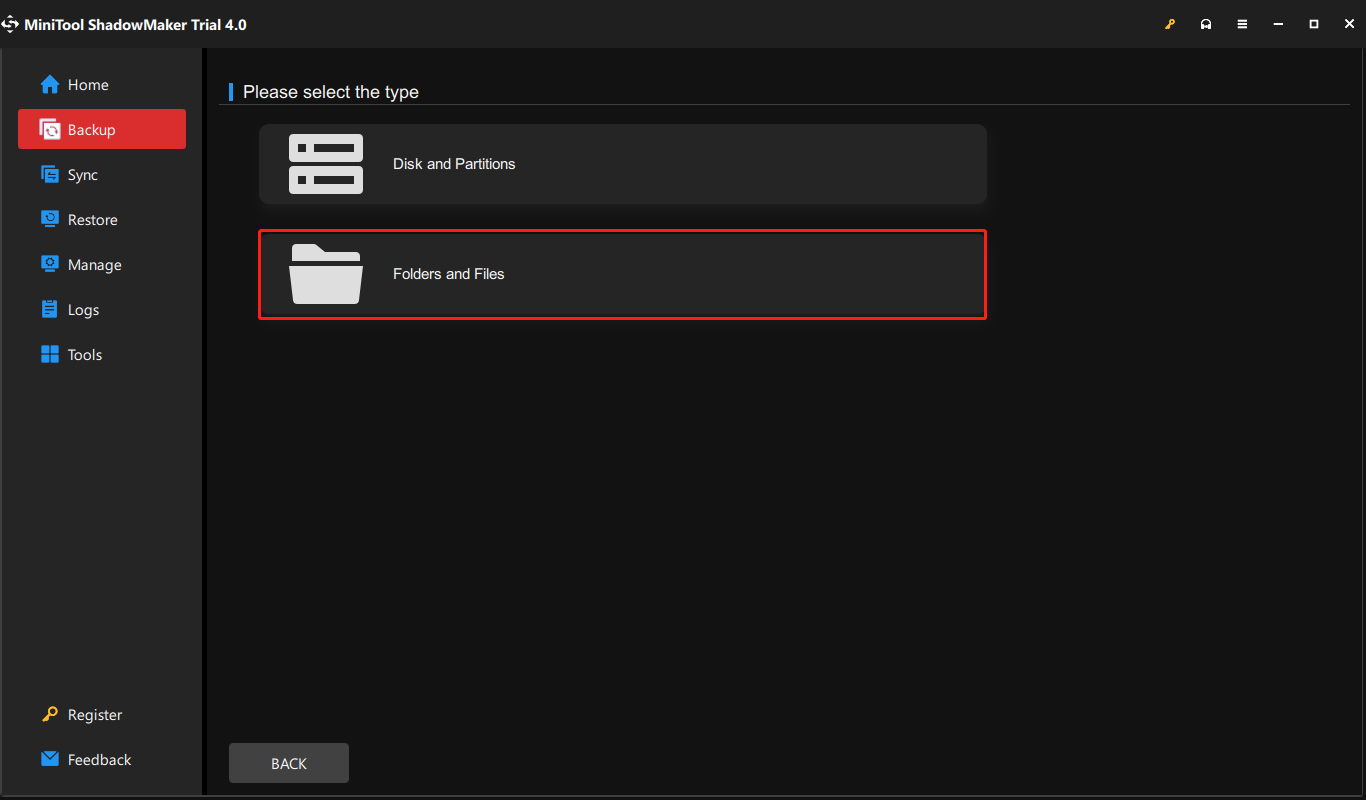
2. Select the files you want to back up and click OK.
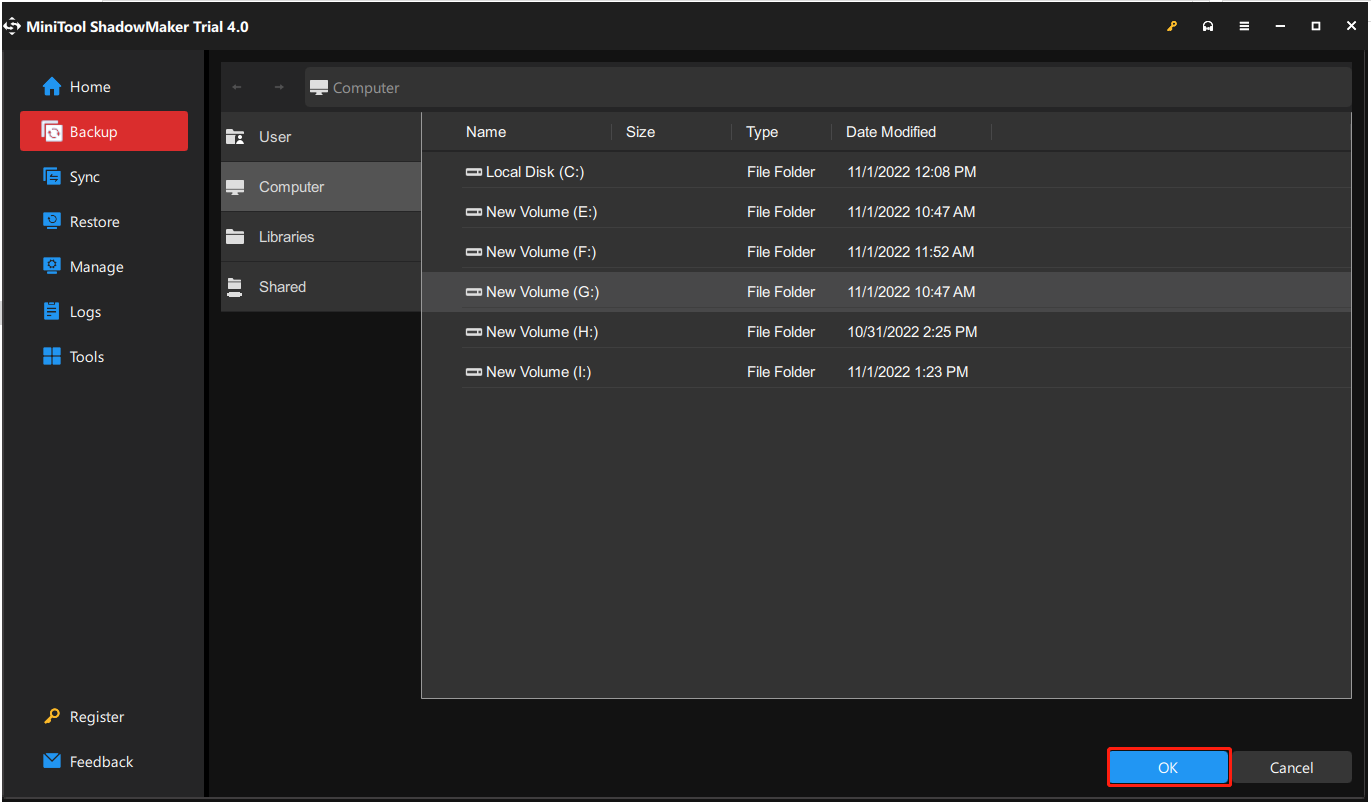
Step 3: Choose the Destination Path
1. Go to the following interface.
2. Choose one destination to store your image based on your needs and click OK.
Step 4: Start to Back up
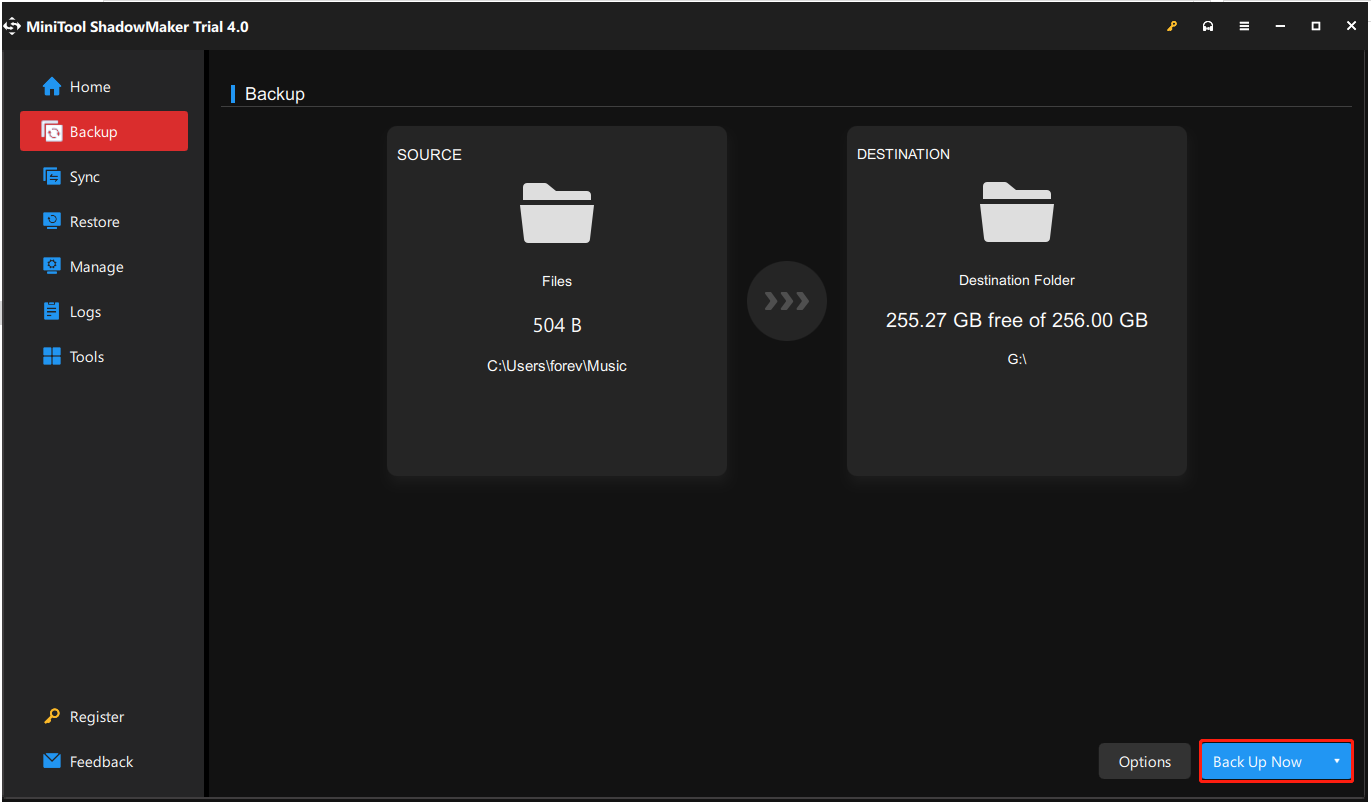
1. Go back to the following interface.
2. Click Back Up Now to start the process immediately.
Further reading:
- To back up files automatically, you can click Schedule on the Backup page. MiniTool ShadowMaker can back up your important files regularly after turning this Schedule on to specify a time point.
- MiniTool ShadowMaker supports full backup, incremental backup, and differential backup. If you want to change the backup scheme, you can click the Schemebutton to change it.
Reset This PC Not Working on Windows 11/10
Some users report that they encounter the Windows 11 not resetting issue. Here is a user’s feedback.
“I don’t understand what is happening. So when I am trying to reset my pc at a certain point, it will say undoing changes then a blue screen would pop up and say There was a problem resetting your PC. No changes were made. I have no clue what is happening. Can someone explain to me how does this happen? Any help would be appreciated.” – Reddit
If you also encounter the issue, follow the guide below to get rid of it.
Fix 1: Run Startup Repair
If Reset this PC not working on Windows 10/11, you can try to run Startup Repair to get rid of the issue. Here are the detailed steps.
Step 1: Open Settings by pressing the Windows + I keys at the same time.
Step 2: Click System > Recovery. Under the Recovery options part, click Restart now in the Advanced startup section.
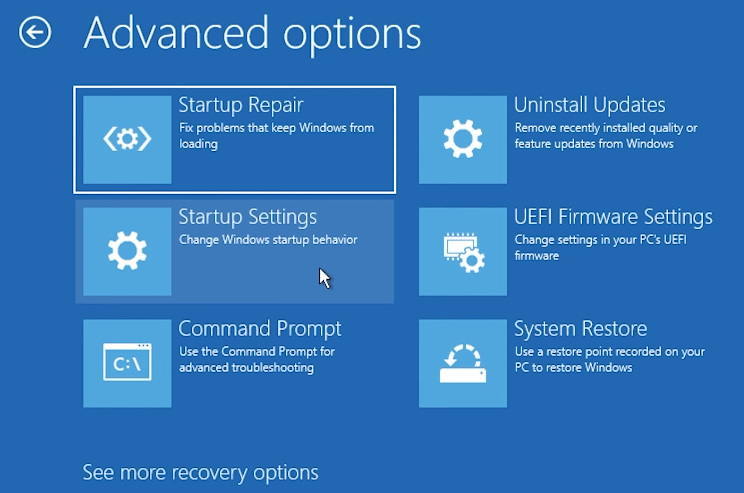
Step 3: When the recovery screen appears, choose Advanced options.
Step 4: Then click Troubleshoot > Advanced options.
Step 5: In the Advanced options tab, select Startup Repair. Then the Windows 11/10 Startup Repair tool will automatically diagnose and fix the Windows 11/10 not resetting issue.
If the Windows 11/10 not resetting issue persists, continue to the next method.
Fix 2: Run SFC/DISM
Repair Windows system files with SFC (System Filer Checker)/DISM (Deployment Image Servicing and Management). Sometimes, this issue is caused by corrupted Windows system files. Here are the steps to fix it:
Step 1: Input cmd in the Search box. Then right-click Command Prompt and select Run as administrator to open the command window.
Step 2: Type the command sfc /scannow and then press Enter.
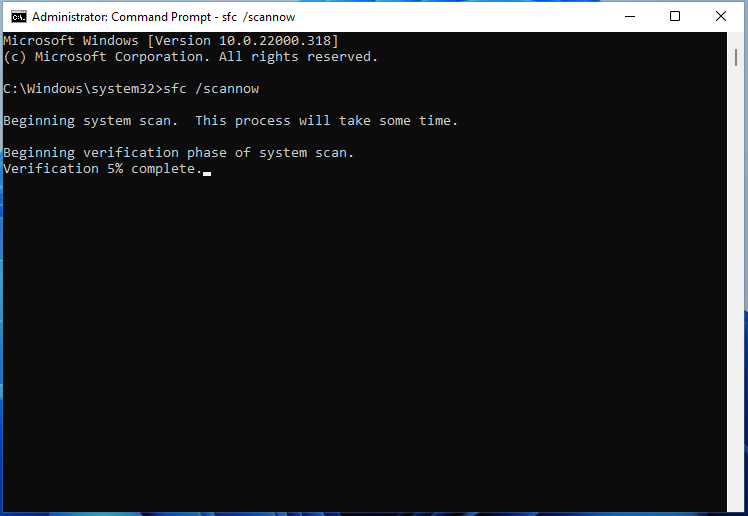
Wait patiently until the verification process 100% complete. Then reboot the computer to see whether the issue still exists or not.
If sfc /scannow command is unable to fix the reset issue on Windows 10/11, you can run DISM to fix the Windows system image. Type the following command and press Enter.
Dism /Online /Cleanup-Image /CheckHealth
Dism /Online /Cleanup-Image /ScanHealth
Dism /Online /Cleanup-Image /RestoreHealth
After that, you can check whether the issue still persits or not.
Fix 3: Perform the System Restore
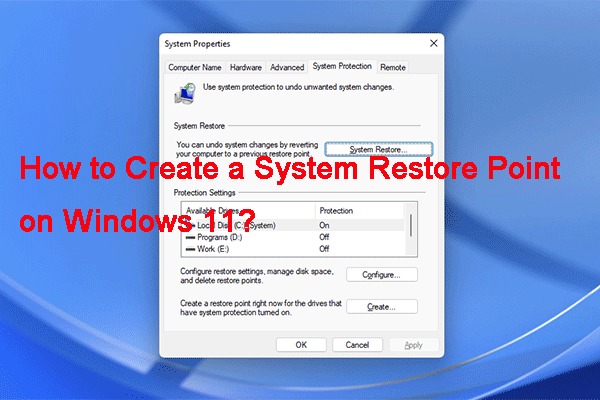
When Windows 11/10 resetting fails, you can restore the system to a working condition using the system restore point you have created. Here is how to create a system restore point and how to restore it.
Create a system restore point
Step 1: Type create system restore point in the Search box.
Step 2: Under System Protection, you need to check whether protection is enabled. If not, you need to first enable it. Select C drive and click Configure. Select Turn on system protection. Click Apply and OK.
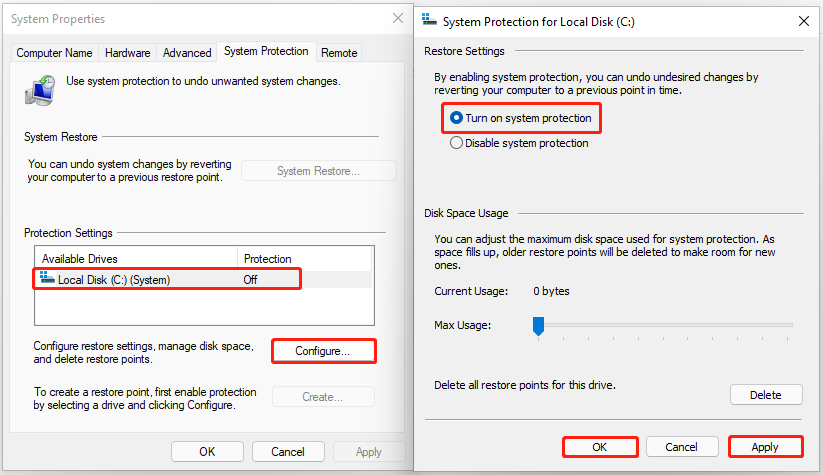
Step 3: Select C drive and click Create. Type a description for the system restore point. Then, it will start to create the system restore point. When the process finishes, click Close.
Perform the system restore
Step 1: Under the System Restore part, click System Restore… and click Next.
Step 2: Select the target system restore point and click Next.
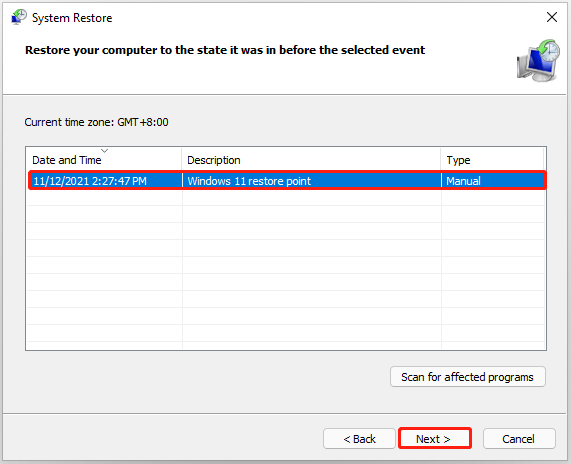
Step 3: Confirm your restore point and click Finish. Then, you need to wait patiently.
Fix 4: Perform a Clean Boot
Performing a Clean Boot can help you start Windows through a minimal set of drivers and startup programs, which can avoid software conflicts while resetting Windows 10/11. In order to perform a clean boot, you need to do:
Step 1: Type msconfig in the Run box (pressing the Windows +R keys to open the Run box), and press Enter.
Step 2: Then go to the Services tab. Check the Hide All Microsoft Services box.
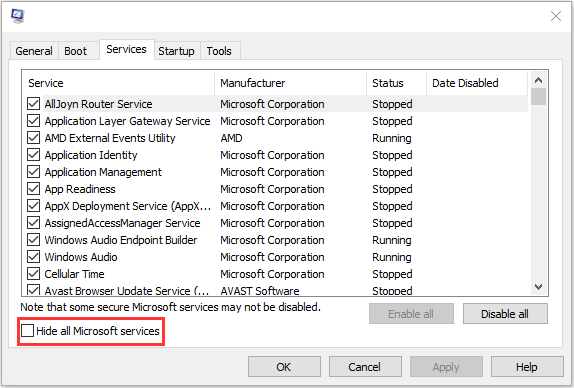
Step 3: Now, click the Disable all button, and click Apply to save the change.
Step 4: Navigate to the Startup tab and click Open Task Manager.
Step 5: In the Task Manager tab, select the first enabled application and click Disable. Here you need to disable all enabled applications one by one. After disabling all programs, close Task Manager and click OK.
Afterward, you can try to reset your Windows 10/11 again.
Bottom Line
This article shows you some of the advantages and disadvantages of using cloud download or local reinstall when resetting Windows 11/10. Besides, you can know how to fix the “Reset this PC” not working on Windows 10/11.
If you have any problem with MiniTool ShadowMaker, please feel free to contact us via the email [email protected] and we will reply to you as soon as possible.
