How to Delete Local Disk D on Windows 10/11?
A partition is a logical division of a hard disk with specific settings and file system. The operating system shows it to you as a separate hard drive. Since a hard drive might contain many partitions, you need to organize the partitions on your computer to meet your needs.
For example, you can delete unnecessary partitions to free up space to adjust the size of other partitions. In this post, we intend to present 4 ways to delete local disk D. Now, scroll down to get detailed instructions!
Preparation: Back up Your Data on the D Drive with MiniTool ShadowMaker
Deleting local disk D will erase all the data on it. So, if there are any important files on the D drive, make sure to back them up before proceeding. To back up data, it is highly recommended to try a piece of free Windows backup software called MiniTool ShadowMaker.
This tool is dedicated to providing services on file backup, disk backup, Windows backup, and partition backup. Just with a few clicks, you can backup data or system. Once done, you can recover your data and restore the OS when there is something wrong with your data or system. Now, let me show you how to back up the files on your D drive:
Step 1. Launch MiniTool ShadowMaker that offers a 30-day free trial.
MiniTool ShadowMaker TrialClick to Download100%Clean & Safe
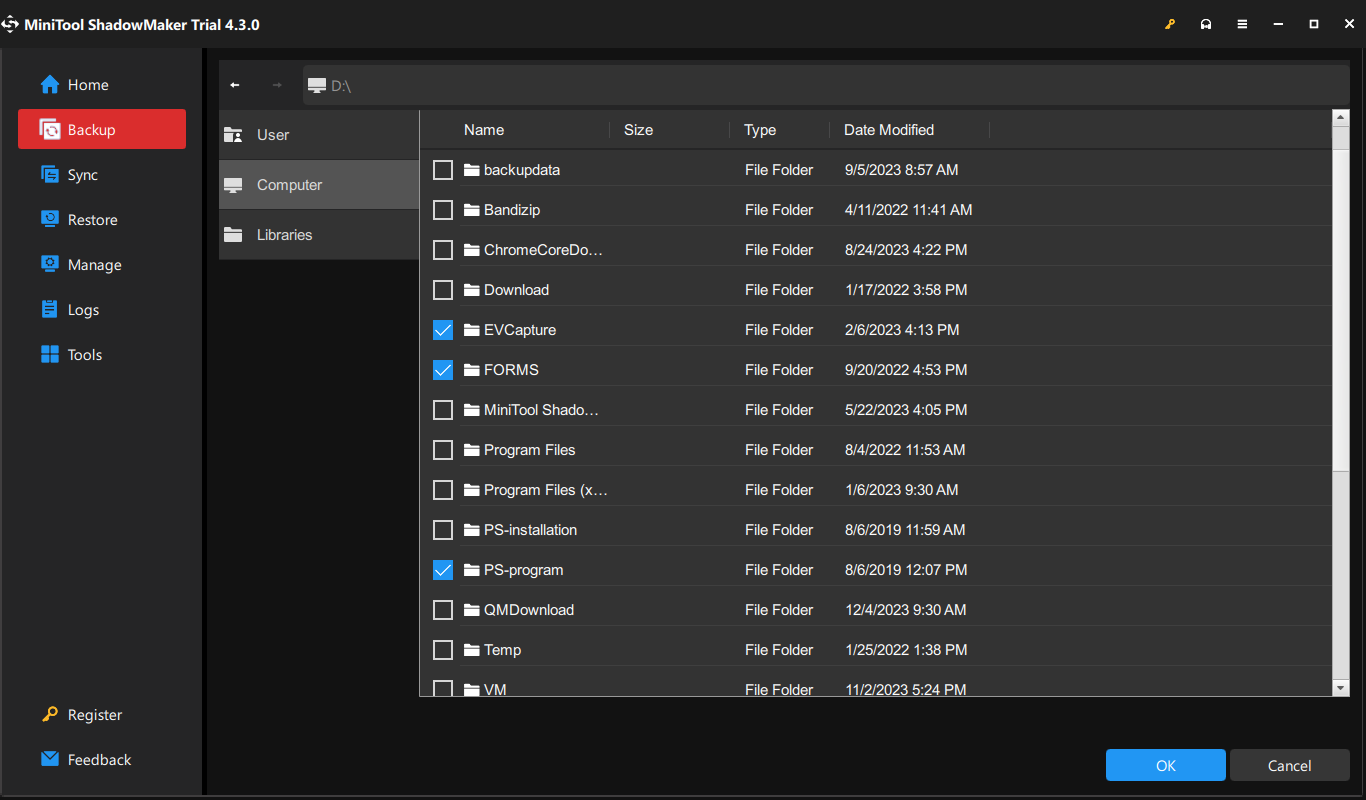
Step 2. In the Backup page, you can choose the backup source and destination.
Backup source – go to SOURCE > Folders and Files to choose the important files on your D drive.
Backup destination – go to DESTINATION to select a path to store the backup.
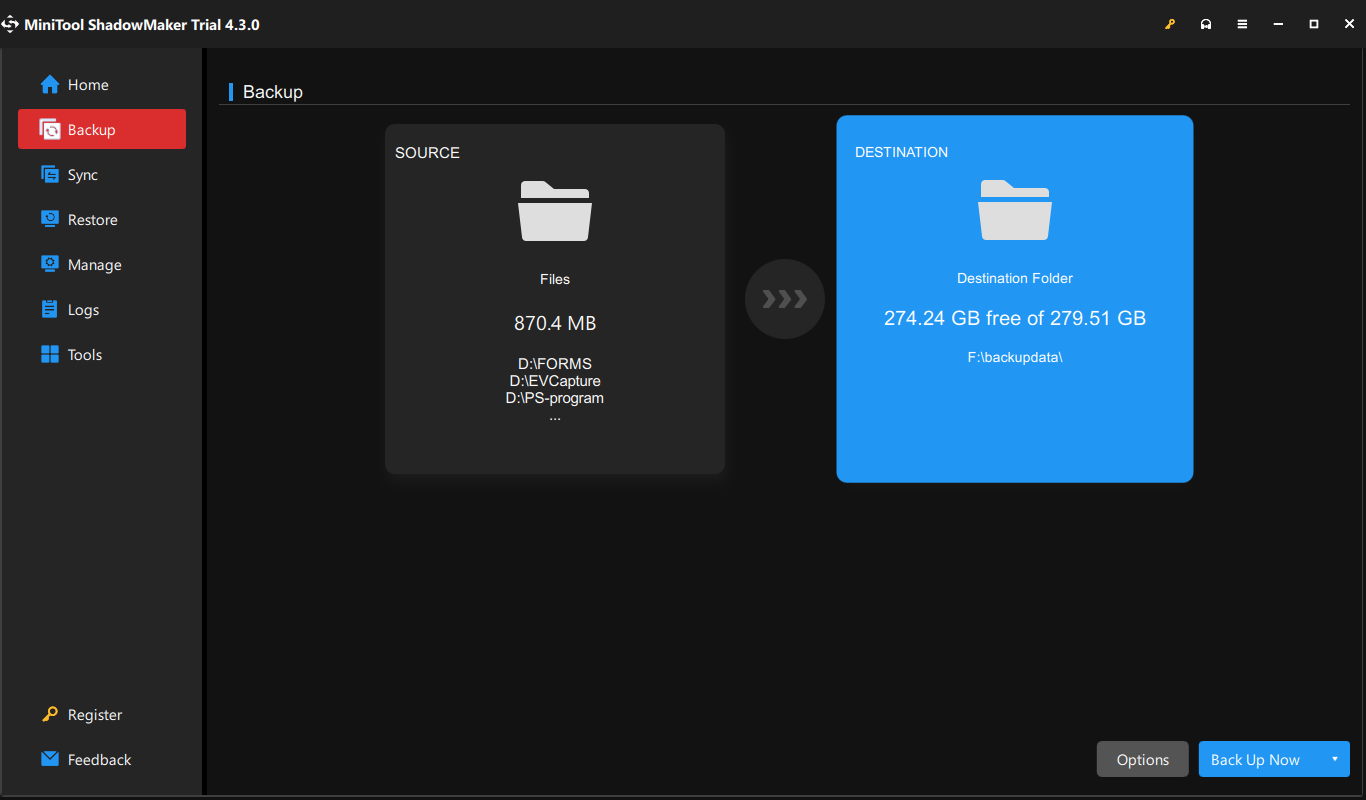
Step 3. Click on Back Up Now to start the process at once.
Delete Local Disk D via Disk Management
Disk Management is an inbuilt utility in Windows for advanced storage operations. Using this utility, you can initialize, format, or partition a hard disk. Here’s how to delete local disk D via it:
Step 1. Press Win + X to open the quick menu and then select Disk Management.
Step 2. Right-click on the disk partition you want to delete and select Delete Volume.
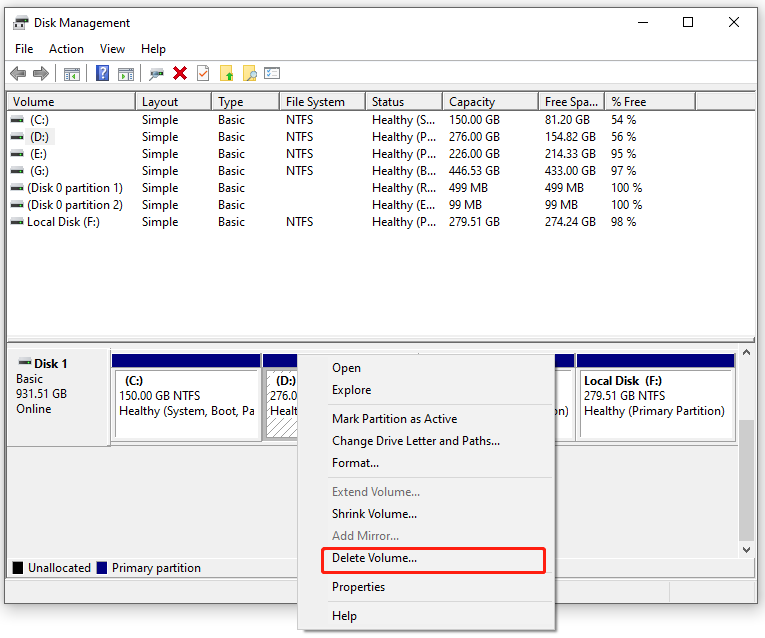
Step 3. Then, you will be informed that all the data in the partition will be erased. Click on Yes to confirm the deletion.
After the partition is deleted, the space it occupied will be shown as unallocated space. You will need to merge unallocated space to make full of the disk space, see this guide – How to Merge Unallocated Space in Windows 10 for a Large Drive.
Delete Local Disk D via MiniTool Partition Wizard
If you are not familiar with computers, the best way to delete local disk D is to resort to more user-friendly third-party software like MiniTool Partition Wizard. This free partition manager is designed to move, resize, format, extend, delete, & copy partitions as well as other basic & advanced partition management options on both basic and dynamic disk on Windows devices. Here’s how to delete local disk D via it:
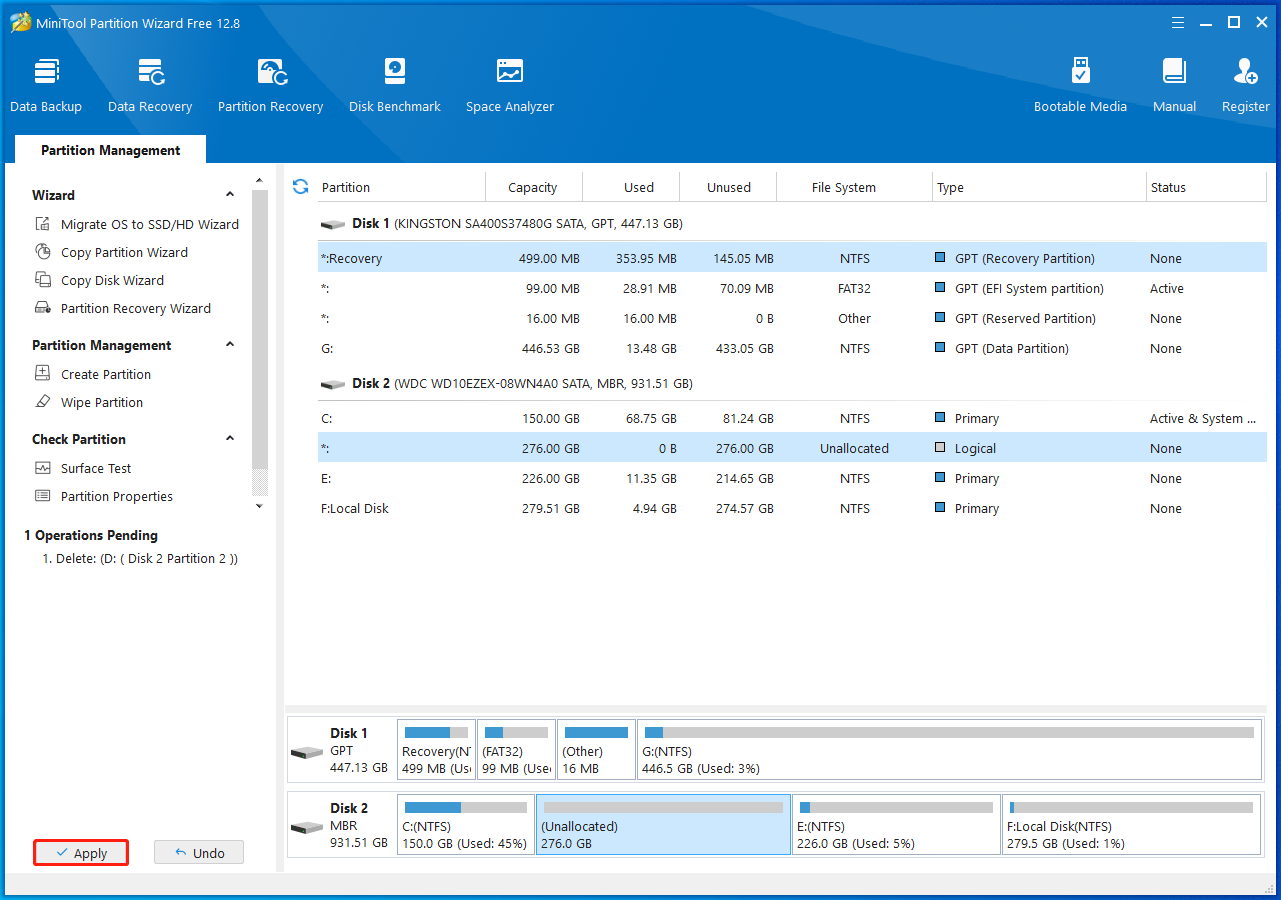
Step 1. Launch MiniTool Partition Wizard.
MiniTool Partition Wizard FreeClick to Download100%Clean & Safe
Step 2. In the right pane, right-click on the partition you need to delete and then select Delete from the context menu.
Step 3. Click on the Apply button in the lower left and then wait for the deleting operation to complete.
Delete Local Disk D via Diskpart
Another inbuilt disk management tool is Diskpart. This tool enables you to format partition, create partition, delete partition, and even format the unallocated disk. Follow these steps to delete D drive via it:
Step 1. Type cmd in the search bar to locate Command Prompt and then select Run as administrator.
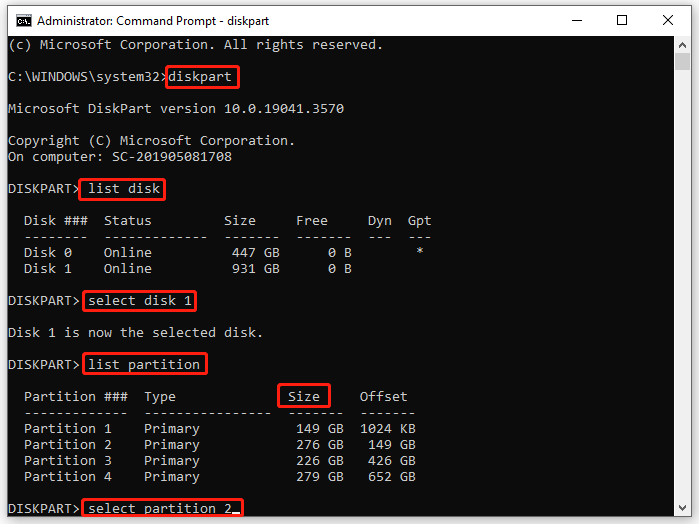
Step 2. In the command window, type diskpart and hit Enter.
Step 3. Type list disk and hit Enter to list all the disks in the system.
Step 4. Type select disk 1 and hit Enter. Replace 1 with the number of the target disk.
Step 5. Type list partition to list all the partitions on this disk and hit Enter.
Step 6. Type select partition 2 and hit Enter. Here, you need to replace 2 with the number of the partition you want to delete. You can find the target partition according to its size.
Step 7. Type delete partition and hit Enter to delete local disk D.
Delete Local Disk D via Windows PowerShell
Windows PowerShell is a Windows command-line shell and scripting language tailored for administrators. This tool is more powerful than CMD and you can use some scripts to manage your operating system. Deleting a partition on your computer is also permitted. To do so:
Step 1. Right-click on the Start icon and select Windows PowerShell (Admin).
Step 2. Type Get-Volume to get a list of partitions on your computer.
Step 3. Then, type Remove-Partition -DriveLetter D and hit Enter.
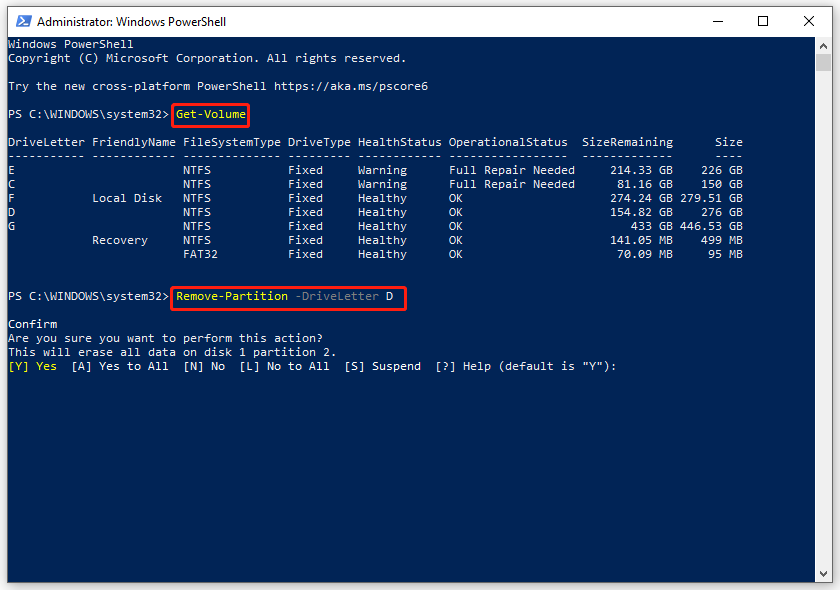
Step 4. Type Y to confirm the operation.
We Need Your Voice
This post walks you through on how to delete D drive via Disk Management, Diskpart, Windows PowerShell, and MiniTool Partition Wizard. What’s more, it’s important to create scheduled backups with MiniTool ShadowMaker for data and system protection. If you have any questions while using our products, welcome to turn to us for help via [email protected].
About The Author

Position: Columnist
Aurelie is a passionate soul who always enjoys researching & writing articles and solutions to help others. Her posts mainly cover topics related to games, data backup & recovery, file sync and so on. Apart from writing, her primary interests include reading novels and poems, travelling and listening to country music.