When you are attempting to install Windows 10 on your PC by using a USB flash drive, you may fail with the “Windows setup select the driver to install” issue. Why does this issue occur and how to fix it? If you wonder about those, you can pay attention to the following content.
Reasons for Windows Setup Select the Driver to Install
The “Windows 10 setup select the driver to install” issue can be caused by various factors. And this post summarizes some common reasons for this issue as follows.
- There are certain temporary glitches and bugs.
- You connect the USB drive to an improper USB port.
- You download the incorrect ISO file.
- The ISO file you download gets corrupted or missing.
- Hard drive settings in BIOS are wrong.
After knowing the possible causes for the “select the driver to install Windows 10” issue, you may wonder how to fix this annoying issue. To help you get rid of this issue and install Windows successfully, there are several effective methods available. Let’s get down to working the problem out with the given methods.
Method 1: Remove and Then Plug the USB Drive Back in
When the “Windows 10 select the driver to install” error message shows up on your screen, the first thing you can try is to remove your USB drive and then re-insert it. It’s the simplest way that may fix this issue. To do this, follow the steps below.
Step 1: Click Cancel in the pop-up window. By doing so, you will go back to the first setup screen.
Step 2: Remove the USB flash drive you use to install Windows. Then reconnect it with your PC.
Step 3: After that, try the Windows installation again to see if the error is repaired.
Method 2: Change the USB Port
If the port you use to connect your USB drive is a faulty one, you are likely to run into the “Windows 10 setup select the driver to install” issue as well. In this case, you can try to solve this issue by simply plugging the USB drive into another different USB port that works well.
If the error persists after you change to the good USB port, you should continue with other solutions.
USB 2.0 vs 3.0: What’s the Difference and Which One Is Better
Method 3: Change BIOS Settings
As mentioned earlier, the improper BIOS settings may also lead to the “Windows setup select the driver to install Windows 10” issue from time to time. As for this, you can first try resetting BIOS to factory defaults. Here’s how to change BIOS settings.
Step 1: Reboot your PC and press & hold the BIOS hotkey as soon as possible. This will help you enter BIOS.
Tip: The BIOS hotkeys may be different on various PCs. Normally, you can press F2 to enter BIOS for all Asus PCs; F2 or F12 for Dell PCs; F10 for HP PCs; F1 for Lenovo desktops, F2 or Fn + F2 for Lenovo laptops; F2 for Samsung PCs, etc. To get the correct hotkey for your PC, you can check your user manual or search online.
Step 2: Locate the Setup Defaults option. It might be named Load Default, Load Setup Defaults, Load Default Settings, Load BIOS Defaults or Load Optimal Defaults. Select the specific option and press Enter to open the Setup Confirmation window.
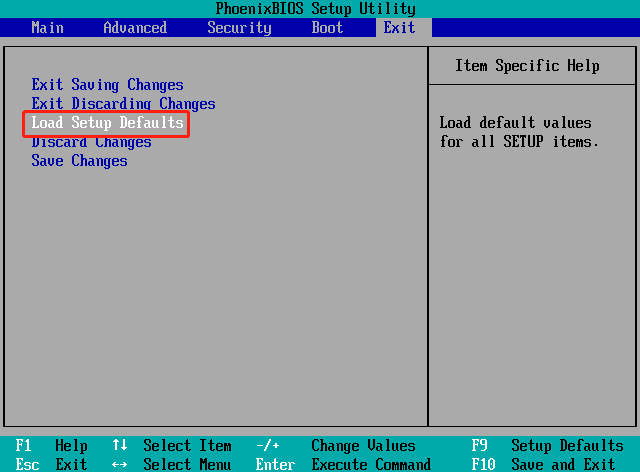
Step 3: After that, click Yes to confirm and start the resetting process.
Tip: If the error is still here, then you can try entering BIOS again and changing the SATA mode manually. You should set the mode as IDE if the current mode is AHCI. Likewise, if the current mode is IDE, you should change to AHCI.
Method 4: Add the Needed Driver to the USB
Copying the missing needed driver to the USB drive that is used for Windows installation is another possible solution to the “Windows setup select the driver to install Windows 10” issue.
Tip: To learn more about how to download drivers, you can pay attention to this post: How to Download and Install Drivers for Windows 10 – 5 Ways.
Step 1: Go to the official website of your computer manufacturer.
Step 2: After that, find and download the missing driver (usually the Rapid Storage driver).
Step 3: Once the download is finished, unzip the driver file.
Step 4: Copy and paste the unzipped folder to the Windows installation USB drive.
Step 5: At last, try installing Windows again and the issue may disappear.
Method 5: Re-Download the ISO
If there is something wrong with the ISO file download, your ISO may get corrupted, leading some files in it to be missing. As a result, you may experience the “Windows 10 select the driver to install” issue. To get rid of it, you’d better download the ISO file again and re-create the Windows installation USB drive manually with this file.
Tip: You can also create a Windows installation media with Windows 10 Media Creation Tool.
This operation can be divided into three parts. Just follow them to finish creating a Windows installation USB drive and use it to install Windows.
Part 1: Format the USB Drive to FAT32
First of all, you should format the prepared USB drive to FAT32 so that it can boot either BIOS-based or UEFI-based PCs.
Tip: To learn about UEFI vs BIOS, you can read this post: UEFI vs BIOS – What’s the Difference and Which One Is Better.
Microsoft Windows enables you to perform a format for the USB drive with offers useful tools, like Disk Management and diskpart. Unfortunately, sometimes certain issues may happen while using the two utilities to format the USB drive, such as Diskpart format stuck at 0 percent, Disk Management Format option greyed out, and so on.
Another drawback of formatting a USB drive with Windows built-in formatters is that they only support formatting a USB drive no larger than 32GB to FAT32. Therefore, to avoid unexpected issues and break the size limit, we highly recommend you format your USB drive with MiniTool Partition Wizard.
It’s a piece of professional disk partition software including a wide range of features related to partitions and disks. For instance, it allows you to create/format/resize/delete partitions, copy/wipe disks, check disk errors, migrate OS to SSD/HDD, etc.
With MiniTool Partition Wizard, you can format a USB drive large than 32GB to FAT32. Here’s a step-by-step guide on how to format the USB drive via this partition manager.
Step 1: Connect the USB drive used to create the Windows installation drive to your computer.
Step 2: Download and install MiniTool Partition Wizard on your PC. Then launch MiniTool Partition Wizard to enter its main interface.
MiniTool Partition Wizard FreeClick to Download100%Clean & Safe
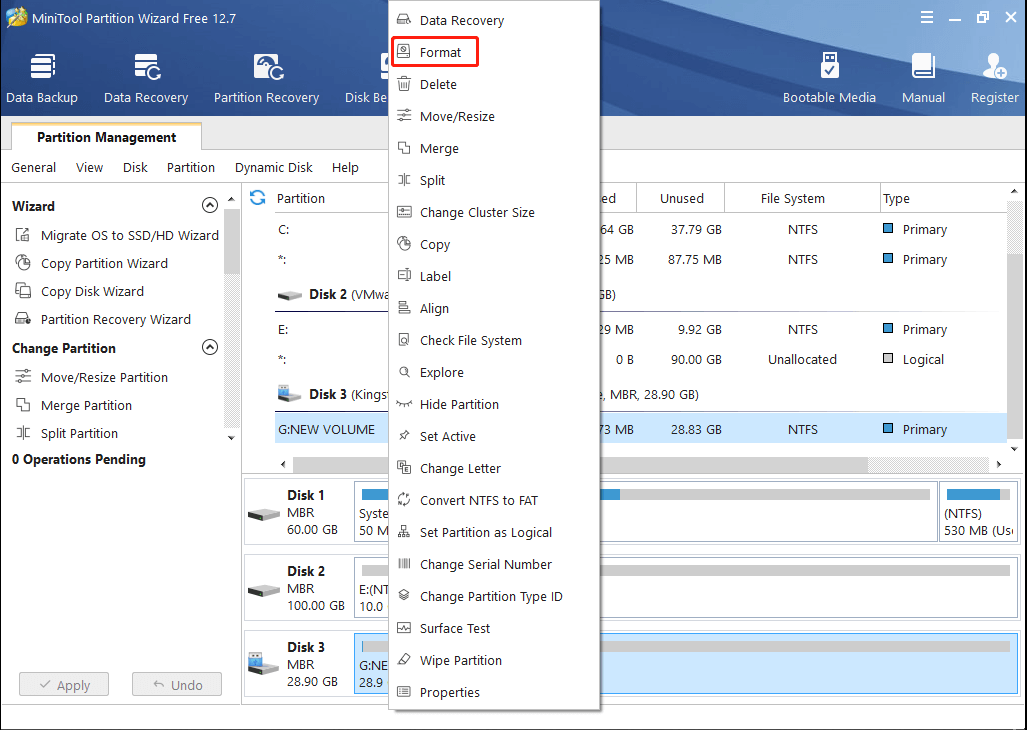
Step 3: Right-click the partition on the target USB drive and select Format. Alternatively, you can highlight the partition of the USB drive and select Format Partition from the left action pane.
Step 4: In the prompted window, select FAT32 from the drop-down menu. Then click OK.
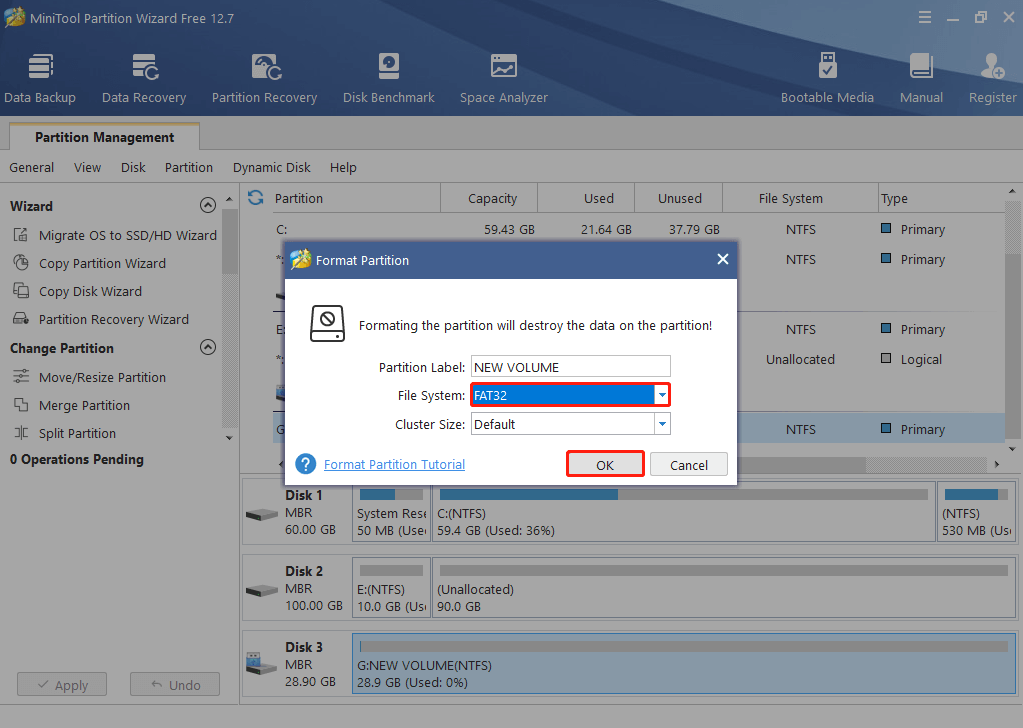
Step 5: After that, you can preview that the target partition is formatted to FAT32. Just click Apply to start the formatting process.
Part 2: Download the Windows ISO File and Copy It to the USB Drive
After getting the FAT32 USB drive, you can now download the ISO file by following the steps below.
Step 1: Go to the official Microsoft website. Then follow the on-screen instructions to select the specific version and language.
Step 2: Once done, click the 32-bit or 64-bit download link according to your situation.
Step 3: Wait until the ISO file download is completed. Then locate this file in File Explorer.
Step 4: Copy and paste the ISO file to the USB drive.
- Right-click the ISO file and select Copy.
- Right-click the empty space in the USB drive and select Paste.
Part 3: Set the USB Drive as Active
To make sure you can install Windows with the USB drive, you should set the target drive as active. The following steps tell you how to do that.
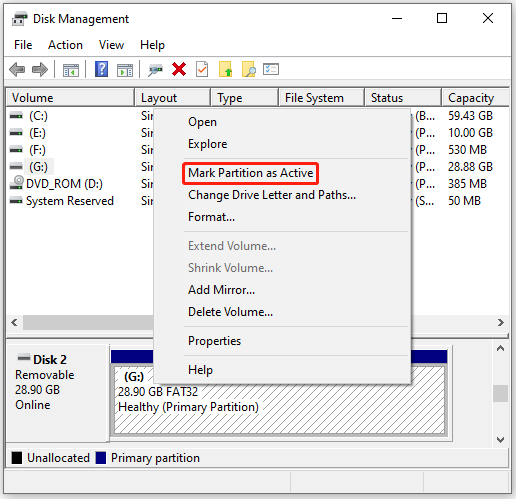
Step 1: Right-click the Start icon and select Disk Management.
Step 2: Right-click the target USB partition and select Mark Partition as Active.
Step 3: After that, you will get a Windows installation USB drive. Just use this drive to install Windows and check if the error is repaired.
![[FIXED] Windows 10 Media Creation Tool Stuck](https://images.minitool.com/minitool.com/images/uploads/2021/11/windows-10-media-creation-tool-stuck-fixed-thumbnail.png)
Method 6: Install a Different Windows Build
If none of the above methods fix the “Windows setup select the driver to install” issue, it may indicate that some bugs may exist in the Windows build you are trying to install currently. In this case, it’s recommended that you download and install a newer Windows build.
To do this, you simply need to go to the official Microsoft website and download an available build newer than the current problematic one. Then use the newly downloaded ISO file to create a Windows installation USB drive to install Windows.
Bottom Line
When faced with the “Windows setup select the driver to install” issue, you can try the above methods to fix it. If you have any problems with this issue, you can leave a message in the comment area below.
For any issues related to MiniTool Partition Wizard, you can contact us via [email protected]. We’ll reply to you as soon as possible.
About The Author

Position: Columnist
Yamila is a fan of computer science. She can solve many common issues for computer users by writing articles with simple and clear words. The very aspect that she is good at is partition management including create partition, format partition, copy disk and so on. When she is free, she enjoys reading, doing some excerpts, listening to music and playing games.