About Initialize to GPT Disk
Adding new hard disk is regarded as a good way to extend the capacity of the computer. With the fast development of hardware technology, large-capacity hard disks are becoming increasingly common. After a new hard disk with a large capacity is connected to Windows computer, users must initialize it to GPT/MBR in order to use it for data storage.
However, how to finish the disk initialization task easily draws people’s attention. What if users would like to initialize it to GPT? Compared to MBR, GPT has some advantages:
- GPT supports at most 128 partitions in Windows, while MBR only supports 4 primary partitions or 3 primary partitions plus 1 extended partition.
- The largest disk capacity that can be managed by GPT mounts to 18EB, while the capacity limit of an MBR disk is only 2TB.
Hot article: MBR vs. GPT Guide: What’s The Difference and Which One Is Better
Thus, many users would like to initialize their disk to GPT. As for how to initialize to GPT disk, we recommend using MiniTool Partition Wizard. To make the operating process clear, we will give a MiniTool Partition Wizard tutorial. Now, please free download the software and then start to initialize to GPT disk.
How to Initialize to GPT Disk
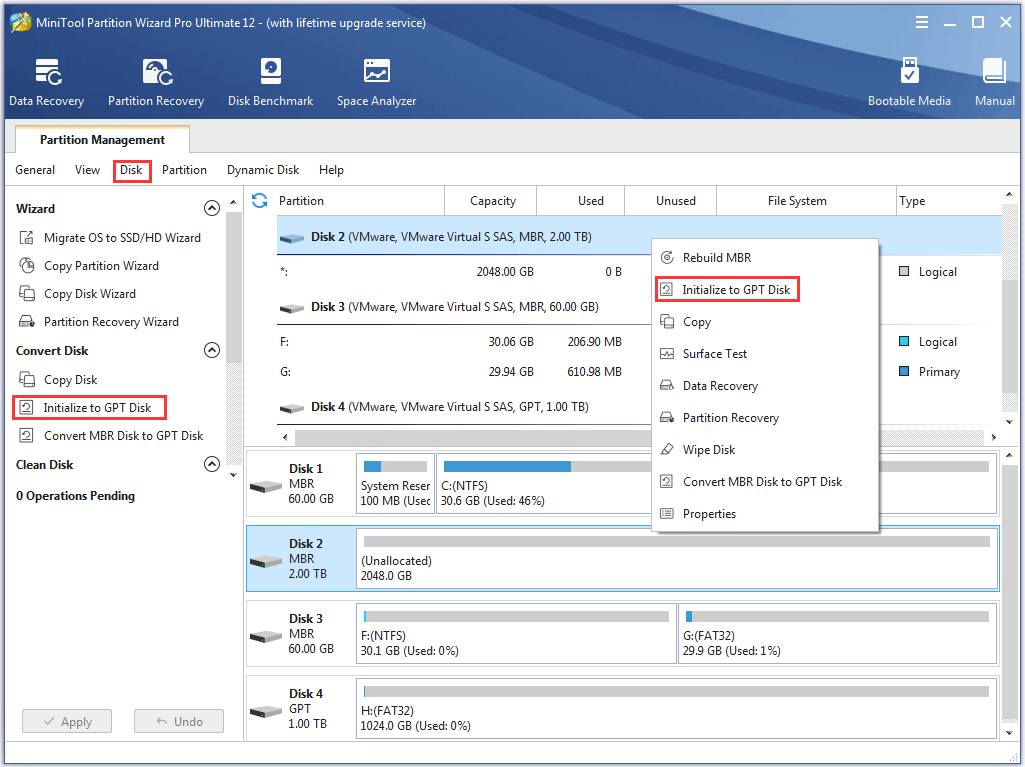
Step 1. Choose the disk that users would like to initialize to GPT and then select Initialize to GPT Disk by
- clicking on it under Convert Disk from the left action panel.
- choosing it from right-click menu of target disk.
- clicking on it from the drop-down menu of Disk option in the menu bar.

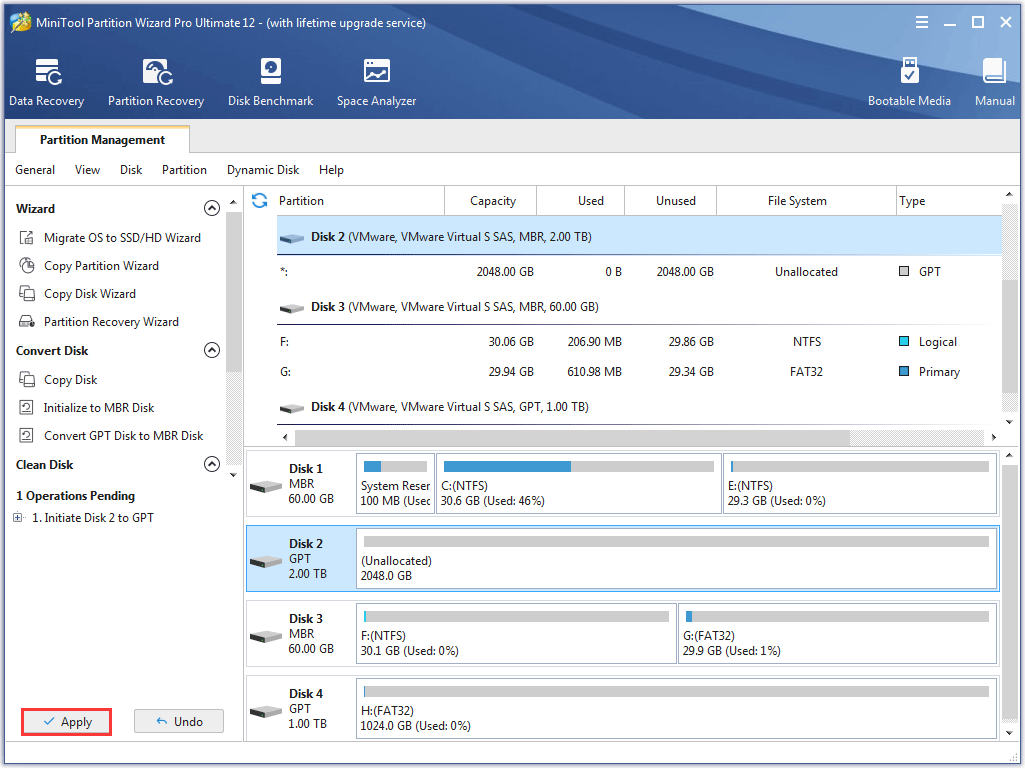
Step 2. Tap Apply in the upper left corner to perform pending operations.

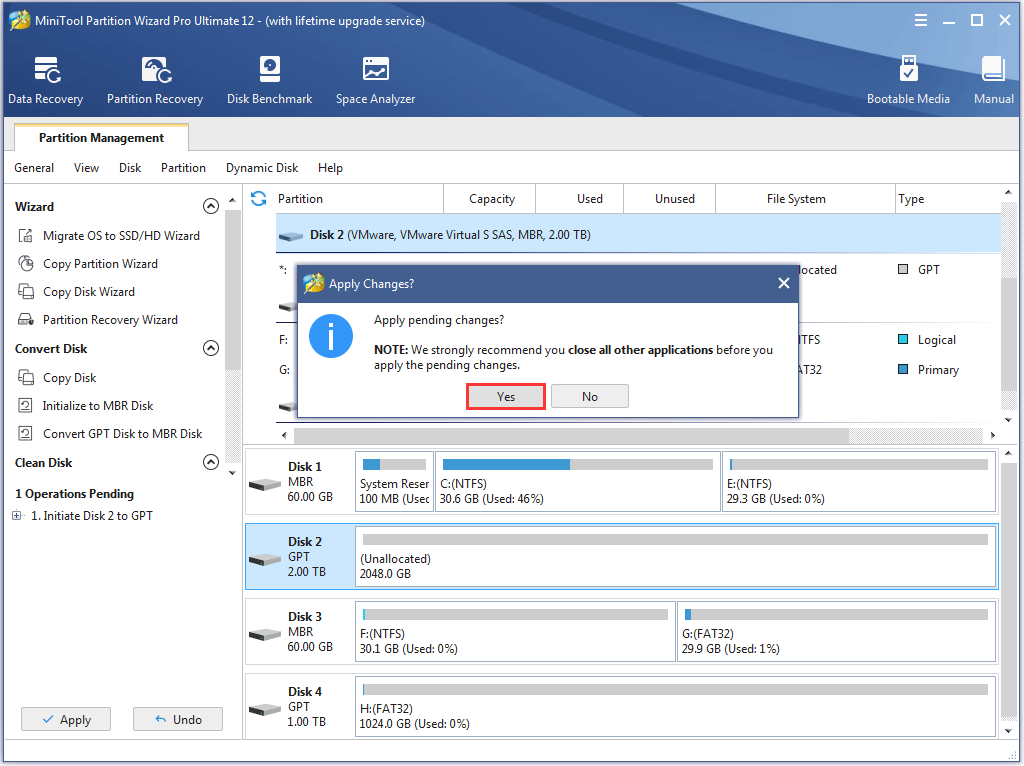
Step 3. Click Yes in the prompt window to allow changes. Users would better close all other applications as suggested.

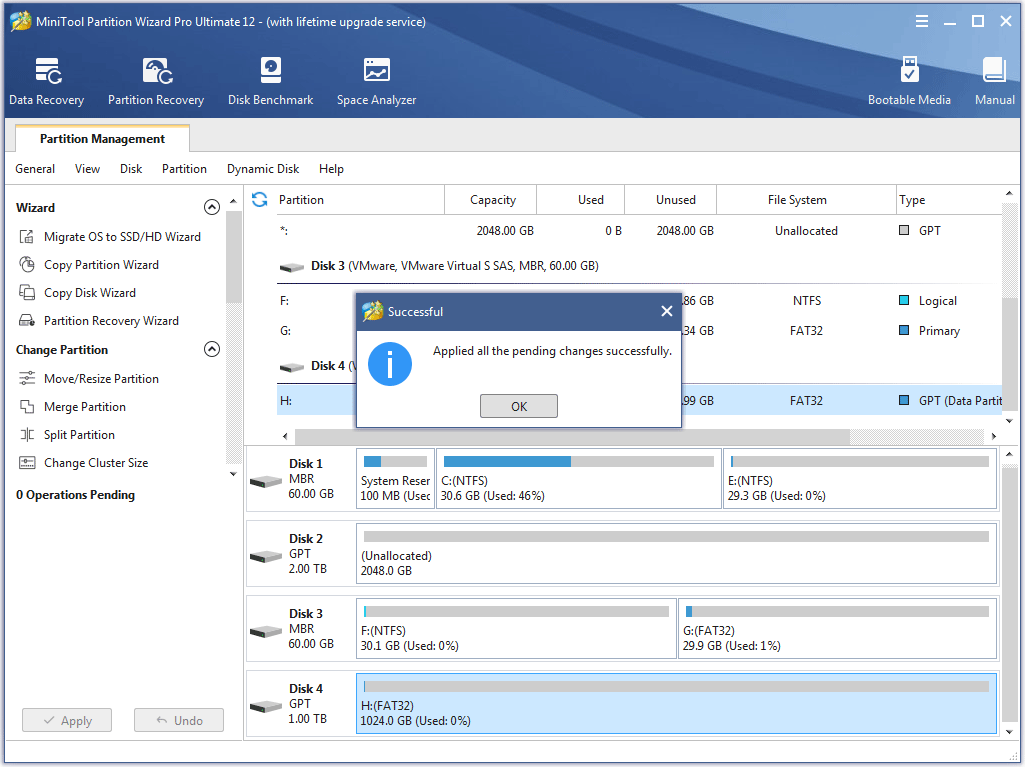
Step 4. Click on OK button at the end of disk initialization.
