Issue: Transcend USB Flash Drive Not Detected/Recognized
Transcend is a well-known memory module manufacturer whose main products include flash memory cards, USB flash drives, portable hard drives, solid-state drives, etc. Among them, Transcend USB flash drives have long been trusted by users due to their stability and durability. But with the increase in usage time or some unexpected situations, many users claimed that they encountered these issues:
- Transcend USB flash drive not recognized.
- Transcend USB flash drive not detected.
- Transcend USB flash drive not working.
If you are one of them, you’ve come to the right place. Keep reading to find possible reasons and potential solutions.
Why Transcend USB Drive Not Detected Windows 11/10
If your Transcend USB drive is not detected, you may consider these reasons:
- The USB port is not compatible with the Transcend USB drive or is damaged.
- The USB driver is corrupted or outdated.
- The USB drive lacks a drive letter.
- The USB drive is not partitioned and cannot be displayed in File Explorer.
- The USB drive is corrupted or damaged physically.
If the Transcend USB drive cannot be recognized, you can unplug the drive and try another USB port. Or, you can disconnect and re-connect the drive to another device and check if it can be recognized.
Recover Inaccessible Data From Transcend USB Flash Drive
If you still struggle with the “Transcend USB drive not accessible” issue after trying the basic troubleshooting steps, the top priority is to recover data from the unrecognized drive.
But, how to access and recover data from an inaccessible USB drive? As long as you use MiniTool Power Data Recovery, you can complete this task easily.
Why Choose MiniTool Power Data Recovery
Support for Assortments of File Types
MiniTool Power Data Recovery is effective in recovering kinds of deleted or lost files, such as documents, pictures, videos, audio files, and other types of data.
Superior Data Recovery From Multiple File Storage Media
It works great on HDD data recovery, SSD data recovery, USB drive file recovery, SD card recovery, pen drive recovery, etc. Many storage device brands are supported, such as Seagate data recovery, Samsung data recovery, and so on.
Effectiveness in Various Data Loss/Inaccessibility Situations
This secure data recovery service is effective in various file loss/inaccessibility scenarios, such as file deletion, disk formatting, hard drive corruption, file system damage, OS crash, and more.
Multiple Editions Available
MiniTool Power Data Recovery provides you with different editions that can fulfill your requirements in different data loss situations. To recover no more than 1 GB of files, you can choose MiniTool Power Data Recovery Free. To recover unlimited files, you can opt for the Personal or Business editions. You can check this page for edition comparison.
Full Compatibility With All Windows Versions
Windows 11, Windows 10, Windows 8, and Windows 7 platforms are all supported by this MiniTool file recovery software.
Steps to Recover Files From Transcend USB Flash Drive
Here are the major steps to perform USB recovery.
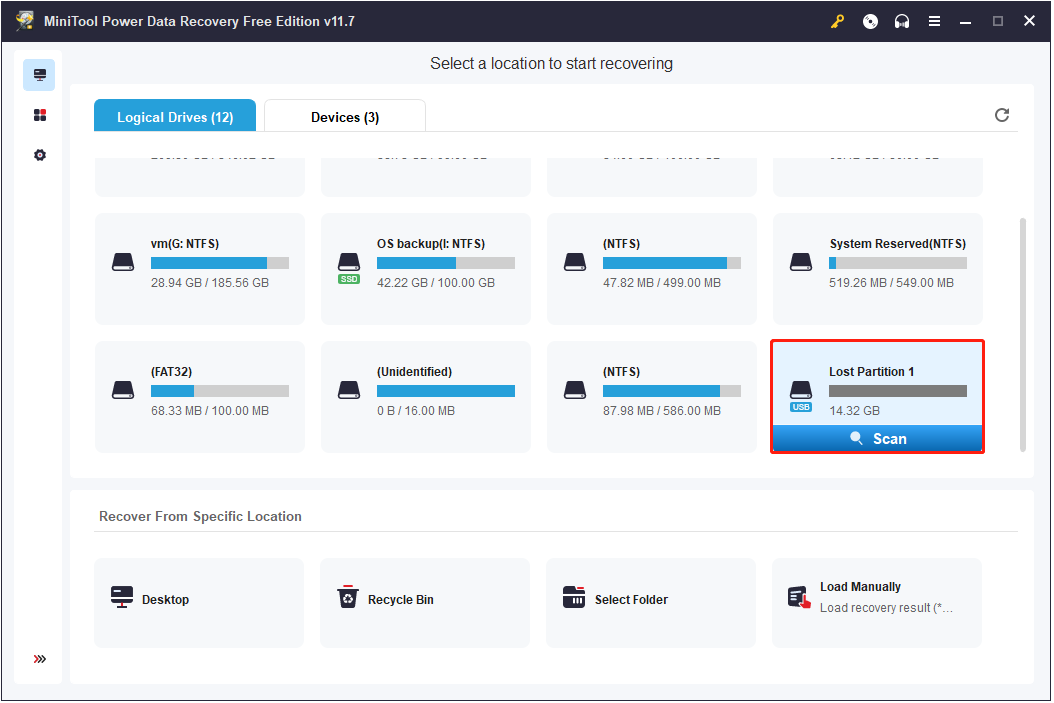
Step 1. Download, install, and launch MiniTool Power Data Recovery Free. On its home page, find and select the Transcend USB drive according to the volume capacity and the USB icon, then click the Scan button.
MiniTool Power Data Recovery FreeClick to Download100%Clean & Safe
Step 2. After scanning, all found files will be categorized by file path under Path by default. To simplify and speed up the file discovery process, you can switch to the Type category list to view files by file type.

Furthermore, the Filter and Search features are also beneficial to locating the required items faster. You are able to filter listed files by file type, file modification date, file size, and file category. Besides, you can search for a specific file by using the file name.
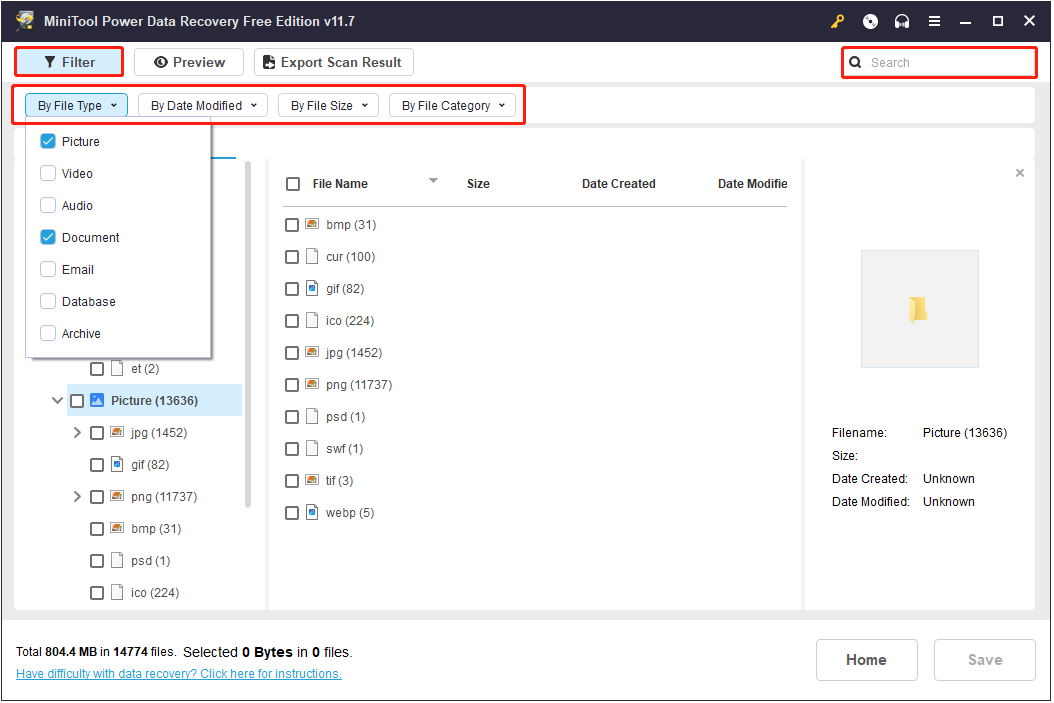
Most importantly, you have the option to preview found files for confirmation before recovering them so as to avoid restoring unwanted items.
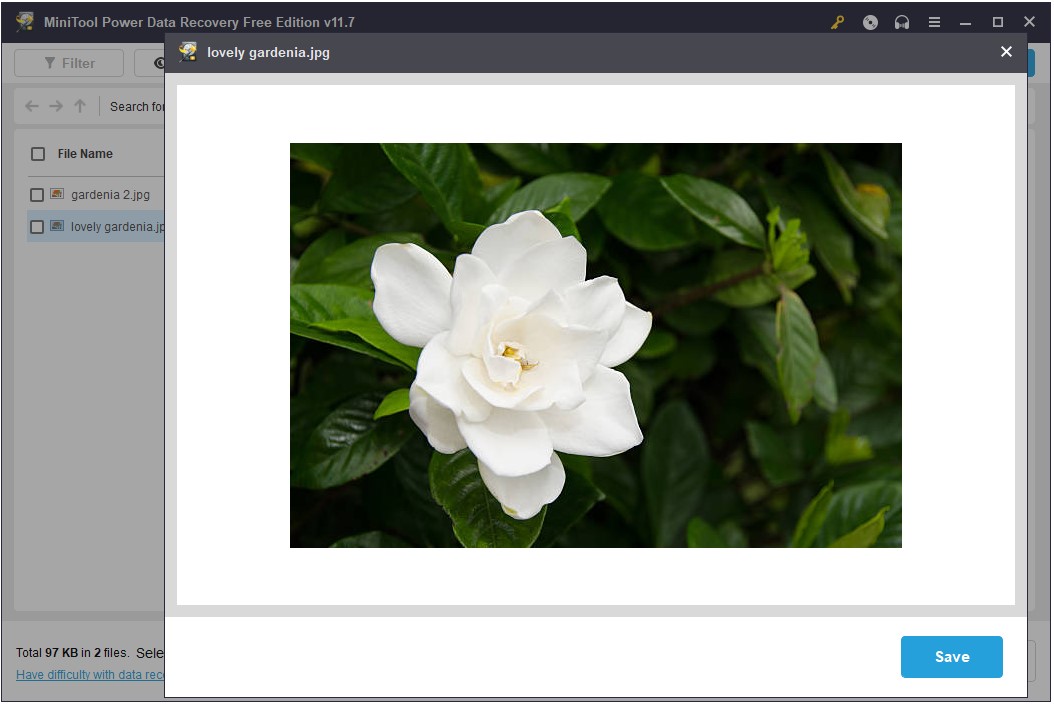
Step 3. Finally, tick all needed items and click the Save button to store them. Of course, you should not choose the unrecognized Transcend USB drive because it needs to be repaired.
Solutions to Fix Transcend USB Flash Drive Not Detected/Recognized
Now, it is time to repair the undetected/unrecognized Transcend USB drive. We have collected a couple of feasible solutions for resolving this issue, and you can try them one by one until the drive shows up.
Solution 1. Create a New Partition
If the partitions on the USB drive are missing or deleted by mistake, then the drive will not be displayed in File Explorer and seems to be undetected/unrecognized. In that case, the drive will be shown as unallocated in Disk Management. To make it show up in File Explorer, you need to partition the disk.
Various ways can be used to partition a disk. Here we will show you how to do that in Disk Management in detail.
Step 1. On your taskbar, right-click the Windows logo button, then select Disk Management.
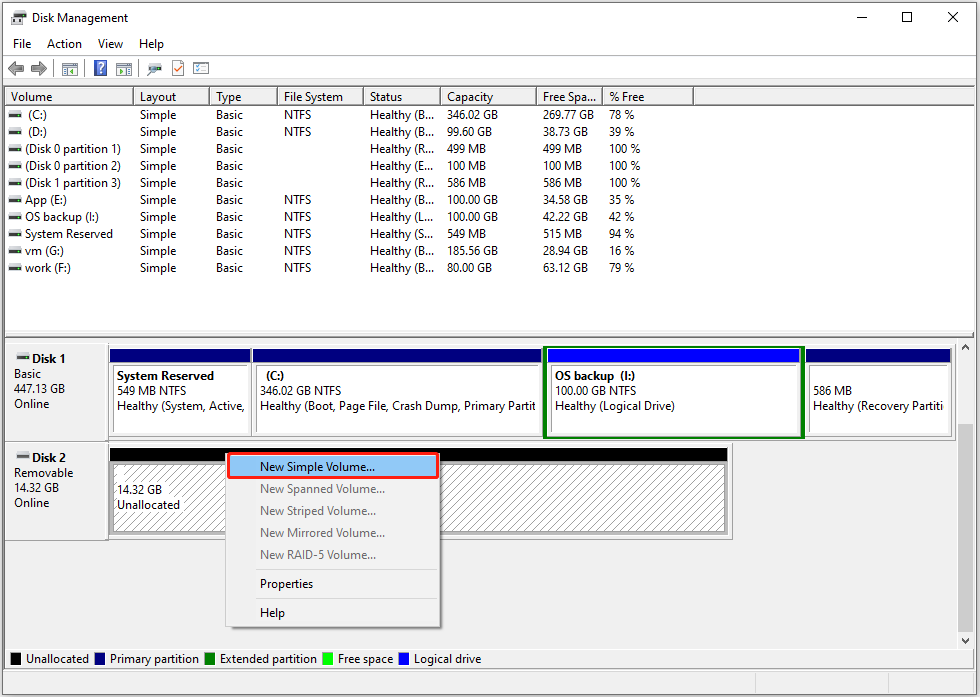
Step 2. In Disk Management, right-click the unallocated space and select the New Simple Volume option from the context menu.
Step 3. Click Next to continue.
Step 4. Specify the volume size and click Next. In the new window, choose an available drive letter from the drop-down list and click Next.
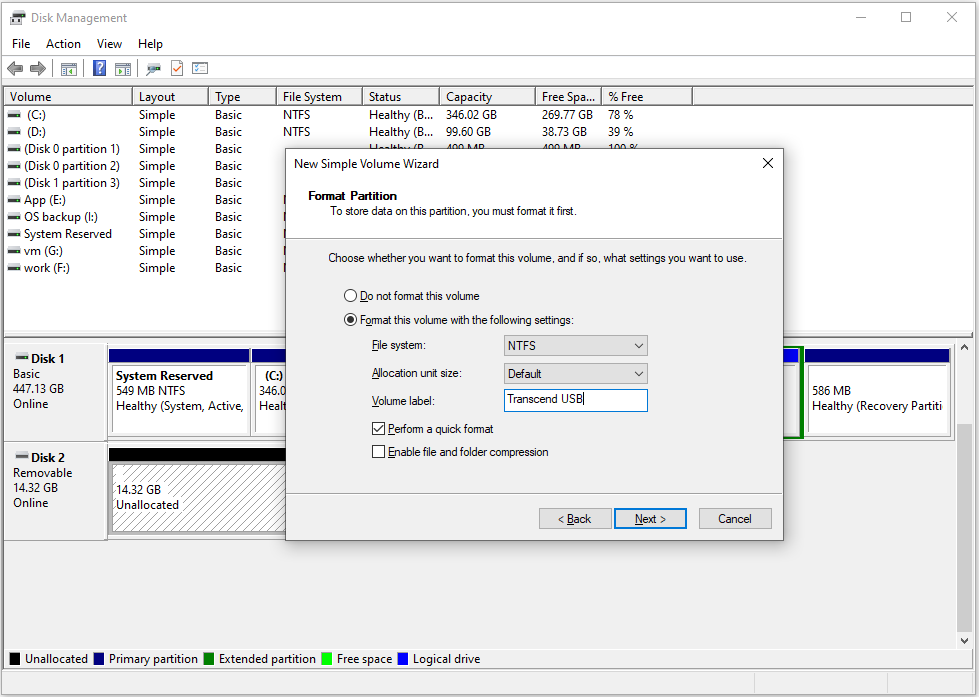
Step 5. Subsequently, choose a file system, type a volume label, and hit Next.
Step 6. Click Finish. Now, the USB drive is partitioned, and it should be displayed in both File Explorer and Disk Management.
Solution 2. Assign/Change a Drive Letter
If the drive letter of the Transcend USB drive is missing, the disk won’t show up in File Explorer. In this situation, you can check the volume status in Disk Management and make sure there is a drive letter. If not, you need to assign one.
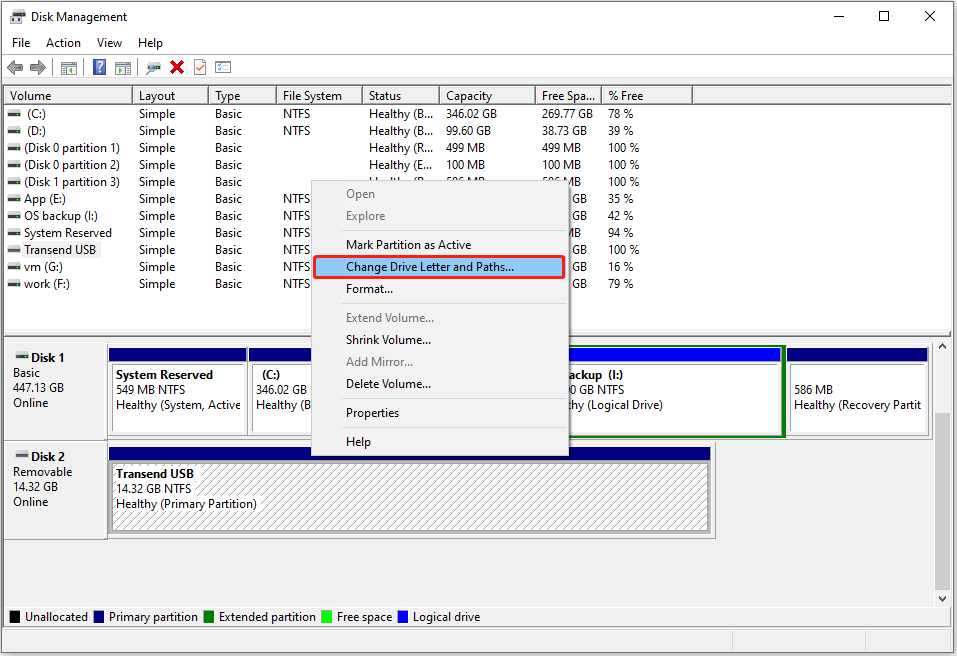
Step 1. In Disk Management, right-click the USB drive and click Change Drive Letter and Paths.
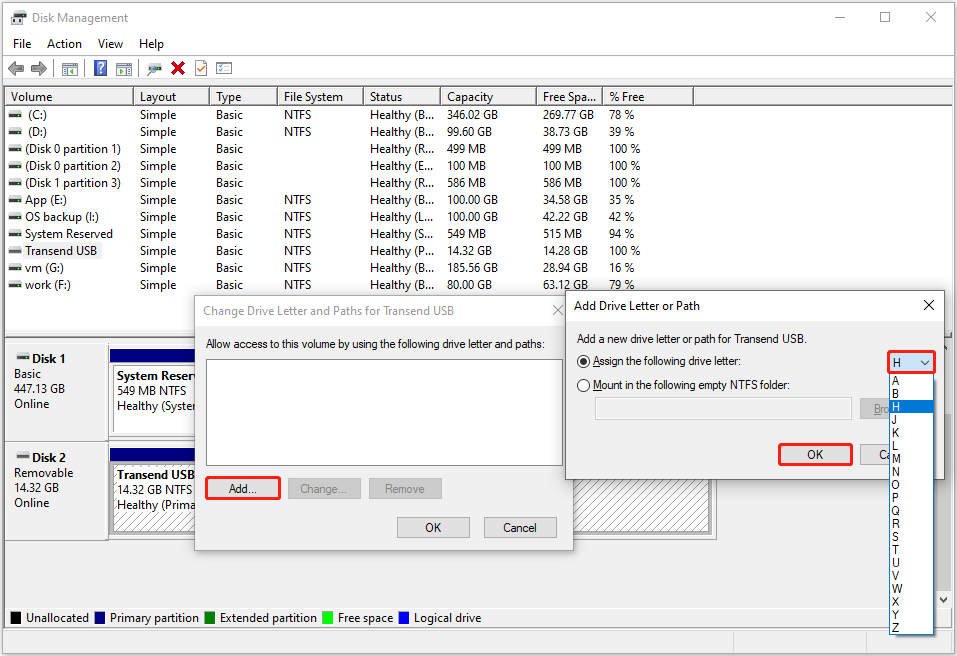
Step 2. Next, click Add. In the pop-up window, choose a desired drive letter from the drop-down list and click OK.
Step 3. After that, you can go to File Explorer and check if the USB drive appears.
See Also: [Resolved] Change Drive Letter and Paths Greyed out Windows 10
Solution 3. Update the USB Device Driver
Outdated or corrupted USB drives may trigger the drive not to be detected/recognized. To deal with this problem, you can update or reinstall the USB driver via Device Manager. Here are detailed instructions:
Step 1. Right-click the Start button on the taskbar and choose Device Manager.
Step 2. Expand Disk drives, then right-click the Transcend USB drive according to the device name and select Update driver.
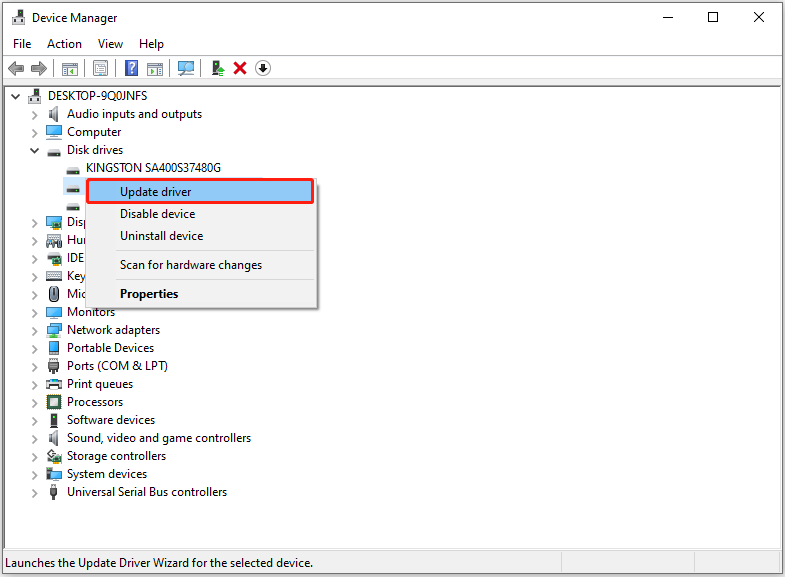
Step 3. In the next window, click Search automatically for drivers. Then follow the on-screen instructions to complete the necessary actions.
Solution 4. Disable and Re-Enable the USB Root Hub
A USB Hub is responsible for monitoring the insertion or removal of a USB device on its ports. If the USB Root Hub is disabled accidentally, the inserted USB drive may not show up. To rule out this cause, you can try to disable and re-enable the USB Hub.
Step 1. Press the Windows + R key combination to open the run window. Next, type devmgmt.msc in the input box and press Enter.
Step 2. In Device Manager, expand the Universal Serial Bus controllers option. After that, right-click a USB Root Hub, and then click Uninstall device to remove it.
Step 3. Restart your computer. After the PC restarts, Windows will automatically scan for hardware changes and reinstall any USB Root Hubs that were uninstalled.
Step 4. Repeat these steps to other USB Hubs until the issue has been resolved.
Solution 5. Disable the USB Selective Suspend Feature
The USB selective suspend feature allows a hub driver to suspend a single port without affecting the operation of other ports on the hub. This feature is useful for saving battery power on portable computers. However, sometimes it can cause the USB drive not to be recognized. To rectify this problem, you can follow the instructions below to disable USB selective suspend settings.
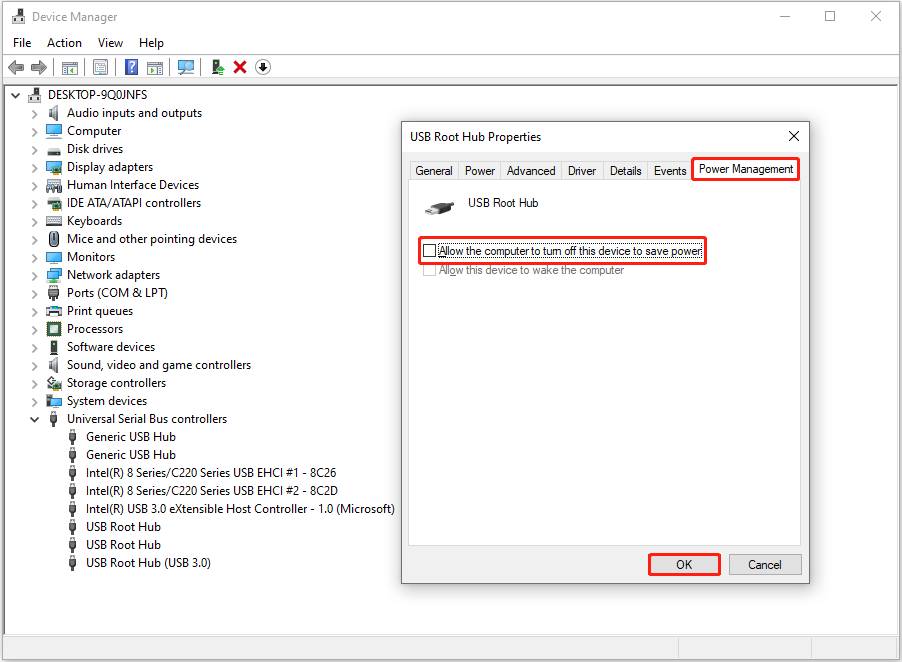
Step 1. Right-click the Start button to select Device Manager.
Step 2. Expand the Universal Serial Bus controllers category, and then right-click a USB Root Hub to select Properties.
Step 3. In the new window, move on to the Power Management tab, and then uncheck the Allow the computer to turn off this device to save power option. After that, click OK.
Step 4. Duplicate the steps to other USB Root Hubs. Finally, check if the issue has been resolved.
Solution 6. Check the USB Drive for File System Errors
USB storage media can easily cause file system damage due to virus attacks, improper removal, or sudden power outages. This may also be a factor why the USB flash drive cannot be recognized.
To deal with this situation, you can check the disk for file system errors.
MiniTool Partition Wizard, a powerful and reliable disk management tool, is highly recommended. It is of great help in verifying file system integrity and locating bad sectors on hard drives.
Now, click the button below to get the free partition manager installed and start checking the USB drive for file system errors.
MiniTool Partition Wizard FreeClick to Download100%Clean & Safe
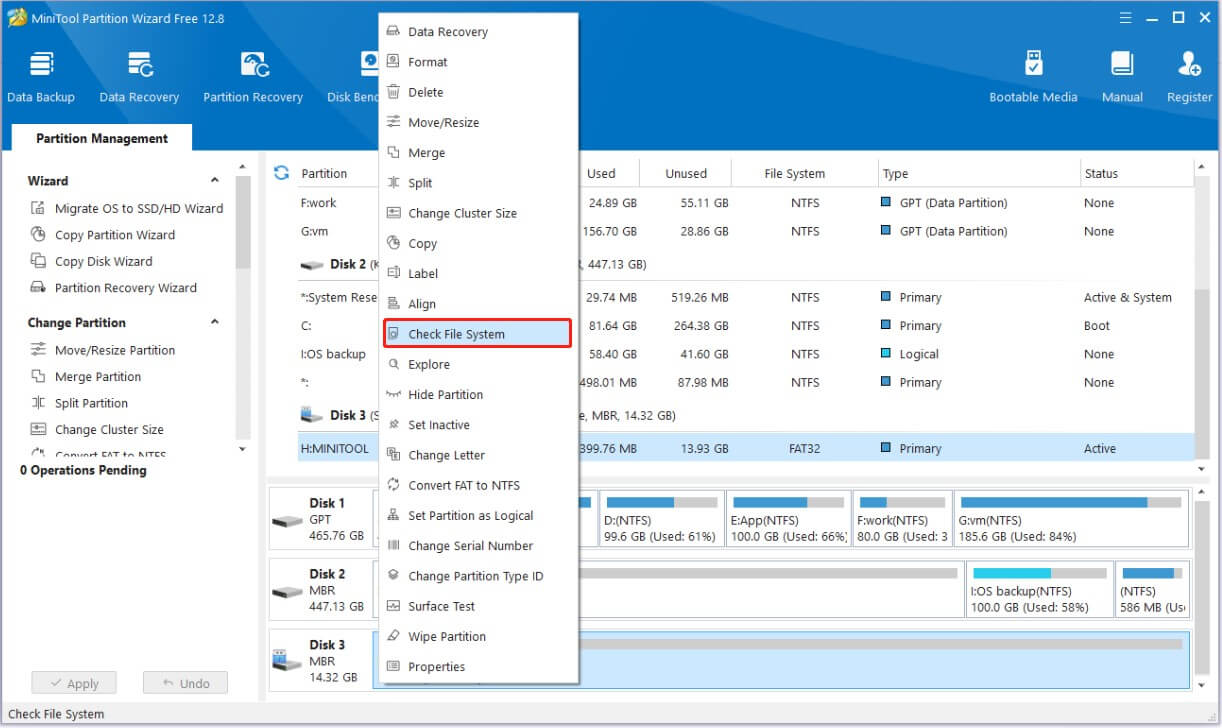
Firstly, launch MiniTool Partition Wizard to go to its main interface. Then, right-click the target USB drive and choose Check File System from the context menu.
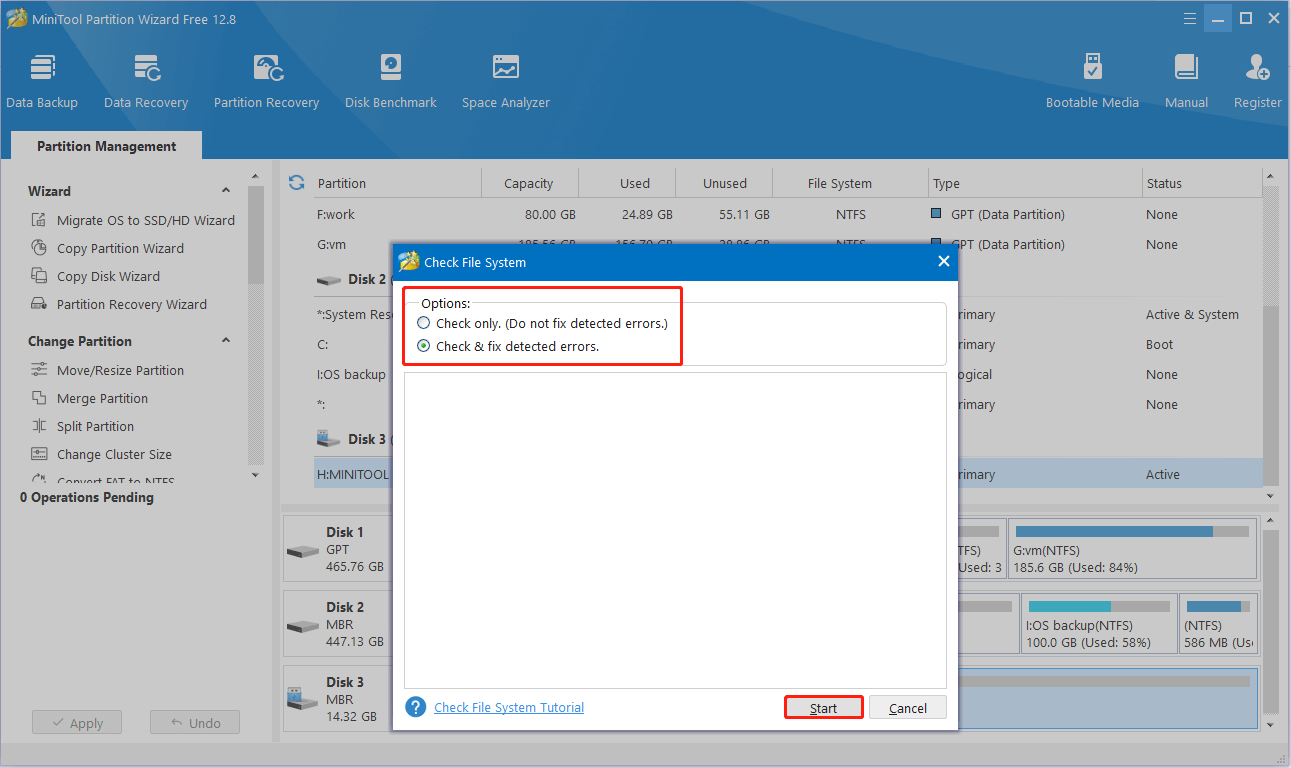
Secondly, a new window will pop up with two options: Check only (Do not fix detected errors) and Check & fix detected errors. You may consider choosing the latter one so that the software will fix the errors automatically. After that, click the Start button to continue.
Solution 7. Repair the Drive With JetFlash Online Recovery
The last way to address the Transcend USB flash drive not working/recognized issue is to use JetFlash Online Recovery.
JetFlash Online Recovery is a repair tool specially developed for Transcend JetFlash USB flash drives. This tool is mainly used when the JetFlash flash drive is no longer recognized by the PC or does not work properly. It helps by restoring the flash drive to its factory default settings.
You can go to its official site to download it and give it a try.
Wrapping Things Up
All in all, this guide covers why a Transcend USB flash drive is not detected, how to recover files from inaccessible USB drives with MiniTool Power Data Recovery, and how to repair the drive with detailed instructions.
MiniTool Power Data Recovery FreeClick to Download100%Clean & Safe
In order to protect your USB drive, it is recommended to back up files regularly, disconnect the USB drive safely, always put your USB disk in a dry and safe place, and do not connect the drive to an untrusted computer, etc.
If you need further assistance from MiniTool support, you can send an email to [email protected].
About The Author

Position: Columnist
Shirley graduated from English major and is currently an editor of MiniTool Team. She likes browsing and writing IT-related articles, and is committed to becoming a professional IT problem solver. The topic of her articles are generally about data recovery, data backup, and computer disk management, as well as other IT issues. In spare time, she likes watching movies, hiking and fishing.