About Set Active/Inactive
When users install system on a hard drive, there will be a system partition. If system partition is not set active, Windows will be unbootable, as only setting the system partition active can MBR visit the very partition to find Windows boot programs BOOTMGR and Boot Configuration Database.
Normally, if users have added a new disk to computer and finished migrating OS from the original disk to the new one, user need to set boot partition on the new disk as active and then set it to be the first boot device in order to make computer boot from it successfully.
Now, the question comes – how to set active/inactive manually when necessary? We’ll introduce the method of using Set Active/Inactive in MiniTool Partition Wizard.
Here is the step-by-step MiniTool Partition Wizard tutorial.
How to Set Active
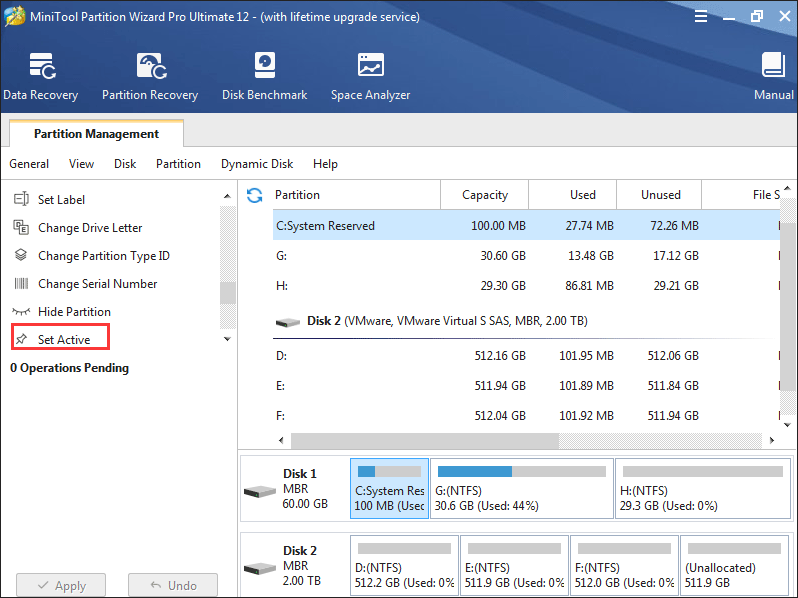
Step 1. Select the partition users would like to set as active and choose Set Active from the left action panel.
Kindly Remind:
- If users are running an MBR disk, only the primary partitions on it can be set active. But if the disk is GPT, there’s no such limit.
- One disk can hold at most 1 active partition.
- If users set the wrong partition as active and change the original active partition into inactive, they will be blocked out from Windows system.
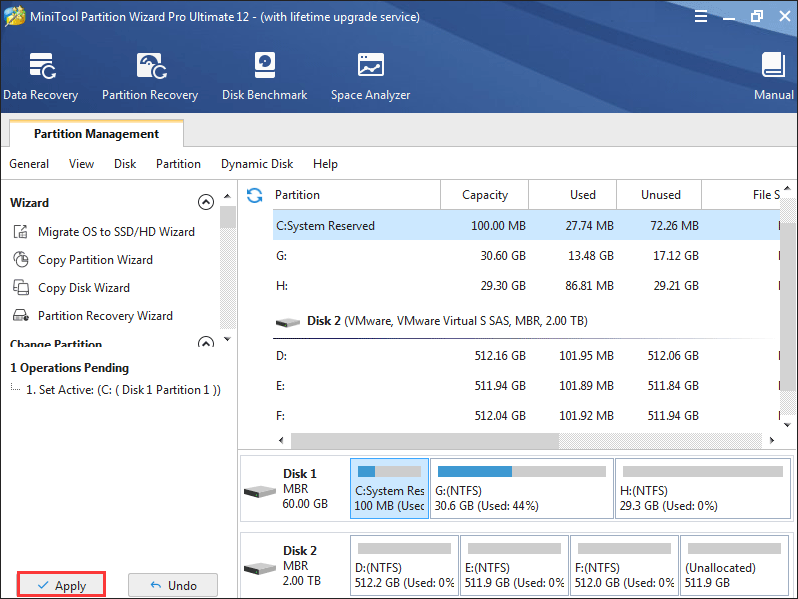
Step 2. Click on Apply button to perform pending operations.
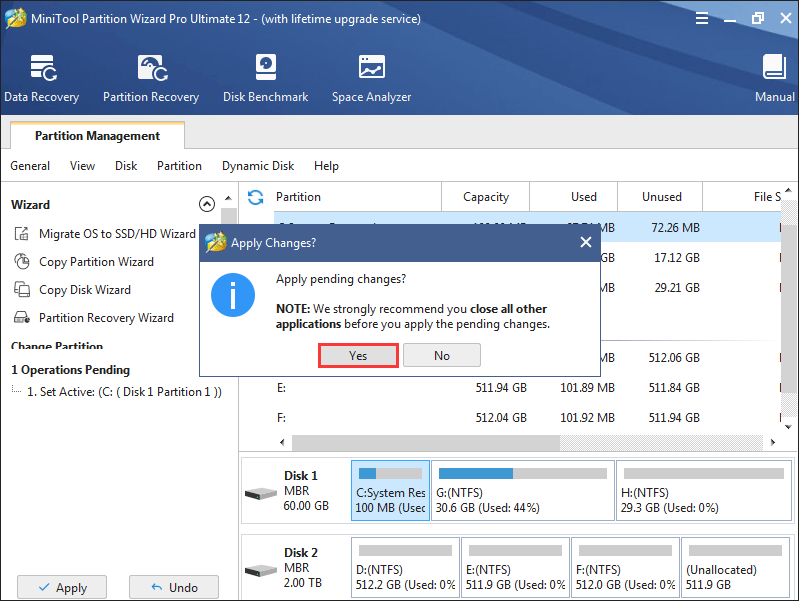
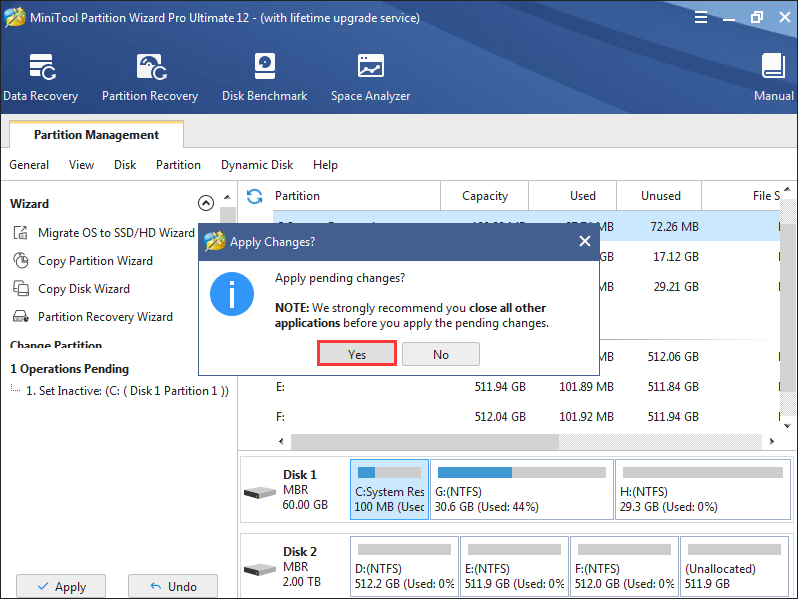
Step 3. Choose Yes from Apply Changes prompt window to confirm.
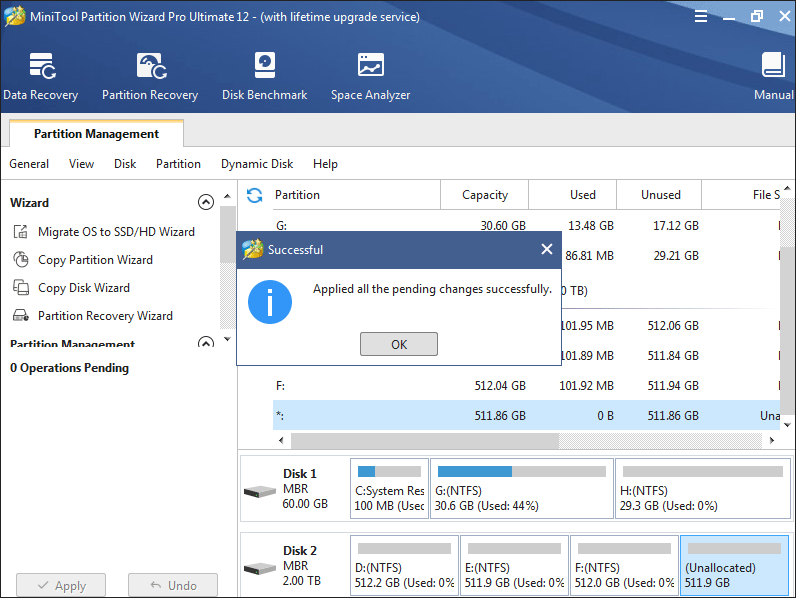
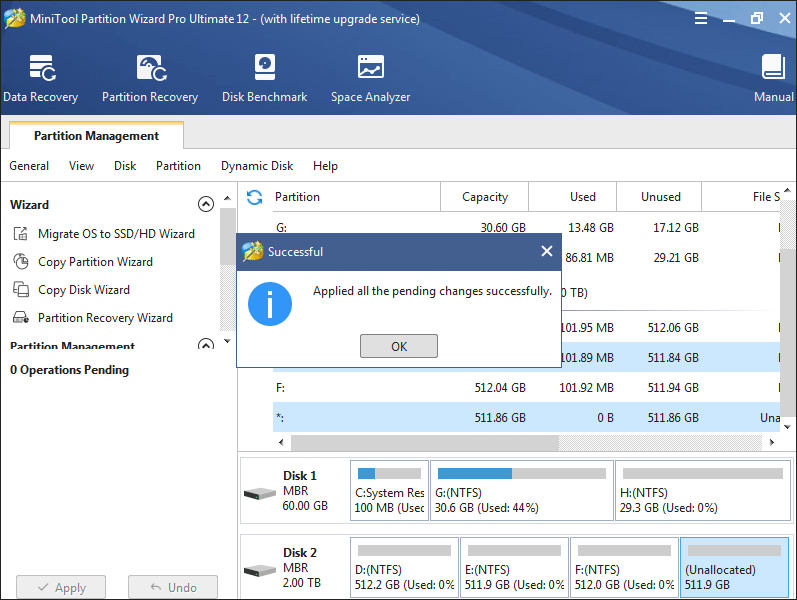
Step 4. Click on OK button when the Successful prompt window shows up so as to end this task.
How to Set Inactive
The process to set inactive is very similar to set active.
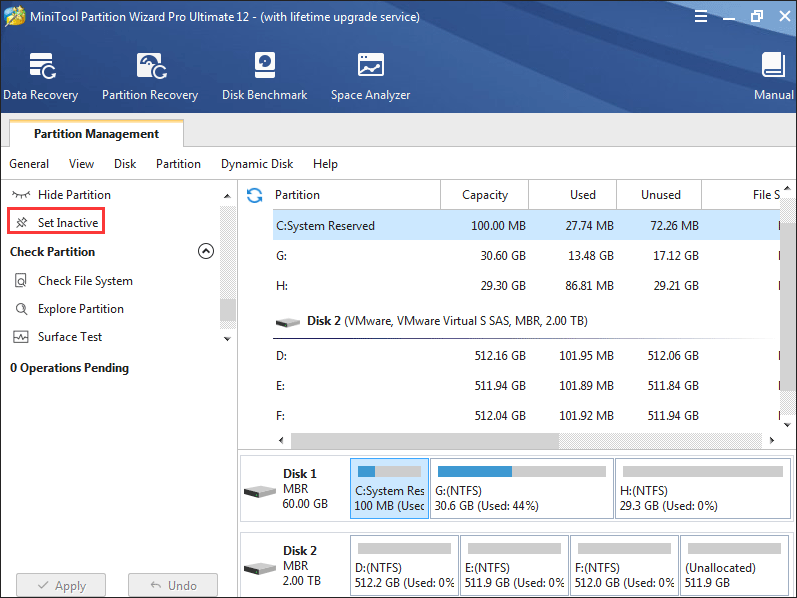
Step 1. Select the partition users would like to set as inactive and choose Set Inactive.
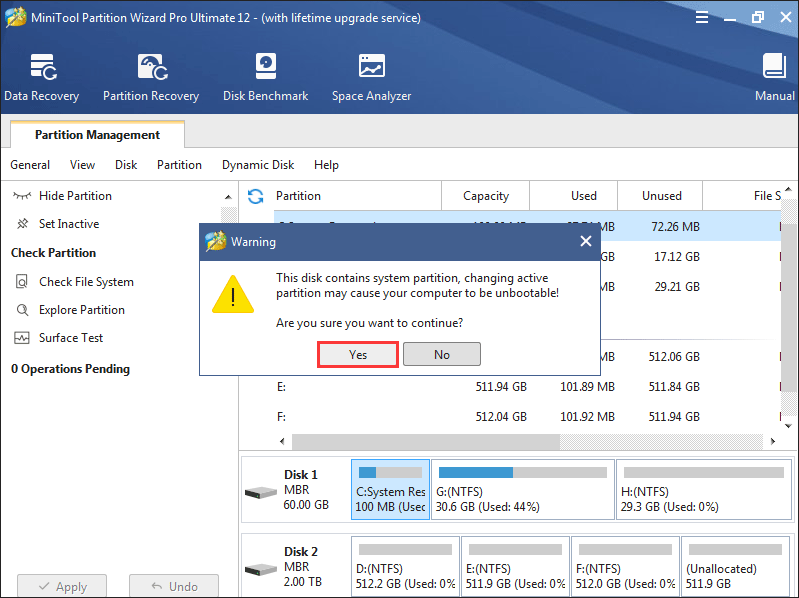
Step 3.Click on Yes button in Warning window to continue.
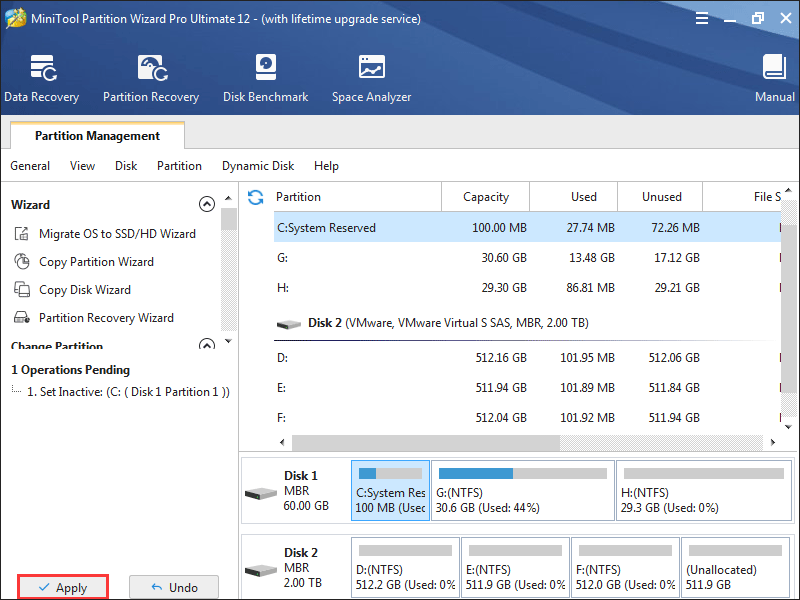
Step 4. Click on Apply button to perform pending operations.
Step 5. Choose Yes from Apply Changes prompt window to confirm.
Step 6. Click on OK button when the Successful prompt window shows up so as to end this task.
