What is a Windows 7 system repair disc? How to create a Windows 7 system repair disc using a CD/DVD or a USB flash drive? This post from MiniTool provides a guide with one-by-one steps. Now, continue to read to get more details.
What Is a Windows 7 System Repair Disc
Windows 7 includes a built-in tool for creating system repair discs that can be used to access advanced troubleshooting options. If your Windows 7 installation is corrupted or unbootable, the system repair disc is useful.
Windows 7 recovery media are bootable CDs or DVDs that contain Windows recovery tools. These tools can be used to automatically repair or resolve various issues, including startup issues and malware infections. Besides, recovery discs can restore your Windows 7 system to a previous state.
Creating a Windows 7 system repair disc is mainly used for the following purposes:
- Recovers Windows from critical errors – The system can be affected by a hard drive failure, viruses, hacking, physical damage, etc. Therefore, if you make a system repair disk, you can easily repair system errors.
- Install or reinstall the Windows system image – The system repair CD contains not only system recovery tools, but also system startup programs. Therefore, you can reinstall your Windows 7 with it.
- Create system repair discs for another computer – For computers with the same hardware, you can create a repair disk on one computer to repair the system of another computer.
Note: As of January 2020, Microsoft is no longer supporting Windows 7. It’s highly recommended to upgrade to Windows 10 or Windows 11 to continue receiving security updates.

How to Create a Windows 7 System Repair Disc
How to create a Windows 7 system repair disc? Follow the guide below:
Step 1: Type Control Panel in the Seach box to open it.
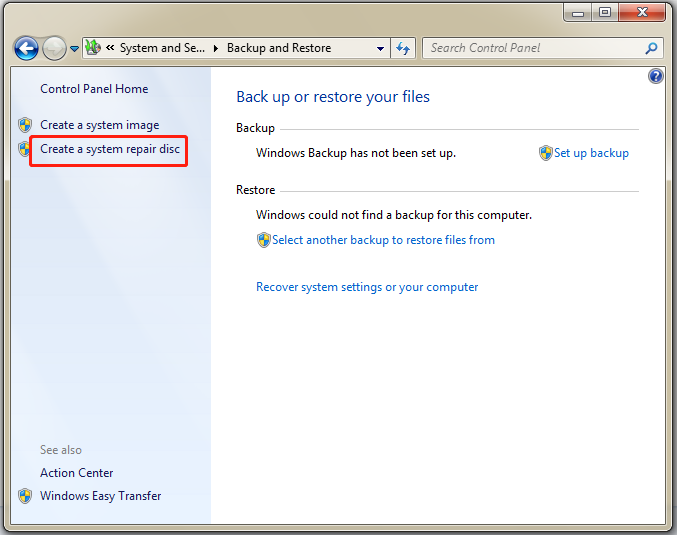
Step 2: Under System and Security, click Back up your computer.
Step 3: Then, click the Create a system repair disc option.
Step 4: Select a CD/DVD drive and insert a blank disc into the drive. Then, click Create disc.
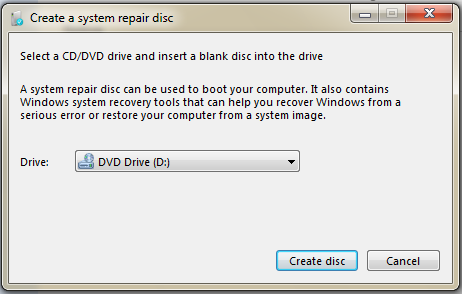
Step 5: Windows 7 will now start to create the System Repair Disc. You just need to wait for the process to be complete.

How to Boot from the Windows 7 System Repair Disc
After creating Windows 7 recovery disk, you can boot your PC from the Windows 7 system repair disc. Here is how to do that:
Step 1: Change the boot order in the BIOS so that the CD, DVD, or Blu-ray drive is listed first.
Step 2: Insert the Windows 7 system repair disc into your disc drive.
Step 3: Restart your computer. When you see the Press any key to boot from CD or DVD message, you need to press a key to boot from the disc.
Alternative to Windows 7 System Repair Disc
There is another way to create a bootable USB recovery drive and that is to use MiniTool ShadowMaker. It is a Windows backup software that allows you to create a system image and then perform system image recovery in case of system breakdown. You can use it on Windows 7/8/10/11, Windows XP as well as Windows Server.
If your computer fails to run, you can also back up the system on another PC with different hardware and then restore the system to your non-working computer. The Universal Restore feature is quite helpful.
Now, you can download MiniTool ShadowMaker to create a system recovery drive.
MiniTool ShadowMaker TrialClick to Download100%Clean & Safe
Part 1: Perform the System Backup
Step 1: Launch MiniTool ShadowMaker. Click Keep Trial to continue.
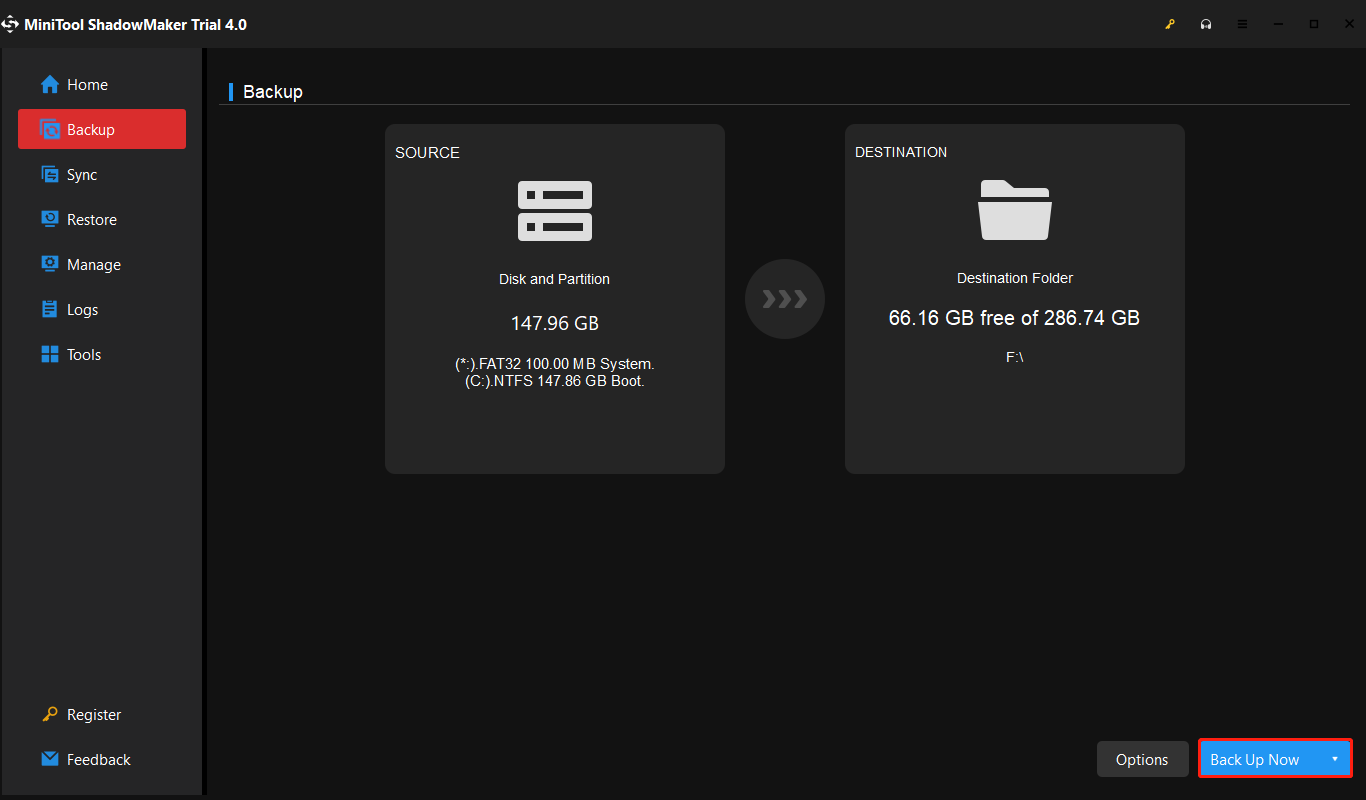
Step 2: Then, go to the Backup page. MiniTool ShadowMaker chooses the system as the backup source by default.
Step 3: Click the DESTINATION module to choose the backup destination. Here are four available paths including User, Computer, Libraries, and Shared.
Step 4: Click the Back Up Now button to execute the system immediately.
Part 2: Create a Bootable USB Drive
Then, prepare an empty USB flash drive and connect it to your computer.
Step 1: Open MiniTool ShadowMaker and go to its Tools page.
Step 2: Choose the Media Builder feature. Click WinPE-based media with MiniTool plug-in to continue.
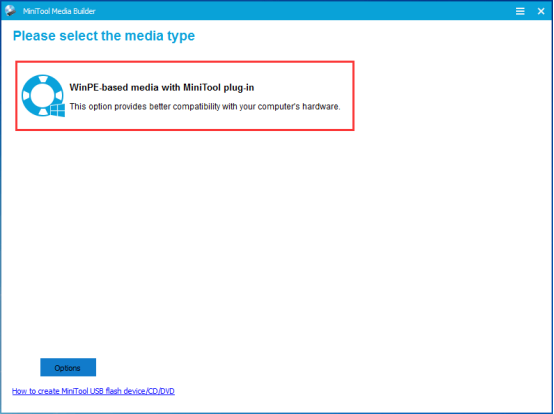
Step 3: Then, you need to choose a media destination. You can choose the ISO file, USB flash drive, and CD/DVD driver based on your needs. After that, it will start to create.
Part 3: Restore the System Using the Recovery USB Drive
you can boot the computer from the bootable device you have created and go to the Restore page to perform a system image recovery. Since the incompatibility between the system and the hardware, maybe the system can’t boot and you need to perform a universal restore with MiniTool ShadowMaker.
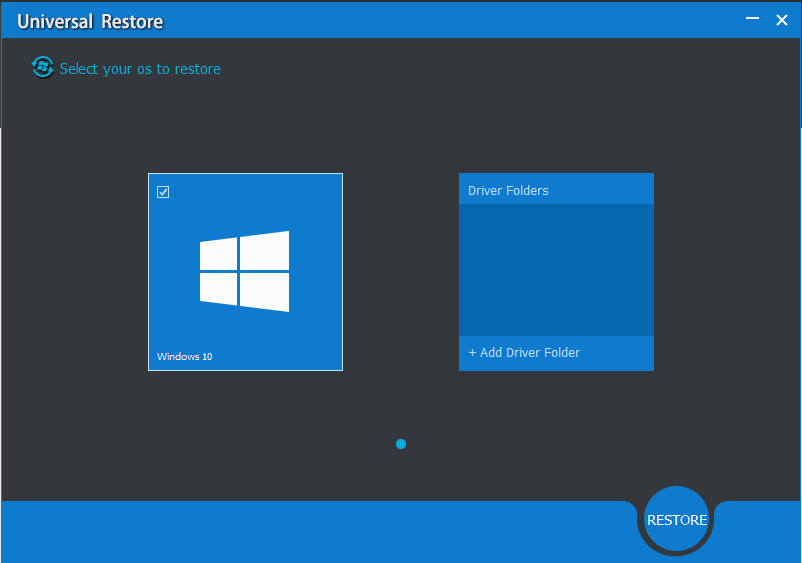
Step 1: You need to go to the Tools page and click the Universal Restore feature.
Step 2: This feature will automatically list the operating system on the left pane and you need to click the RESTORE button to continue.
Bottom Line
What is a Windows 7 system repair disc? How to create a Windows 7 system repair disc using a CD/DVD or a USB flash drive? This post has introduced detailed information for you. Besides, there is another way to create a bootable USB recovery drive and that is to use MiniTool ShadowMaker.
About The Author

Position: Columnist
Having been an editor at MiniTool since graduating college as an English major, Daisy specializes in writing about data backups, disk cloning, and file syncing as well as general computer knowledge and issues. In her free time, Daisy enjoys running and going with friends to the amusement park.