Many Zoom users wonder how to back up Zoom recordings for the following reasons:
- To avoid something happening to the original file.
- Ability to access recordings if Zoom’s servers are down or there’s an issue with your account.
- Share recordings with people who can’t attend the meeting.
- Prevent data loss due to insufficient Zoom Cloud storage space.
Before introducing how to back up Zoom Recording, you need to know the Zoom recording file location. Zoom offers two types of recordings: cloud recordings and local recordings.
Here are the default recording Locations for the local recordings:
- Windows – C:\Users\[Username]\Documents\Zoom
- Mac – /Users/[Username]/Documents/Zoom
- Linux – home/[Username]/Documents/Zoom
Here is the recording location in the cloud:
Zoom offers two options for storing recordings in the cloud: Basic and Pro. To find your cloud recordings, log into the Zoom official website and click My Recordings. You will see a list of all cloud recordings, along with the date and time of the recording.
How to Back up Local Zoom Recordings
To back up local Zoom recordings, the free backup software – MiniTool ShadowMaker is competent. It provides data protection services and disaster recovery solutions for Windows PCs, Servers, and Workstations. It is designed to back up the operating system, disks, partitions, files, and folders. Download it now!
MiniTool ShadowMaker TrialClick to Download100%Clean & Safe
Step 1. Launch MiniTool ShadowMaker to enter the main interface.
Step 2. Click the Backup tab in the left panel. Under Backup, click the SOURCE part
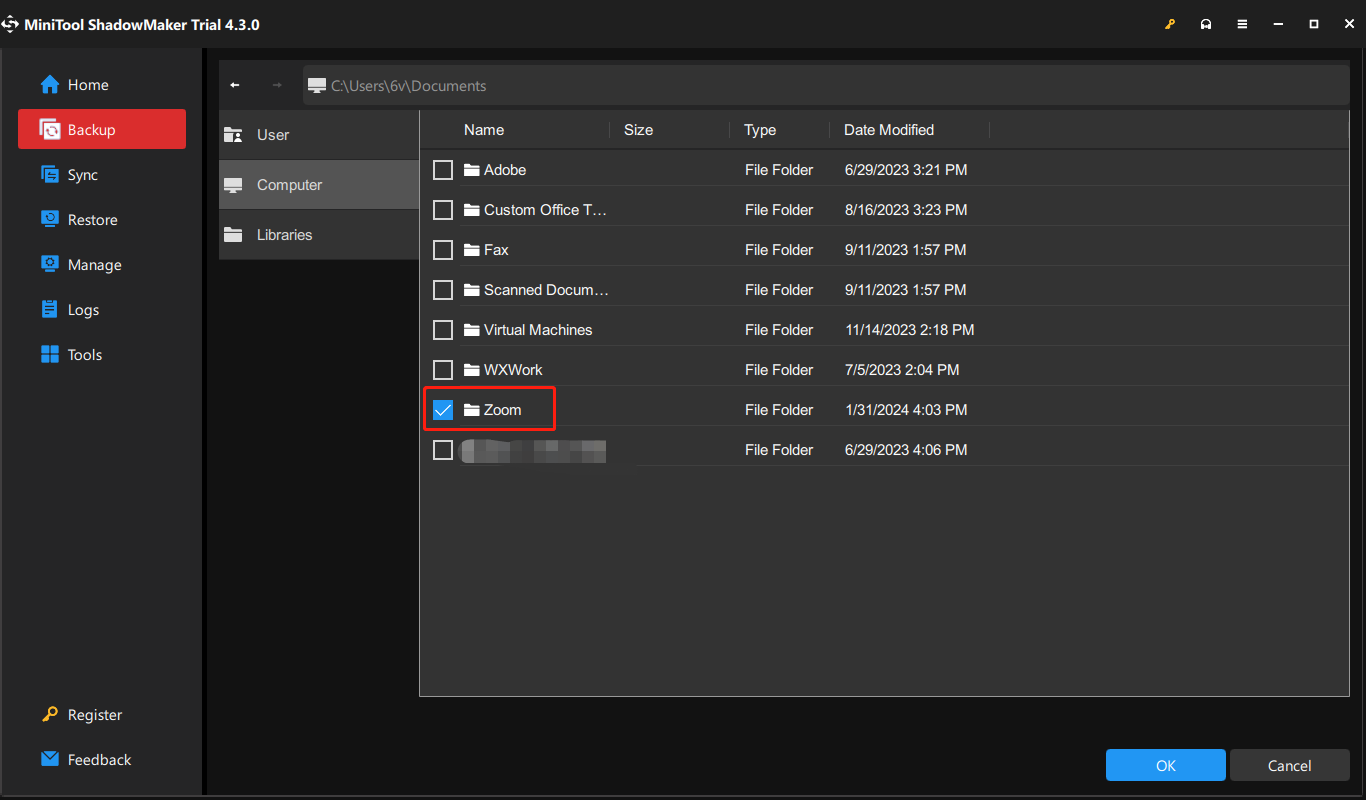
Step 3. Then click Folders and Files from the pop-up window.
Step 4. Go to C:\Users\[Username]\Documents\Zoom to find your Zoom recordings and check them. Then, click OK to continue.
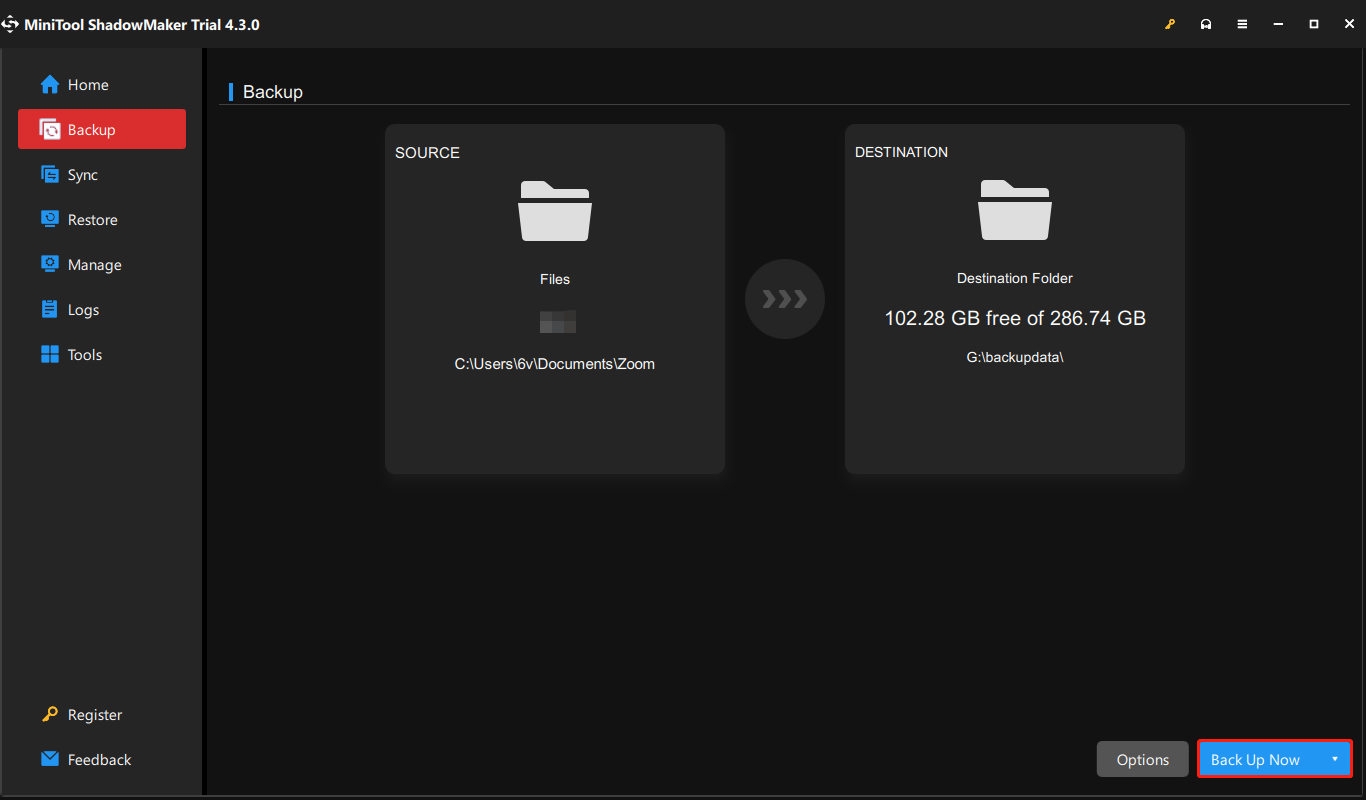
Step 5. Then click DESTINATION to choose a target disk to save the backup image. There are 4 paths available – User, Computer, Libraries, and Shared.
Step 6. Click Back Up Now to start the task.
How to Back up Cloud Zoom Recordings
How to back up cloud Zoom recordings? First, you need to download them from the Zoom official website:
Step 1.Log in to the Zoom web portal and click My Recordings.
Step 2. Click the Cloud Recordings tab, find the recording that you want to download, and hover your mouse over the “More” on the right side.
Step 3. Click on the Download button that appears.
Then, you can follow the steps on how to back up local Zoom recording part.
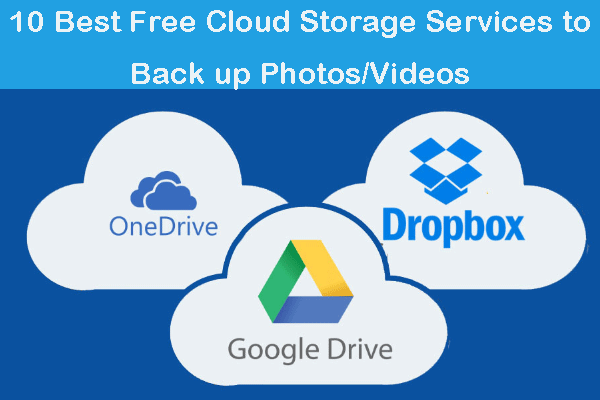
You can also choose to back up the Zoom recordings to the cloud. Here are some free Cloud storage spaces and you can choose one of them based on your needs.
- DropBox – 2GB of free Cloud storage space
- OneDrive – 5GB of free Cloud storage space
- Google Drive – 15GB of free Cloud storage space
Final Words
How to back up Zoom recordings? This post introduces how to back up local Zoom recordings and how to back up cloud recordings. You can go to the corresponding part to find answers.
About The Author

Position: Columnist
Having been an editor at MiniTool since graduating college as an English major, Daisy specializes in writing about data backups, disk cloning, and file syncing as well as general computer knowledge and issues. In her free time, Daisy enjoys running and going with friends to the amusement park.