MiniTool ShadowMaker provides a one-click system backup solution. It enables you to back up your system drive completely, including system partition, system reserved partition, and EFI system partition. All data including applications, drivers, computer settings, system files, and boot files will be imaged.
Some of you may ask: Do I need a backup that is bootable? Which files get backed up? System files? Hidden files? Sure, you need a backup that is bootable. And all files for Windows to run such as system files, hidden files, etc. will be backed up. When the system crashes, you can restore your computer to a normal state.
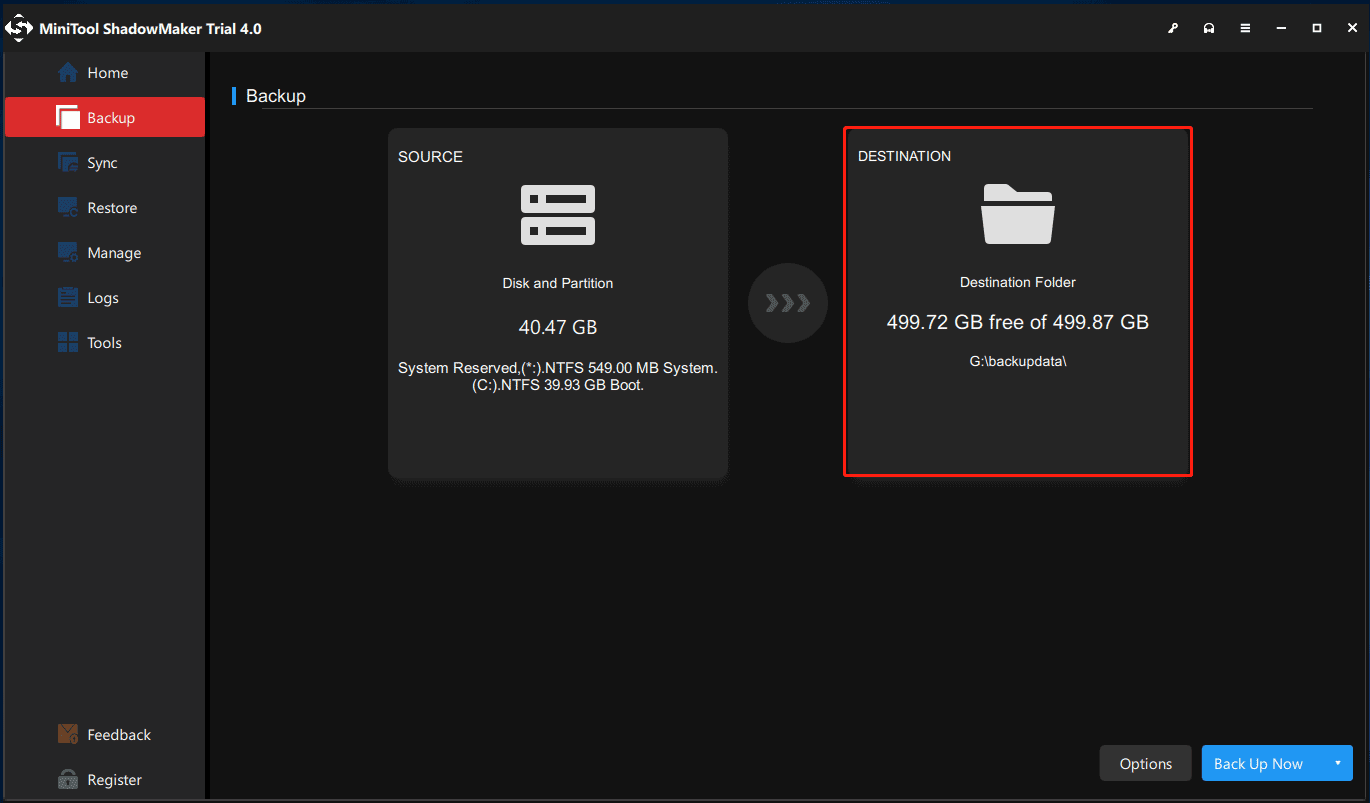
Step 1: Launch MiniTool ShadowMaker to get the main interface.
Step 2: MiniTool ShadowMaker is designed to back up Windows OS by default. In the Backup bar, you can see system required partitions are checked by default. Thus, you only need to click DESTINATION to choose a destination path to store the system image.
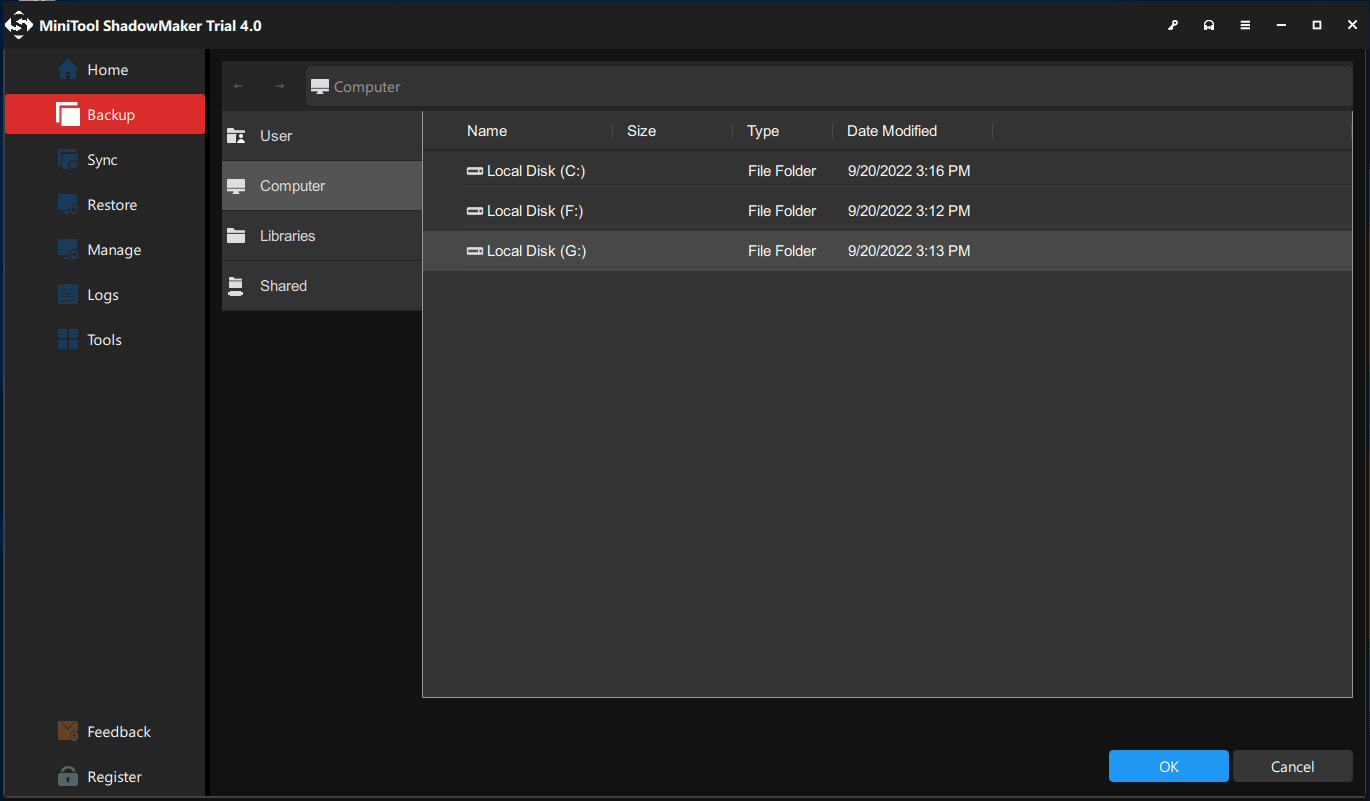
Step 3: In the pop-up window, you can see four options: Users, Computer, Libraries, and Shared. Your purpose is to back up system, so do not choose Users and Libraries since they belong to the system drive. It is recommended to choose one partition of an external hard drive or a USB flash drive as the location.
Of course, you are also allowed to create a system image of Windows 11/10/8/7 to a shared folder. See how to back up system to Shared:
To do this task, make sure the target PC should be on the same LAN. Besides, create a folder called LLL and then create a sub-folder called DDD.
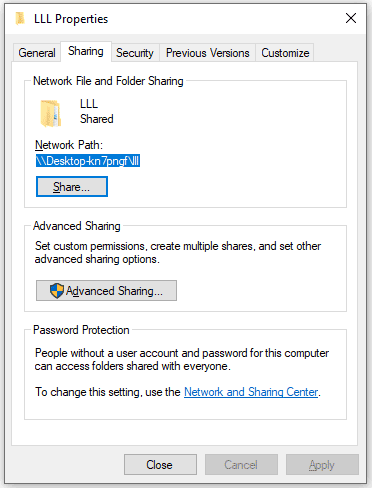
Then, right-click on the LLL folder to choose Properties. Under the Sharing tab, click Share. Then, select the user or group to share a file or folder and click Add. Choose Read/Write as Permission Level and click Share to create a shared folder.
After creation, go back to the Sharing tab and note down the network path.
Then, go back to MiniTool ShadowMaker and start the configuration. Two ways are available:
Use an IP:
1. Under the Shared tab, click the Add button, and type the path, user name, and password.
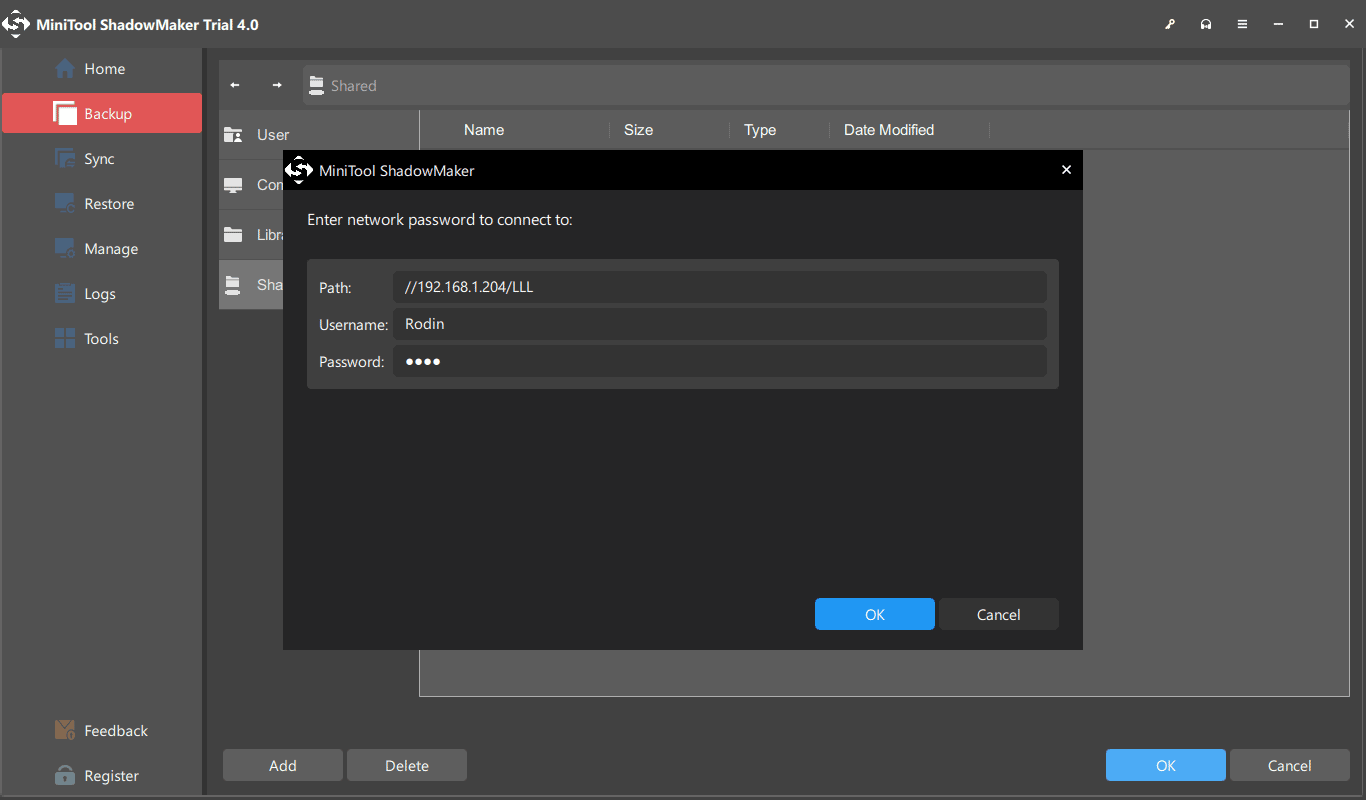
2. Open the main folder (LLL) and choose the sub-folder (DDD) as the storage path.
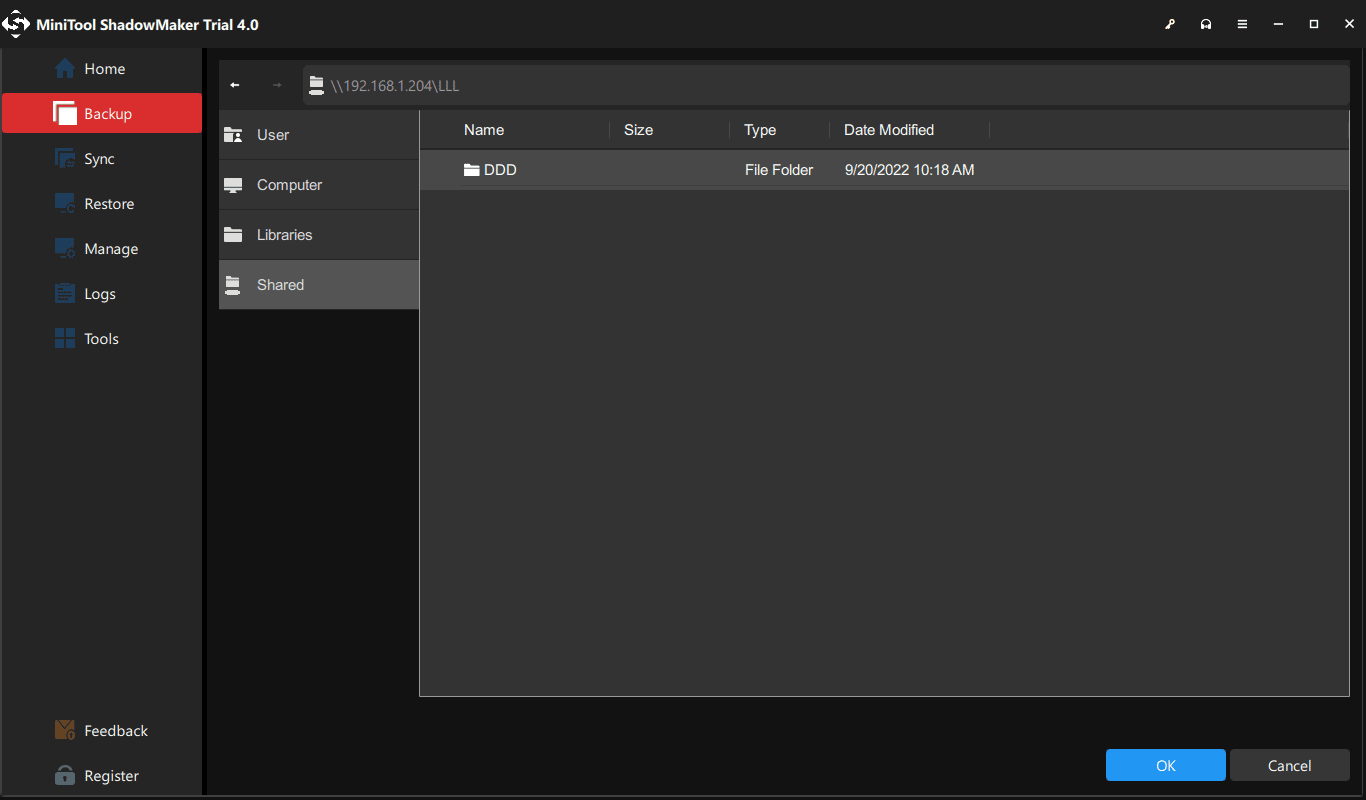
Use the folder path:
1. Type the network path of the shared folder, username, and password.
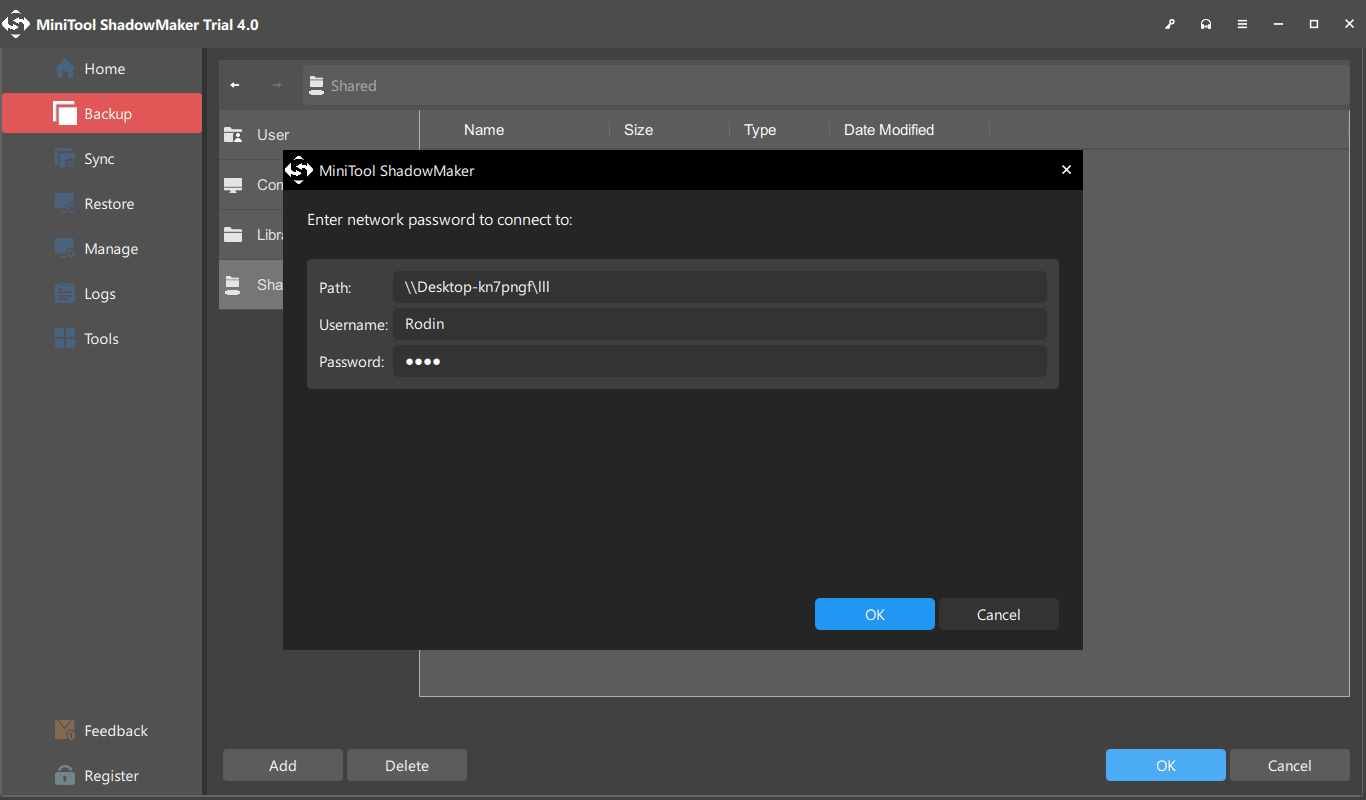
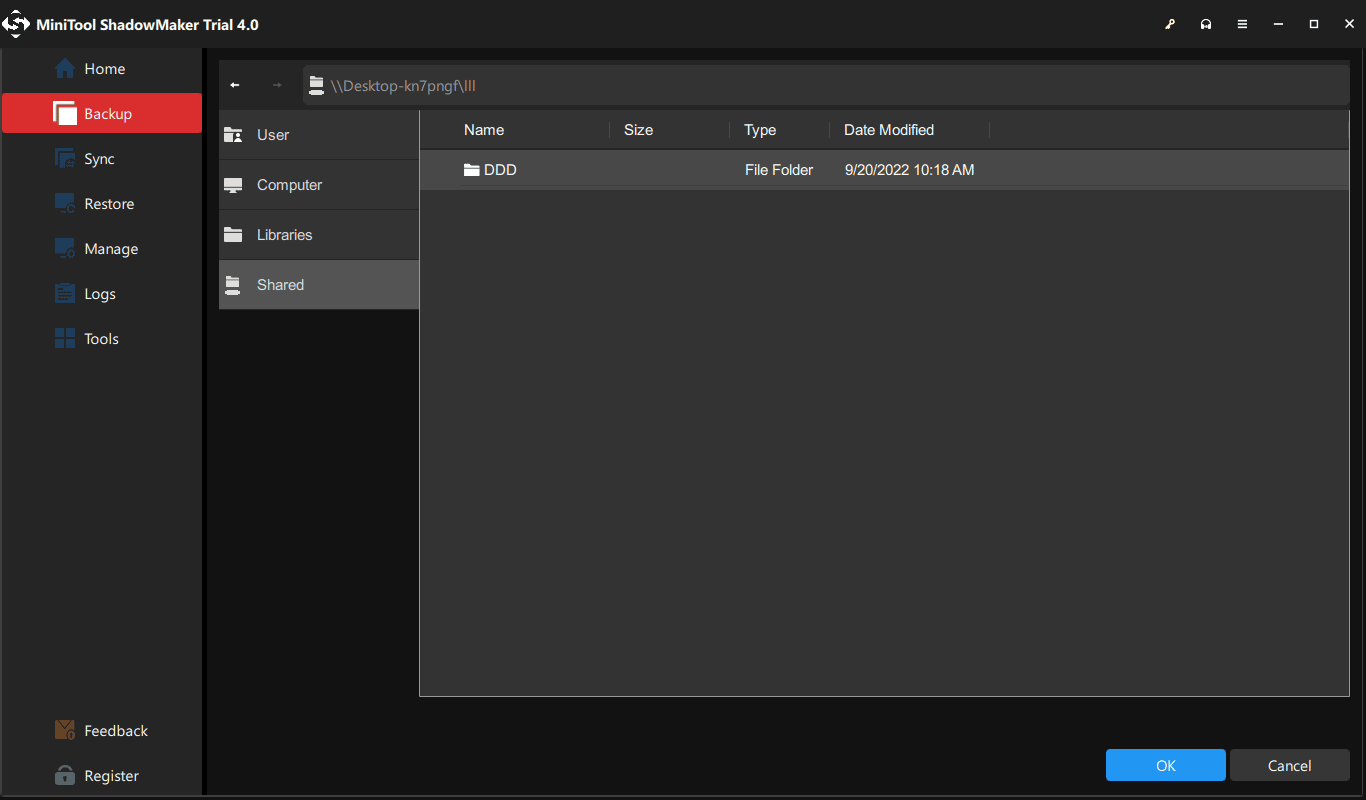
2. Open the main folder and choose the sub-folder (DDD) as the storage path.
Step 5: After choosing a destination path, go back to the Backup tab and choose Back Up Now or Back Up Later. You can start the delayed backup task on the Manage page.
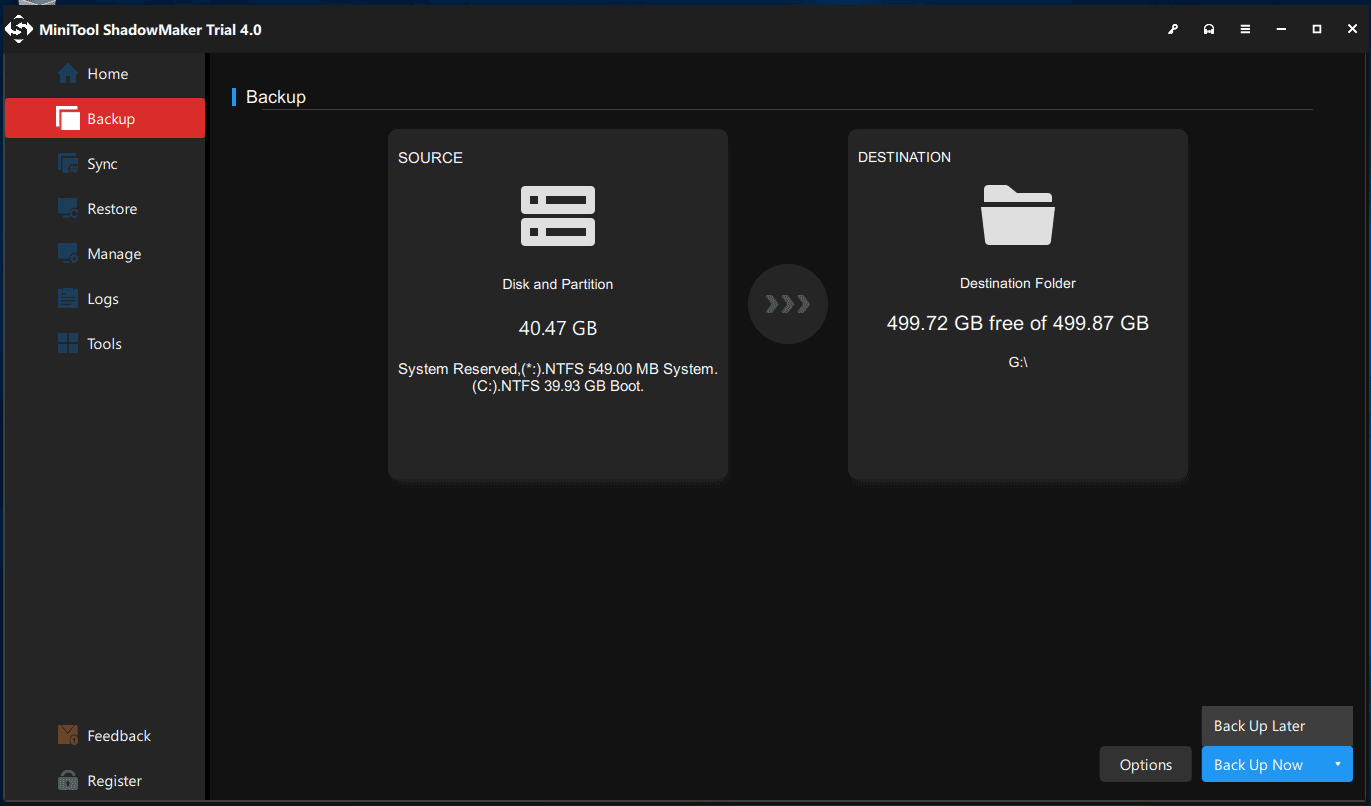
1. To set advanced parameters for the current backup task, click Options > Backup Options.
2. To specify a backup task to run on a regular basis, go to Options > Schedule Settings.
3. To manage disk space occupied by backup files, go to Options > Backup Scheme.
To know much information, refer to Backup Settings.