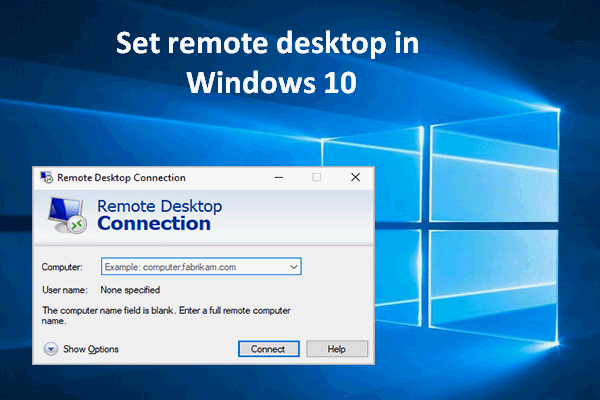
Windows 10 Remote Desktop not working? This post not only introduces the causes of the Windows 10 Remote Desktop not working error but also gives several efficient methods to fix the error. You can get the methods from the MiniTool website.
The Causes of the Windows 10 Remote Desktop Not Working Error
There are multiple causes of the Windows 10 Remote Desktop not working error. And when the error occurs, there is an error message saying that “Remote Desktop can’t connect to the remote computer for one of these reasons”. The following are three reasons:
- Remote access to the server is not enabled.
- The remote computer is turned off.
- The remote computer is not available on the network.
So what are the detail causes of the error? I have listed some of the most common causes below:
- Internet connection is not stable.
- Login credentials are not matching.
- RDP is not working after updating Windows.
- Antivirus or Firewall problem.
- Network Profile problem.
How to Fix the Windows 10 Remote Desktop Not Working Error?
After you have known the causes of the Windows 10 Remote Desktop not working error, you maybe wonder how to fix the error. Then keep reading, and you can find several useful methods.
Method 1: Change Firewall Settings
The first method you should take to fix the Windows 10 Remote Desktop not working error is to change the Firewall settings. Here is the tutorial:
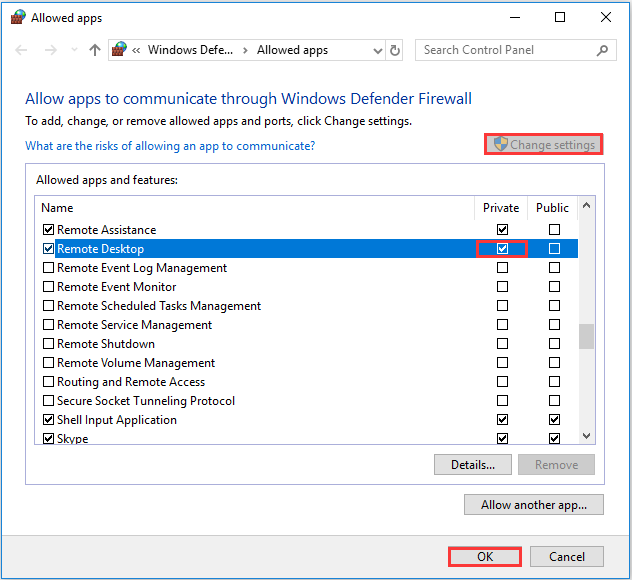
Step 1: Type allow an app through windows firewall in the search box and then click the best match one.
Step 2: Click Change settings on the top right corner.
Step 3: Find Remote Desktop and then check the box under the Private tab. Click OK to save changes.

Step 4: Close the window and then the Remote Desktop connection not working error should be fixed.
Method 2: Allow Remote Desktop Connections If Not Allowed
If the Remote Desktop connections are not allowed in your Windows, then the Windows 10 Remote Desktop not working error will occur.
Follow the instructions to allow Remote Desktop connections:
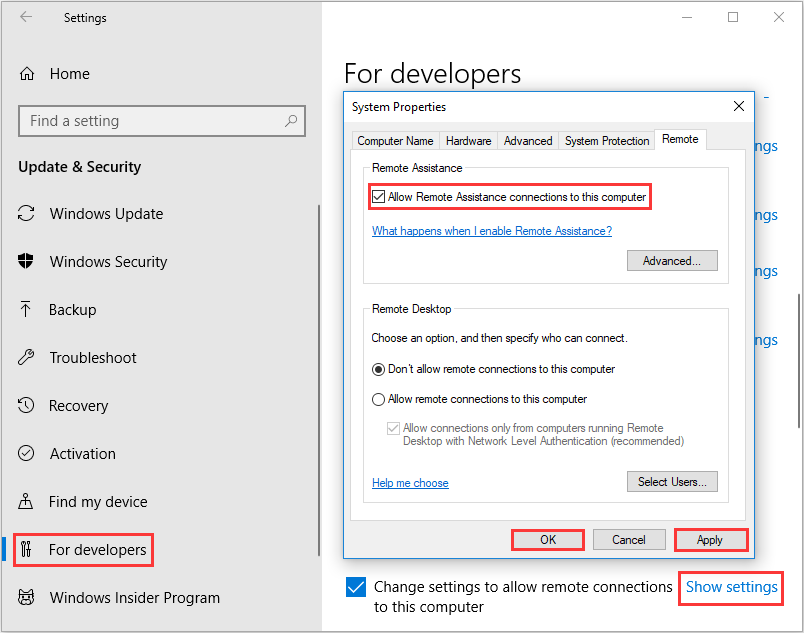
Step 1: Press the Win key and the I key at the same time to open Settings.
Step 2: Click Update & Security and then go to the For developers section.
Step 3: Find Change settings to allow remote connections to this computer in the right panel and then click Show settings next to it.
Step 4: Check the box next to Allow Remote Assistance Connections to this Computer. Click Apply and OK to save changes.

Step 5: Close the window and then the Remote Desktop can’t find the computer error should be fixed.
Method 3: Remove Your Remote Desktop Credentials
When your Remote Desktop credentials are not matching, then the Windows 10 Remote Desktop not working error will occur if you try to connect to another remote computer. Therefore, you should try to reset your Remote Desktop credentials.
Step 1: Type Remote Desktop connection in the search box and click the best match one.
Step 2: Type in the remote computer’s IP address. If there are any credentials saved for this specific computer, you will be given the option to either edit or delete.
Step 3: Click delete to remove the credentials.
Step 4: Retry connect the remote computer and then check if the error is gone.
Method 4: Add the Remote Computer’s IP Address to Your Hosts File
You can also try to add the remote computer’s IP address to your hosts file to fix the Windows 10 Remote Desktop not working error. Here is the tutorial:
Step 1: Type cmd in the search box and then right-click Command Prompt to choose Run as administrator. Click Yes.
Step 2: Type cd C:/Windows/System32/Drivers/etc in the Command Prompt window and then press the Enter key.
Step 3: Type notepad hosts in the window and then press the Enter key to open the hosts file in notepad.
Step 4: Add the remote computer’s IP address to the end of the file. Click File and then choose Save. Click Close.
Step 5: Try to connect remote computer again and then check if the error is gone.
Method 5: Make Changes to the Registry Editor
You can fix the Windows 10 Remote Desktop not working error by making changes to the Registry Editor. Here is the way to make changes:
Step 1: Press the Win key and the R key at the same time to open the Run box.
Step 2: Type regedit in the box and then click OK. Click Yes to open Registry Editor.
Step 3: Navigate to HKEY_CURRENT_USER\Software\Microsoft\Terminal Server Client.
Step 4: Right-click the empty space on the right side and then choose New > DWORD (32-bit) Value. Name it RDGClientTransport.
Step 5: Double-click this new key to open its Properties. Set Value data to 1 and click OK to save changes.
Step 6: Try to connect the remote computer one more time and check if the error still exists.
Method 6: Change Network Properties
If your network has been set up as Public, then the Windows 10 Remote Desktop not working error may occur. Thus, you can change the network from Public to Private. Follow the instructions below the change network properties:
Step 1: Open Settings and then click Network & Internet.
Step 2: Go to the Status tab and then click Change connection properties in the right panel.
Step 3: Choose Private under Network profile.
Step 4: Retry to connect the remote computer and then see if the error still persists.
Bottom Line
From this post, you can know the causes of the Windows 10 Remote Desktop not working error. Besides, you can find the methods to fix the error. If you cannot connect the remote computer, then you can try the methods mentioned above.


