In Windows (since the XP Pro days), there’s a remote desktop feature which is able to help increase the productivity. By enabling the Remote Desktop, you’re able to get access to and control your PC conveniently over remote devices. In this article, I’ll show you how to set and activate the remote desktop in Windows 10.
Being a built-in feature of Windows, Remote Desktop Protocol (RDP) makes it an easy job to connect a PC or device to another. By doing so, you can retrieve files and provide PC support easily. The Microsoft Remote Desktop client could be used on different platforms:
- Windows
- Mac OS
- iOS
- Android
Today, I’m going to talk about how to set remote desktop in Windows 10 and then make of this useful feature to increase productivity.
Set Remote Desktop in Windows
Actually, the remote feature is disabled in Windows by default. To make use of the remote desktop, you must enable it first.
Preparations
Supported OS:
- Windows 10 Pro & Enteprise
- Windows 8.1 and 8 Enterprise & Pro
- Windows 7 Professional, Enterprise &Ultimate
- Windows Server 2008 and later versions
Note: Home editions (like Windows 10 Home) don’t give support to Remote Desktop app.
![[SOLVED] How To Recover Permanently Deleted Files In Windows](https://images.minitool.com/minitool.com/images/uploads/2018/08/recover-permanently-deleted-files-thumbnail.png)
Prerequisites of using remote feature:
- The computer must be powered on.
- There must be a network connection.
- Remote Desktop must be enabled.
- You must have network access & permission to the remote computer.
Note: you’d better check the name of the computer you plan to connect so as to figure out whether the Remote Desktop connections are allowed through firewall or not.
How to Set Remote Desktop in Windows 10
You must set up the target computer that you want to connect to, making it allow remote connections. Here’s how to enable remote desktop in Windows 10:
- Click on the Start button located in the lower left corner of the standard desktop.
- Scroll down to find Settings option and click on it.
- Click on the first option – System – in the Settings panel.
- Scroll down to find Remote Desktop option and select it.
- Look at the right panel at this time to find Enable Remote Desktop and switch the button under it to be On.
- A Remote Desktop Settings window will pop up to ask you to confirm your action. You should click on the Confirm button to continue.
- After that, Keep my PC awake for connections when it is plugged in and Make my PC discoverable on private networks to enable automatic connection from a remote device will be checked by default under Enable Remote Desktop. You can click on the Show settings button next to them to change the settings according to your specific needs.

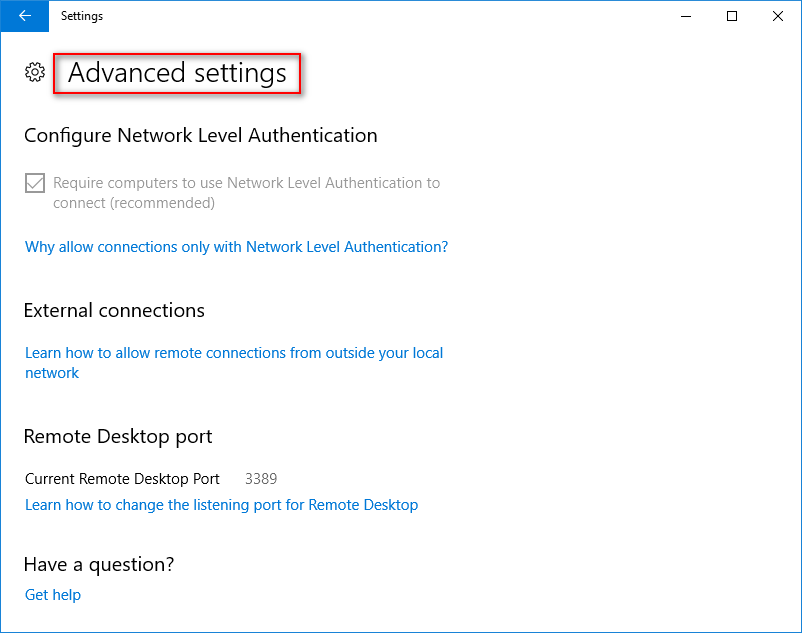
Note: you may click on the Advanced settings button below to reach some other important configuration settings.
Use Remote Desktop to Connect to the PC You Set Up
How to Set on the Local Windows PC
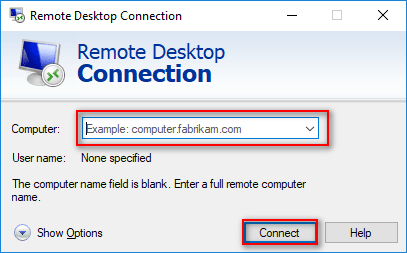
- Type Remote Desktop Connection to the search box on the taskbar of your local computer.
- Click on the Remote Desktop Connection (Desktop app) from the search result.
- Type the name of the PC you want to connect to and then click on the Connect button to confirm.
How to Set on Windows, iOS, or Android Device
- Click to open the Remote Desktop app (which you can get from Microsoft Store, Mac App Store, and Google Play for free).
- Add the name of the target PC that you want to connect to.
- Choose the remote PC name that you have just added and wait for the completion of the connection.
![[SOLVED] How To Recover Deleted Files On Mac | Complete Guide](https://images.minitool.com/minitool.com/images/uploads/2018/09/mac-file-recovery-thumbnail.jpg)