In Task Manager, you may find that the Service Host: Local System is taking much of your disk, CPU and Memory usage. This post shows you how to fix the problem service host local system high CPU with 7 solutions.
The Issue of Service Host Local System High Disk
Many computer users complain that they found that their Service Host: Local System in Task Manager is eating their disk, CPU and memory or come across the issue system host local system high disk or service local system high CPU, as shown in the following picture.
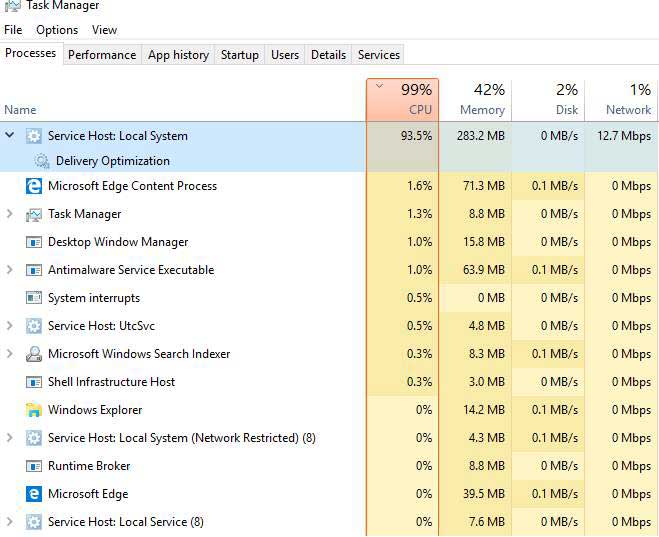
The Service Host: Local System is a bundle of System Processes which operate automatically through system. It includes several processes, such as the Windows Auto Update and many others which will occupy some disk space, memory, CPU and even the Network. And some accidents happened on the Service Host: Local System, you may also encounter the issue 100% disk usage on Task Manager.
However, do you know how to solve the problem service host local system high disk usage? If no, just keep on your reading. This post will list top 7 solutions to the issue of service host local system high memory.
You can try these solutions one by one.
Solution 1. Disable Superfetch
To begin with, we will introduce the first method to solve the issue service host local system high disk. You can try to disable the Superfetch and we will show you how to operate step by step.
Step 1: Open Services Window.
- Press Windows key and R key together to open Run dialog.
- Type services.msc in the box and click OK to continue.
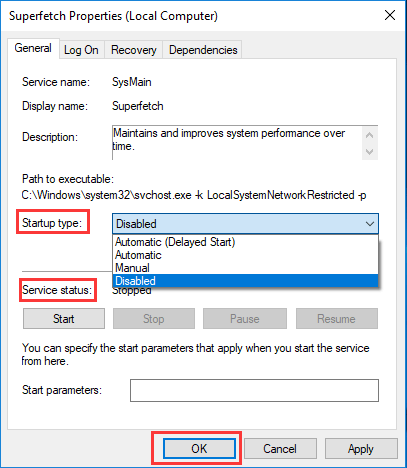
Step 2: Disable Superfetch.
- In the popup window, please scroll down to find the Superfetch.
- Double-click it to continue.
- In the popup window, please change the Startup type to Disabled. And change the Service status to Stopped.
- Click Apply and OK to confirm the changes.
When you have finished all steps, you can reboot your computer to check whether the issue service host local system high disk is solved.
Solution 2. Change Registry Value Data
In order to solve the issue service host high CPU, you can try to fix the Registry.
However, please note that changing registry is very risky. So you had better back up your Windows 10 to keep computer safe before proceeding.
Now, we will show you how to change registry value data to solve the issue of service host local system high memory.
Step 1. Open Registry window.
- Press Windows key and R key simultaneously to open the Run box.
- Type regedit and click OK to continue.
Step 2: Change Value data.
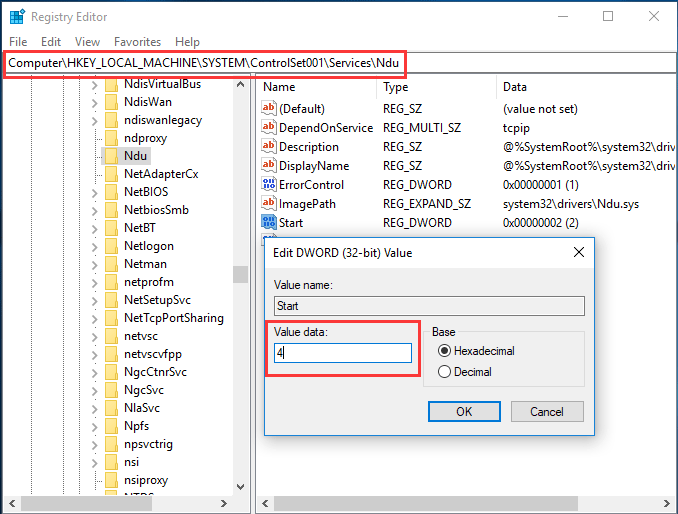
- In the Registry Editor window, please navigate to the ControlSet001 folder according to the following path: HKEY_LOCAL_MACHINE > SYSTEM > ControlSet001
- Then expand the ControlSet001 folder to find out Services folder and choose the Ndu key.
- In the right panel, select the Start key and double-click it.
- Next, change its Value data to 4 and click OK to continue.
When you have finished all steps, you can exit the Registry Editor window and reboot your computer to check whether the issue of service host local system high CPU Windows 10 is solved.
Solution 3. Run System File Checker
The issue service host local system high disk may be caused by corrupted system files. So if you come across the issue service host local system high CPU, you can try to run System File Checker to check and repair the corrupted system files.
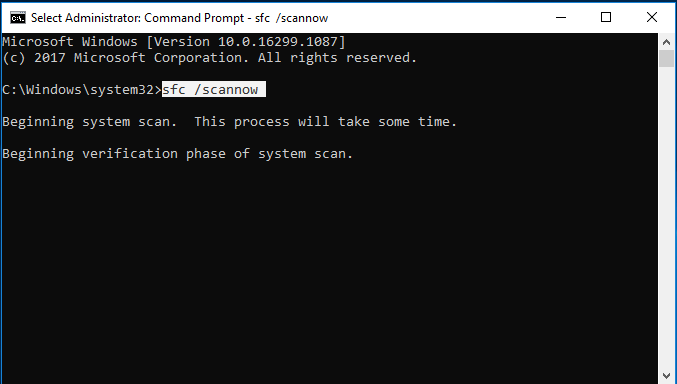
Step 1: Open Command Prompt window.
- Type Command Prompt in the search box of Windows.
- Choose the best-matched one and right-click it to choose Run as administrator.
Step 2: Type the commands.
- In the popup window, type the command sfc /scannow and hit Enter to continue.
- Please don’t close the window until the scanning process to be finished.
When the scanning process is finished, the System File Checker can help you to find the corrupted system files and repair them.
Solution 4: Disable Background Intelligent Transfer Service
In this part, we will show you the fourth method to fix the issue service host local system high disk usage. You can try to disable the Background Intelligent Transfer Service.
Step 1: Open System Configuration window.
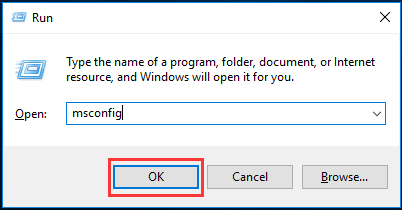
- Press Windows key and R key together to open the Run
- Type the msconfig in the box and click OK to continue.
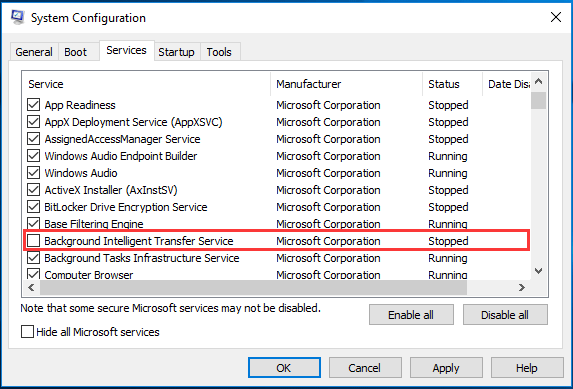
Step 2: Disable Background Intelligent Transfer Service.
- In the System Configuration window, please go to the Services tab.
- Scroll down and find out the Background Intelligent Transfer Service and unchecked it.
- Click Apply and OK to confirm the changes.
When you have finished all steps, you can restart your computer to check whether the issue service host high CPU is solved.
Solution 5. Disable Service Host Local System Task
The fifth solution to service host local system high CPU is to disable the service host local system directly. You can end the task to fix the problem.
Now, we will show you the tutorials.
Step 1: Open Task Manager.
- Right-click on the Taskbar and choose Task Manager from the context menu to continue.
- Or you can also press Ctrl key, Shift key and Esc key together launch Task Manager.
Step 2: Disable Service Host Local System Task.
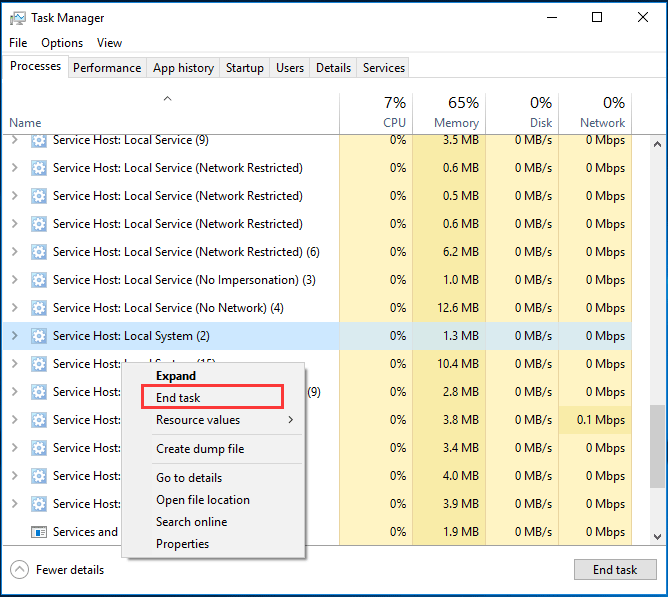
1. In the popup window, please go to the Processes tab to continue.
2. Scroll down to find out the Service Host: Local System. You can also expand it to see what items are eating your CPU, disk and memory usage.
3. After you have known which items are eating the CPU, disk and Memory, you can right-click it and choose End task from the context menu to disable it.
4. Next, you will see a warning message which requires you to confirm whether you want to end the Service Host: Local System.
5. You need to check the option Abandon unsaved data and shut down. Then click Shut down to continue.
After that, you can monitor your CPU in the Task Manager and check whether the issue service host local system high CPU Windows 10 is solved.
Solution 6. Perform a Clean Boot
On top that, the issue of service host locals system high disk may be caused by the third-party software. Thus, in order to fix the high CPU problem, you can perform a clean boot and check whether the problem of high CPU, disk and memory usage is caused by the third-party software and services.
Now, we will show you the tutorials.
Step 1: Open System Configuration window.
- Press Windows key and R key together to open the Run
- Type msconfig in the box and click OK to continue.
Step 2: Perform a clean boot.
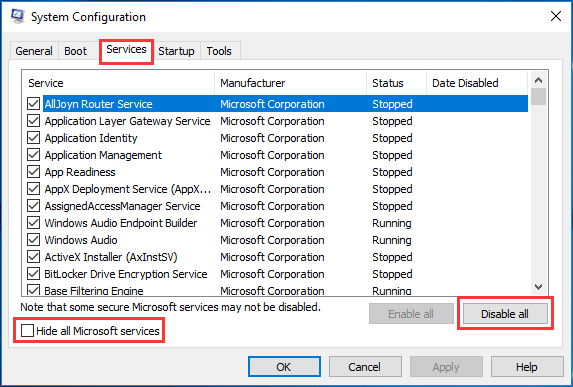
1. In the System Configuration window, please go to the Services tab.
2. Uncheck the button Hide all Microsoft services.
3. Then click Disable all and OK buttons to continue.
4. Go to the Startup tab and click Task Manager.
5. In the popup Task Manager window, move to the Startup
6. Select enabled applications and click Disable button to end it.
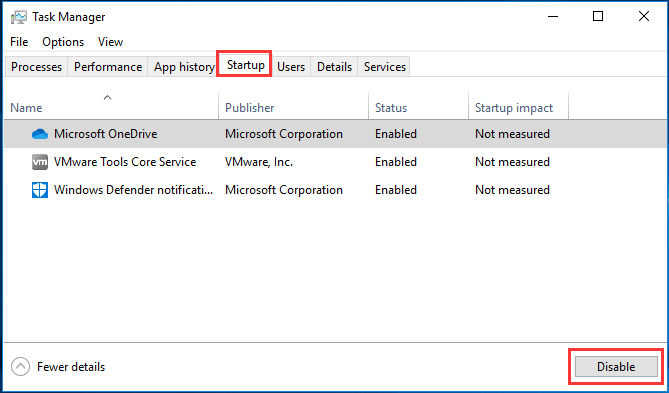
7. Repeat the above step for all applications in the list and then restart your computer.
After restarting your computer in a clean boot, you can check whether the issue service host local system high disk usage Windows 10 is solved. If the problem is solved, you can enable the services again one by one and check what services may give rise to the problem service host local system high memory.
If you find the problematic items, you can choose to disable it or reinstall it.
Solution 7. Upgrade CPU
If none of the above solutions is effective, you can choose to upgrade your CPU. The CPU, also called Central Processing Unit, is an indispensable part of the computer. The issue service host local system high disk may be caused by the old CPU. So, if you come across this issue, you can try to upgrade it. And we will show you the detailed tutorials.
However, the upgrading CPU is always a risky thing. Your computer may fail to boot due to some incompatibility problem after upgrading CPU. If so, you may need to reinstall Windows. Thus, you can back up your data before updating the CPU so as to keep your data safe.
Backing up Data Before Updating CPU
In order to back up data, you can use the professional file backup software – MiniTool ShadowMaker.
MiniTool ShadowMaker is designed to back up the disks, partitions, files, folders and even the operating system. It can also help you to perform some recovery solutions. In particular, when your computer fails to boot, you can use the system image created in advance to restore the computer to a normal state.
In addition, MiniTool ShadowMaker is also a clone tool which can help you to clone OS from HDD to SSD without reinstalling Windows.
In order to upgrade CPU without reinstalling Windows and losing any data, you can back up the operating system immediately.
Thus, try MiniTool ShadowMaker Trial at once or you can choose to purchase an advanced edition.
MiniTool ShadowMaker TrialClick to Download100%Clean & Safe
Now, we will show you how to back up the OS step by step.
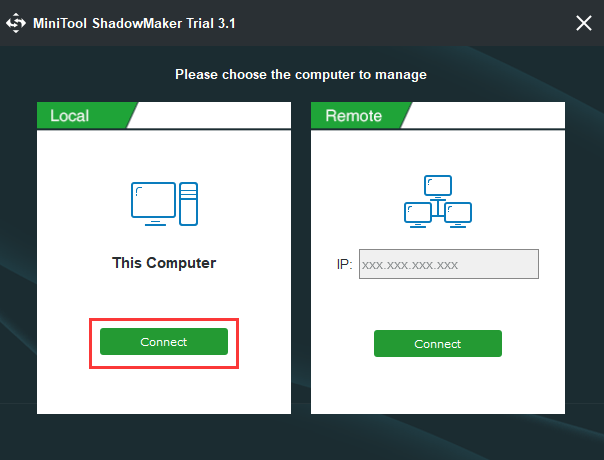
Step 1: Launch MiniTool ShadowMaker.
- Download MiniTool ShadowMaker and install it.
- Launch it.
- Click Connect in This Computer to enter its main interface.
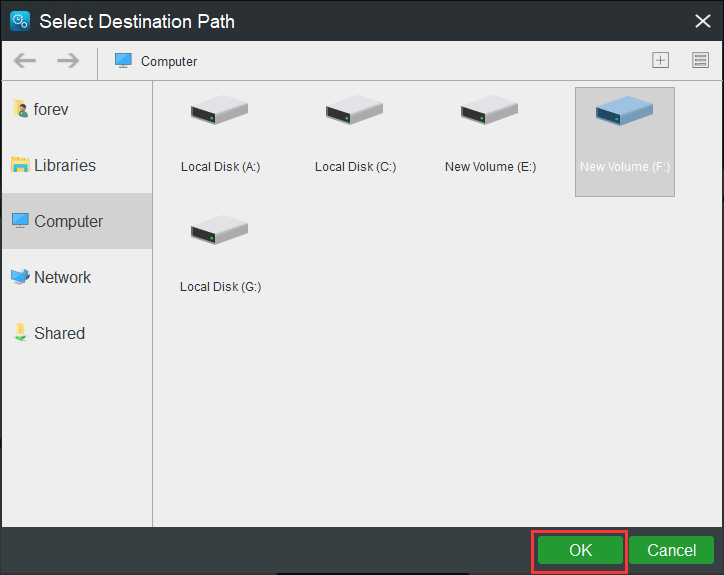
Step 2: Select backup source and destination.
- Click Source module to continue.
- In the popup window, click Folder and Files to continue.
- Choose the files you want to back up and click OK to continue.
- Thus, you just need to Destination tab to choose the target disk to save the backup image.
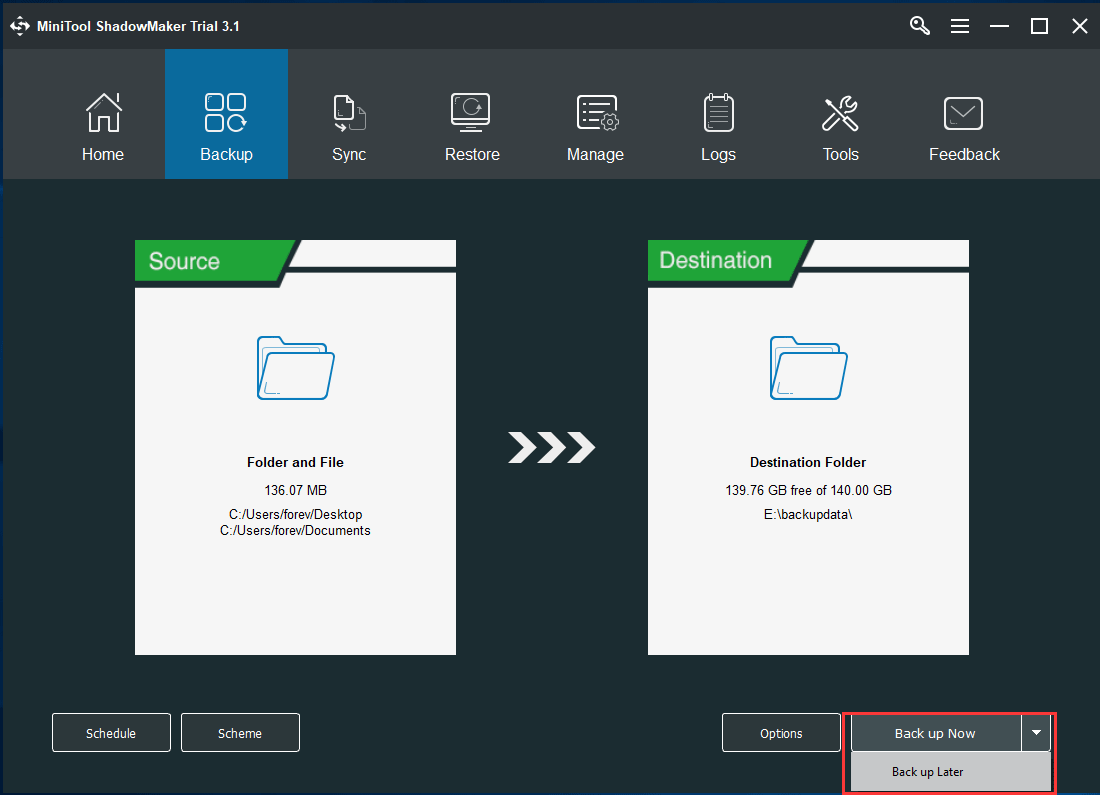
Step 3: Start to back up
- After selecting the backup source and destination, you can start to back up immediately. You can click Back up Now.
- Or you can click Back up Later to delay the backup task and restart it in the Manage page.
Upgrade CPU
After you have backed up your important files, it is time to upgrade CPU. But please note that the CPU should be selected according to the motherboard’s model and performance parameters. Then you can install the new CPU on your computer.
After upgrading, you need to upgrade the drivers. If the computer fails to boot due to some incompatible problem after upgrading CPU, you may need to install the Windows 10. As you have backed up all important files, you don’t worry that your files will lose.
All in all, this post has introduced 7 solutions to solve the service host local system high disk. If you have encountered the same issue, try these solutions.

Bottom Line
In conclusion, this post has shown you how to solve the issue service host local system high disk with 7 solutions. If you have the same issue, try these solutions.
And if you have any better solutions to the service host local system high memory issue, you can share it on the comment zone.
If you have any problem of MiniTool ShadowMaker, you can contact us via the email [email protected] and we will reply to you as soon as possible.