Sometimes, updating a device driver can solve some hardware issues. But, this method doesn’t work all the time or it may cause some other issues. In this situation, you will need to roll back the device driver. Do you know how to roll back a driver? MiniTool will show you how to do this job in Device Manager.
About the Roll Back Driver Feature
Like Windows OS, the device driver on your computer is also updatable. But, an update is not a good thing all the time.
For example, after upgrading the device driver, you find an issue occurs or the new driver is incompatible with the current Windows OS. Or perhaps, the driver update doesn’t solve the issue you want to get rid of.
If something unexpected happens after updating a device driver, you may want to roll back the driver to its original version. Do you know how to roll back a driver on your computer? The feature, Roll Back Driver, will come in handy.
This feature is available in all Windows versions. You can find it in Device Manager. You can use it to uninstall the current version of a device driver and then automatically install its previous version.
In the following guide, we will show you how to use this feature to roll back a device driver.
How to Roll Back a Driver in Windows?
It is very easy to roll back a device driver in Windows 10. You can follow these steps to do the job:
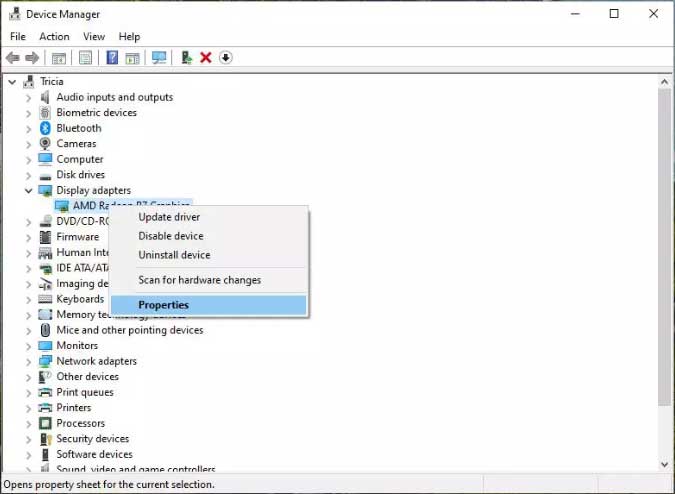
1. Right-click on the Windows button and select Device Manager from the popup menu.
2. Go to find the device that you want to roll back the driver for in Device Manager. Then, press the Arrow Down button or the Plus button to unfold the hardware categories.
3. Right-click on the target device driver and select Properties from the popup menu.
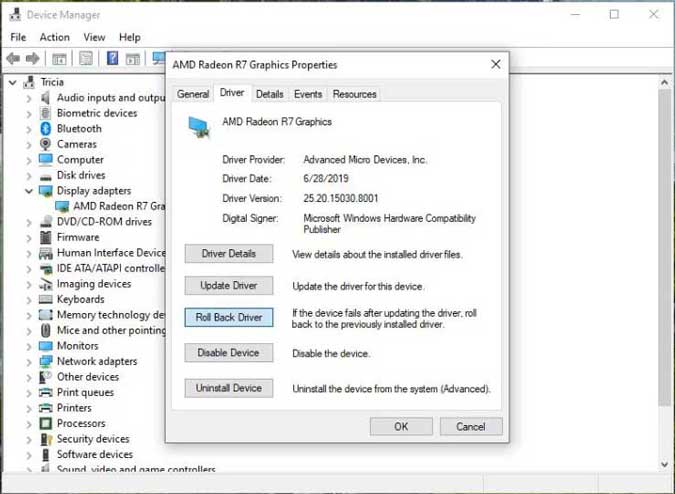
4. On the Properties window, switch to the Driver Then, you will find there are some available buttons including Roll Back Drivers. There is a description of this feature: If the device fails after updating the driver, roll back to the previously installed driver. Press the Roll Back Driver button to continue.
5. You will see the following popup window in which you can select why you need to roll back the device driver. Then, you can press the OK button to start the driver rollback process.

6. The previous version of the device driver will be restored. And then you will see Roll Back Driver greyed out. Now, you can close the Properties windows.
7. You will see the System Settings Change dialog box saying “Your hardware settings have changed. You must restart your computer for these changes to take effect. Do you want to restart your computer now?” You can click Yes to automatically reboot your computer.
After computer rebooting, Windows will automatically load the previous device driver version to your computer.
More Things You Should Know
The Roll Back Driver feature is not available for all devices like printer drivers. It is only for the hardware that is managed within the Device Manager.
Besides, you can only roll back a device driver once because it can only save the latest installed driver version rather than all the previous versions.
About The Author

Position: Columnist
Stella has been working in MiniTool Software as an English Editor for more than 7 years. Her articles mainly cover the fields of data recovery including storage media data recovery and phone data recovery, YouTube videos download, partition management, and video conversions.