The indexing service speeds up Windows 10 search dramatically as your computer doesn’t have to scan the whole system on request. In some cases, you need to rebuild the Windows search index manually to fix bugs or a corrupted search database. This post on MiniTool Website will show you how to rebuild index in 3 ways step by step.
What Is Index and When Do You Need to Rebuild It?
The Windows indexing service is so powerful that allows you to quickly find files and other data via the Start menu or the Start Screen search. However, if there is an indexing glitch in your system or you have installed the new operating system version on incompatible hardware, you will need to reset and rebuild index to fix the corrupted search database. In this post, we will introduce 3 ways on how to rebuild index Windows 10/11 for you.
Any misoperation might cause huge data loss, so you must create a backup of your important data before troubleshooting. To protect your data, you can use a free backup software – MiniTool ShadowMaker to back up the crucial files or folders to an external hard driver or USB flash drive.
MiniTool ShadowMaker TrialClick to Download100%Clean & Safe
How to Reset and Rebuild Index Windows 10/11?
How to Rebuild Index via Control Panel
Rebuilding the index will remove all the existing contents and place it back into its default state. Here’s how to rebuild index Windows 10/11 via Control Panel:
Step 1. Press Win + S to evoke the search bar.
Step 2. Type control panel and hit Enter.
Step 3. Click on the inverted triangle beside View by and choose Small icons.
Step 4. Scroll down to look for Indexing Options and hit it.
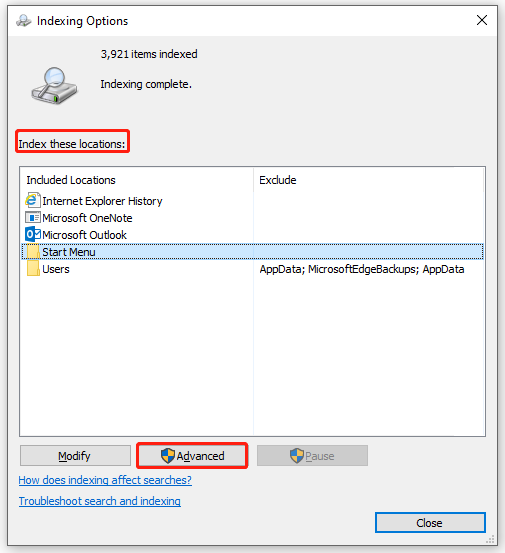
Step 5. Choose one of the folders under Index these locations and tap on Advanced.

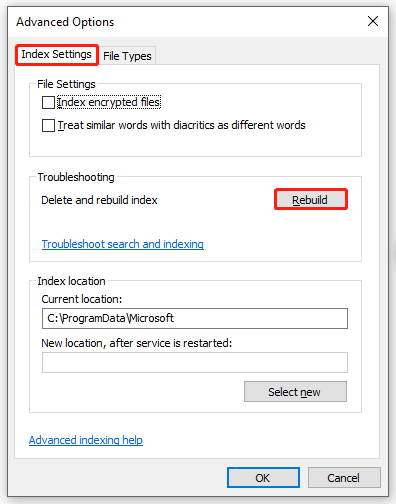
Step 6. Under the Index Settings tab, click on Rebuild.
- The rebuilding process depends on the data stored on your system, so you must wait patiently.
- During the process, you had better not use the search feature.

Step 7. Press OK to save the changes and repeat the steps for another folder.
How to Rebuild Index via Command Prompt
Another way to rebuild index is via Command Prompt. Here’s how to rebuild index with rebuild index Windows 10 command lines:
Step 1. Type cmd in the search bar to locate Command Prompt and right-click on it to choose Run as administrator.
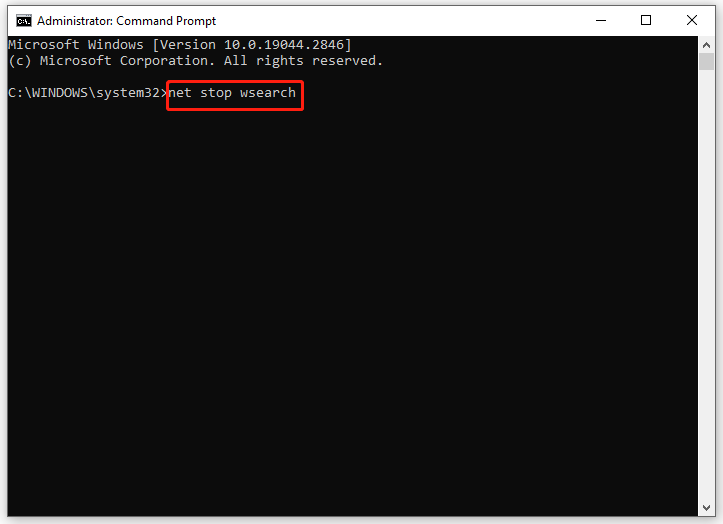
Step 2. Type net stop wsearch and hit Enter to stop the file indexing service.

Step 3. Type the following command and hit Enter to delete search index database files:
del “%ProgramData%\Microsoft\Search\Data\Applications\Windows\Windows.edb”
Step 4. Run this command net start wsearch to restart the Windows 10/11 search indexing service.
If prompted by The Windows Search service could not be started, you can run net start wsearch again. It always takes two or three attempts to be successful.
How to Rebuild Index via Registry Editor
The last approach to rebuild index is to modify the registry key. This method will both reset Windows 10 search indexing options and rebuild the search index.
Step 1. Press Win + R to evoke the Run dialog.
Step 2. Type regedit.exe and hit Enter to open Registry Editor.
Step 3. Navigate to the following path: Computer\HKEY_LOCAL_MACHINE\SOFTWARE\Microsoft\Windows Search
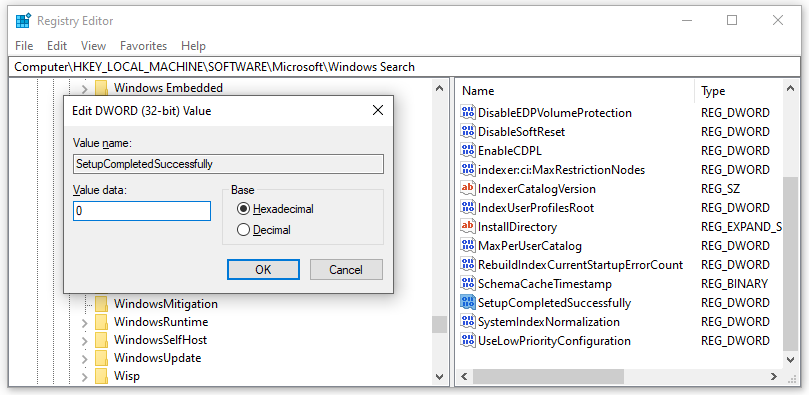
Step 4. In the right-hand pane, check if the SetupCompletedSuccessfully DWORD is present.
- If so, right-click on it to choose Modify > set Value data to 0 > click on OK to save the changes.
- If not, you should create it manually: right-click on the empty space on the right side > select New > choose DWORD (32-bit) Value > rename this new DOWRD as SetupCompletedSuccessfully > set Value data to 0 > hit OK.

Step 5. Quit Registry Editor and reboot your computer.