If the AppData folder is taking up too much space on your PC, it’s time to clean up the AppData folder. Here are some ways to help you make AppData cleanup on your Windows computer. If you delete some files by mistake, you can use MiniTool Power Data Recovery to get them back.
What Is the AppData Folder?
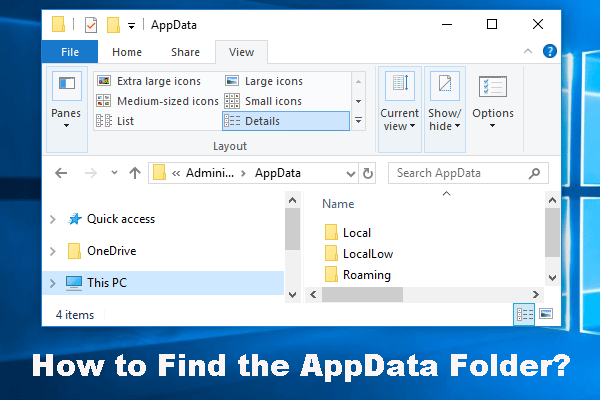
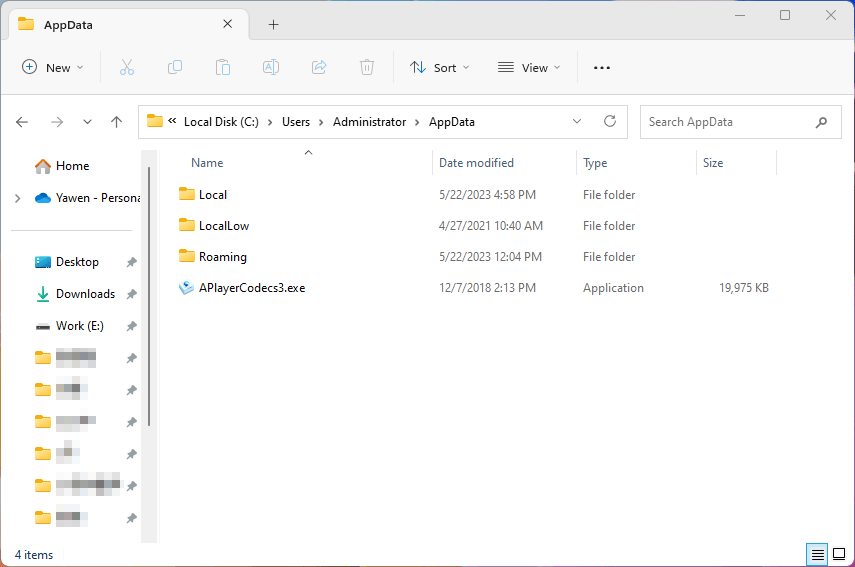
The AppData folder is a location where the app data and settings are saved. Every Windows computer has an AppData folder on the C drive. The path of the AppData folder is C:\Users\[UserName]\AppData.
The AppData folder is a hidden folder by default. If you can’t find this folder in the C drive, you can go to View > Show and select Hidden items on Windows 11 or go to View and select Hidden items on Windows 10. This will make your system show the hidden files and folders, including the AppData folder.
AppData Folder Is Taking up Much Space on Drive C
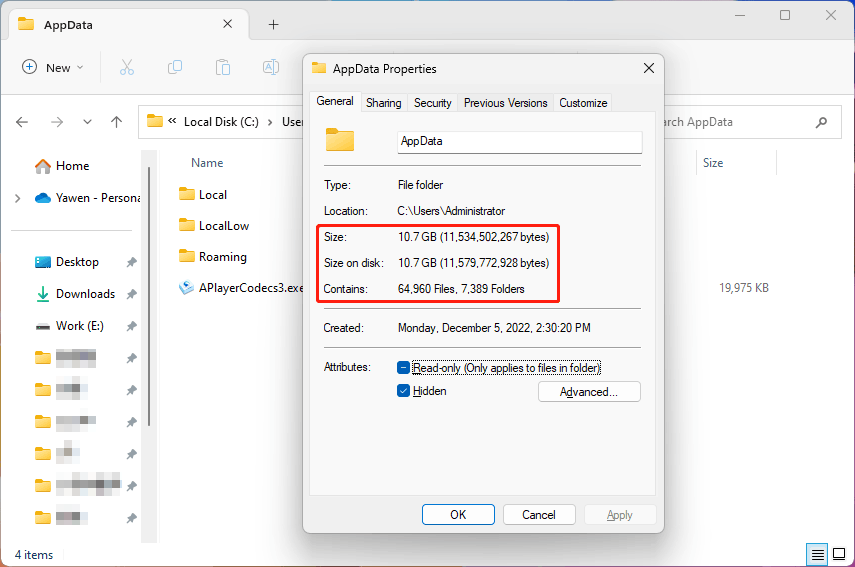
As time goes by, the AppData folder will take up some GBs of space on drive C. This is a common situation. For example, the size of the AppData folder on my PC is 10.7 GB. As you know, too many files in drive C will slow down the system, causing performance issues.
You can choose to clean up the AppData folder to free up disk space for your system drive. In the following part, MiniTool Software will introduce some ways to safely clean up the AppData folder.
How to Clean up The AppData Folder?
Is it safe to directly delete the AppData folder?
It is not safe to delete all files in the AppData folder or directly delete the AppData folder. The files in the AppData influence the apps that are currently installed on your PC. Deleting these files will remove the saved data, user information, and settings of the apps. This may cause apps not to work or other issues.
However, the temporary files in the AppData folder can be safely removed. Here are 3 ways to remove temporary files from the AppData folder to help free up space on the C drive.
Way 1: Manually Delete Files from the AppData Folder
The temporary files of the apps are saved to a Temp folder in the AppData folder. You can delete all files in that folder.
Step 1: Press Windows + R to open Run.
Step 2: Type %LOCALAPPDATA%\Temp into the Run dialog and press Enter. This will navigate to the Temp folder in the AppData folder. These are some temporary files and they are safe to delete.
Step 3: Press Ctrl + A to select all files in the Temp folder. Then, right-click the selected files and select Delete to delete them. You can also directly click the Delete key on your keyboard to delete them.
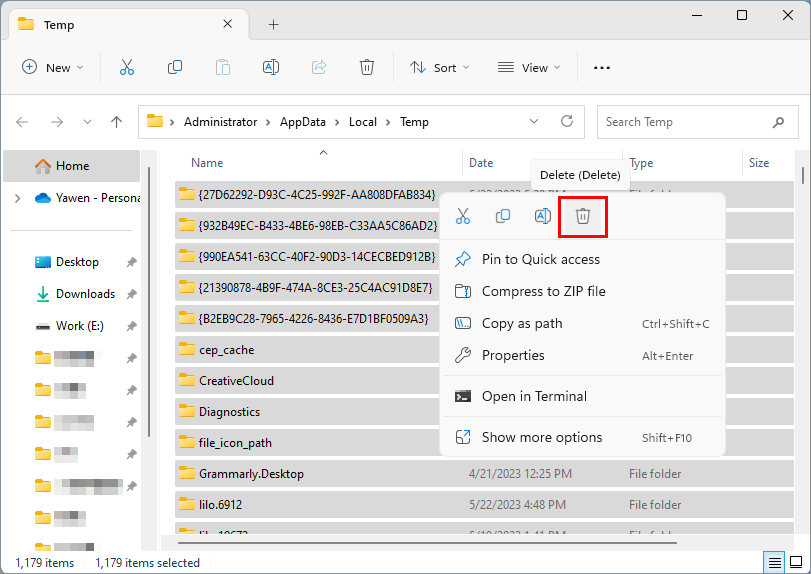
In this step, you can also choose to permanently delete the temporary files: after right-clicking all the selected files in the Temp folder, you can press and hold the Shift key and then click the Delete option from the context menu. Then, a warning window will pop up, saying Are you sure you want to permanently delete these **** items? You need to click the Yes button to delete these files bypassing the Recycle Bin.

Step 4: If you haven’t permanently deleted the temporary files, the files will be moved to Recycle Bin and they are still occupying disk space on the C drive. You need to empty Recycle Bin to get the free space.
Way 2: Use the Storage Feature in the Settings App
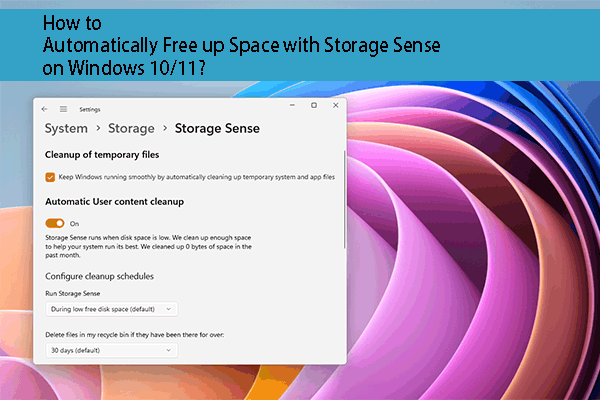
Windows has some built-in features for you to clean up the temporary files in the AppData folder. Storage in the Setting app is one such tool. It can find out unnecessary temporary files and allows you to remove them.
Step 1: Press Windows + I to open the Settings app.
Step 2: Go to System > Storage.
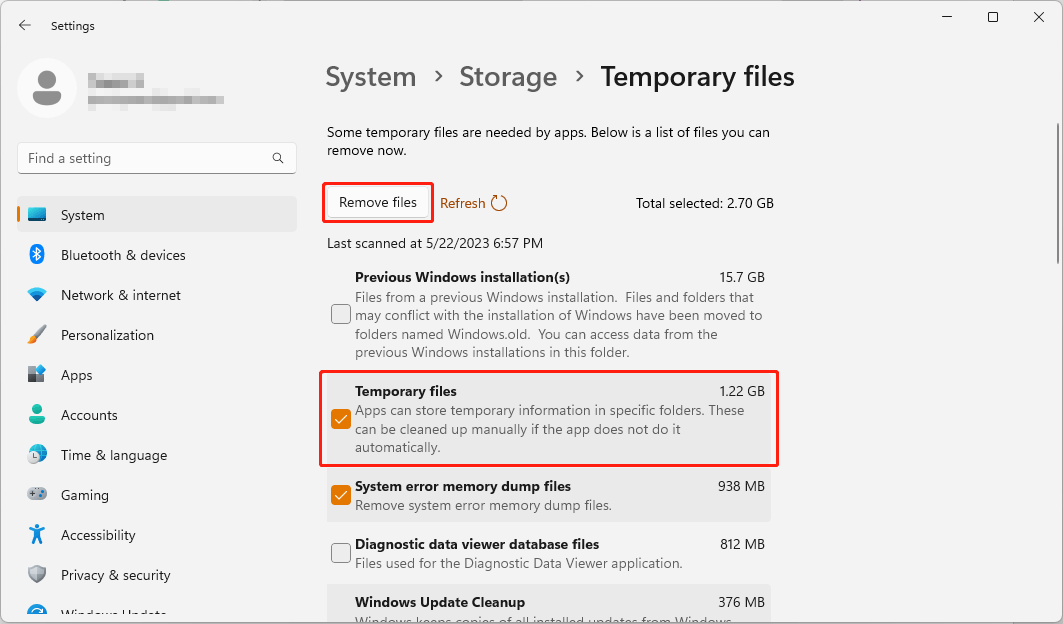
Step 3: Click Temporary files to open the next page.
Step 4: Make sure the Temporary files option is selected, then click the Remove files button. This can help clean up the temporary files in the AppData folder. You can also delete other types of unnecessary files in this step to free up more disk space.
Way 3: Use the Windows Snap-in Disk Cleanup Tool
Disk Cleanup is a Windows built-in cleanup tool that can help you remove junk files from your computer. It can also do AppData cleanup for you. Here is how to use this tool to clean up the AppData folder:
Step 1: Type cleanup into the search box and select Disk cleanup from the search result to open this tool.
Step 2: C drive is selected by default. Click the OK button to start scanning that drive for junk files and temporary files.
Step 3: When you see the Disk Cleanup for (C:) interface, scroll down to select Temporary files. Of course, you can also select other junk files to delete in this step.
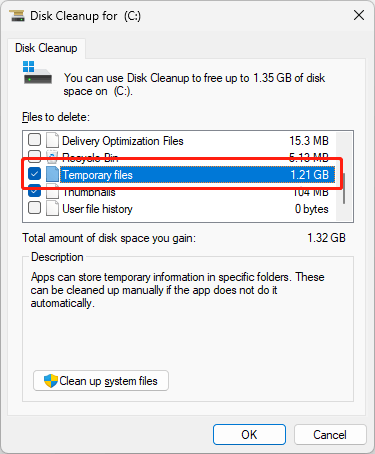
Step 4: Click OK when the process ends.
No matter which methods you use, the temporary files in the AppData folder will be removed and your C drive will have more free space.
Recover Temporary Files Deleted by Mistake
As mentioned above, some temporary files are needed by apps and you should not delete them from the AppData folder. However, you may delete the necessary temporary files by mistake and then the corresponding application gets into trouble. You can restore the mistakenly deleted temp files to make everything go back to normal.
Here are two simple ways to restore the deleted temporary files:
- If the files are not permanently deleted, you can directly restore them from Recycle Bin.
- If the files have been permanently deleted, you can use special data recovery software to get them back.
Now, we will talk about how to recover temp files using these two methods.
Way 1: Restore Deleted Temp Files from Recycle Bin
Step 1: Open Recycle Bin from the desktop.
Step 2: Find the temp files that need to be restored and select them. Here is a tip: you can find where the deleted files were previously saved under the Original Location volume.
Step 3: Right-click the selected files and select Restore.
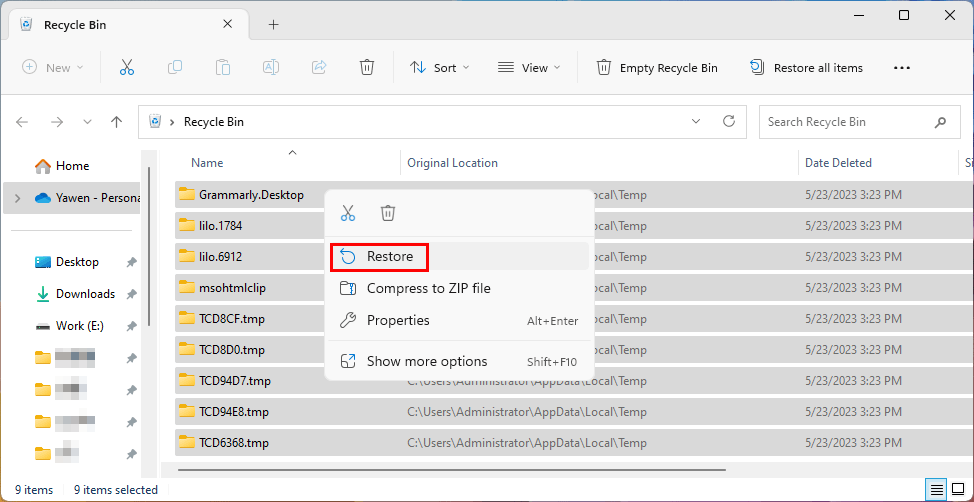
The selected files will be directly restored to the Temp folder in the AppData folder.
Way 2: Use MiniTool Power Data Recovery to Recover the Permanently Deleted Temp Files
If you have permanently deleted these files, you need to use professional data recovery software to get them back. MiniTool Power Data Recovery, the best free data recovery software for Windows, is worth trying.
This software is specially designed to recover all kinds of files from different storage devices like computer internal hard drives, external hard drives, SSDs, memory cards, USB flash drives, SD cards, and so forth.
This software also has some other useful features. For example, it can recover data from a special location like the desktop, Recycle Bin, or a specific folder.
With the free edition of this MiniTool software, you can scan the C drive and check if it can find your needed files. You can also recover no more than 1 GB of files with the free edition. Why not try this freeware before you make a further decision.
MiniTool Power Data Recovery FreeClick to Download100%Clean & Safe
No matter which data restore tool you use, it can recover deleted files that are not overwritten by new data. MiniTool Power Data Recovery is not an exception. So, you’d better not install the software onto the C drive to prevent the deleted temp files from being overwritten and becoming unrecoverable.
It is very easy to recover deleted files using this software. After downloading and installing this data restore tool on your PC, you can use these steps to rescue your files.
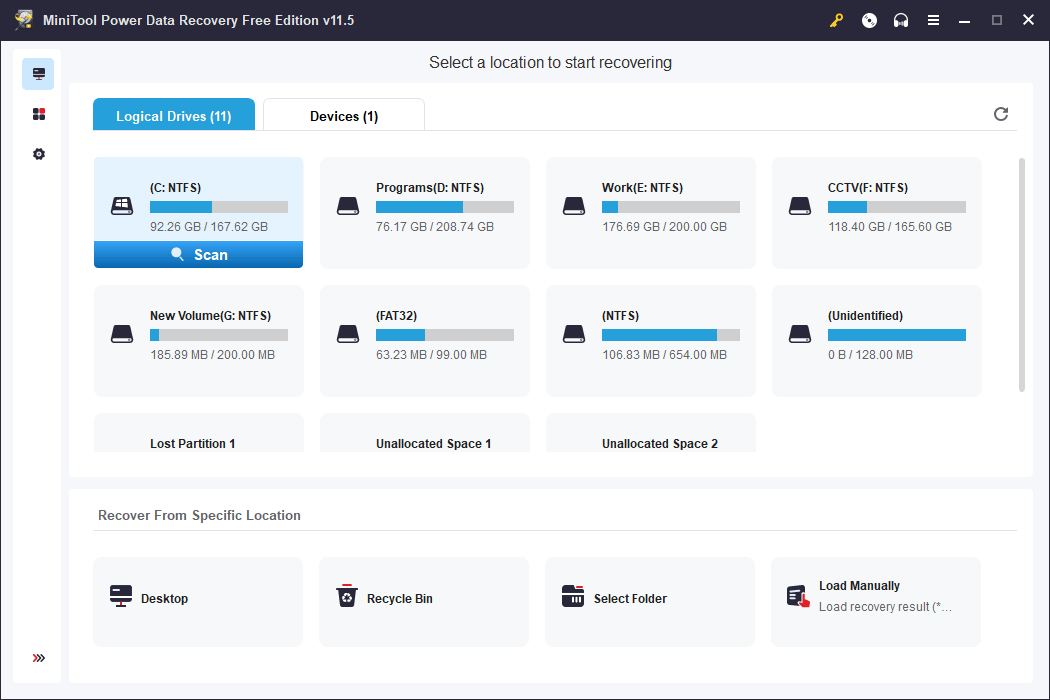
Step 1: Open the software to enter its main interface.
Step 2: The software will display all partitions it can detect under the Logical Drives tab. The AppData folder is in the C drive. So, you can move your mouse cursor to the C drive and click the Scan button to start scanning this drive.
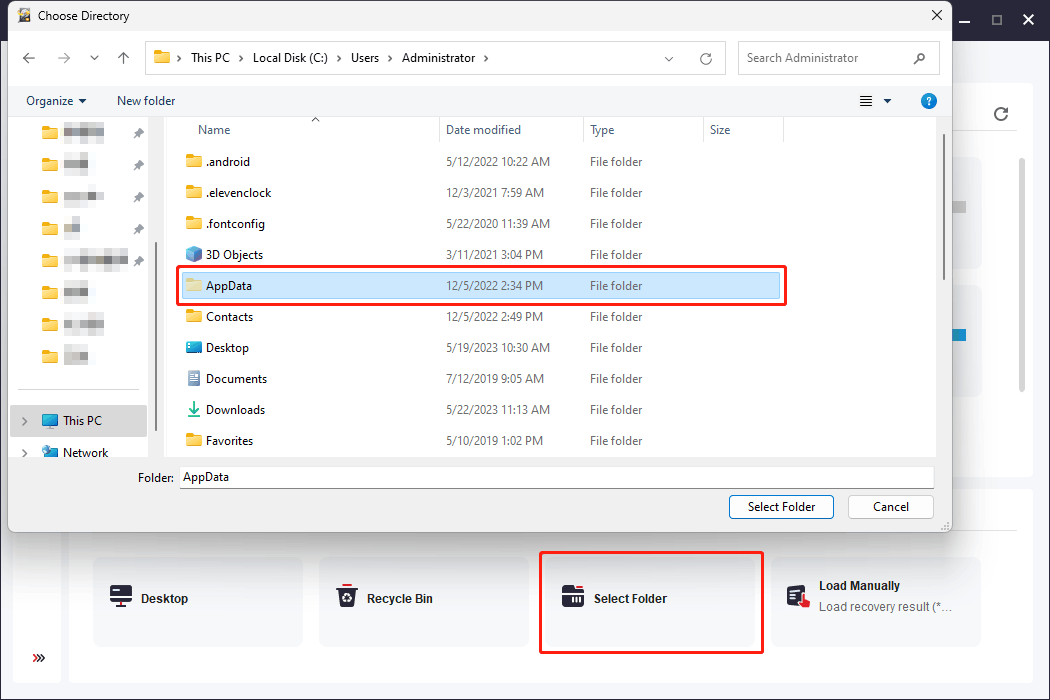
You can also directly recover deleted files from the AppData folder using this software, which can save a lot of time for you. Here is what to do: click Select Folder under the Recover From Specific Location section, then select the AppData folder from drive C, and click the Select Folder button to start scanning the Temp folder.
If the deleted temp files have stayed in Recycle Bin before they were permanently deleted, you can also choose to recover data from Recycle Bin.
Step 3: Wait patiently until the whole scanning process ends. This can guarantee that you get the best data recovery effect. After scanning, this software will list all found files by path by default. You can open each path to find your needed files.
If you know the name of the file you want to recover, you can enter the filename or part of the filename into the search box and press Enter to directly locate the file.
Step 4: Check the files you want to recover, then click the Save button and select a suitable location to save the selected files. In this step, you should not save the files directly to the Temp folder because this can overwrite other deleted files.
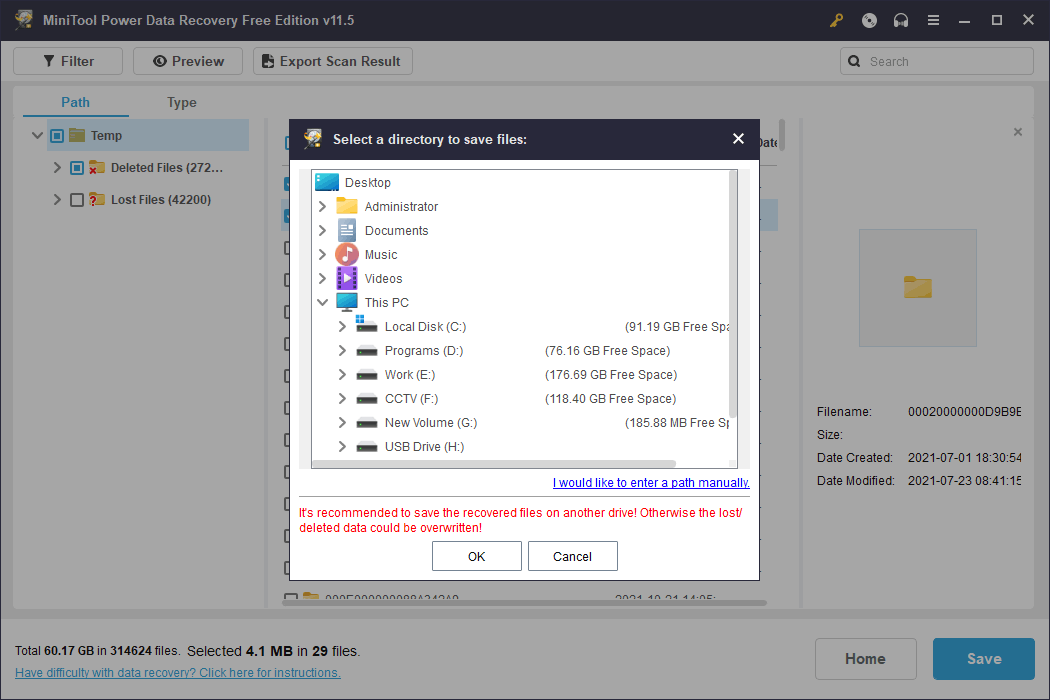
After you are sure everything you need is recovered, you can move the selected files to the Temp folder.
MiniTool Power Data Recovery FreeClick to Download100%Clean & Safe
If you want to use this software to recover more than 1 GB of files, you need to use a full edition. You can go to MiniTool’s store to select a suitable edition. If you are a personal user, the Personal Ultimate edition can fully meet your needs.
An Alternative Data Restore Tool: Windows File Recovery
Of course, MiniTool Power Data Recovery is not the only choice to recover deleted and lost files on Windows. You can also use Windows File Recovery, a free file recovery tool designed by Microsoft, to retrieve deleted files. This tool is not preinstalled on your PC. You need to first download it for further use.
However, if this method is suitable for advanced users because it needs to run special and complex winfr commands to recover deleted data.
>> See how to use Windows File Recovery to recover deleted data.
Back up Your Computer to Safeguard It
Data loss issues always happen unexpectedly. You’d better back up your computer (including files and system) to safeguard it.
MiniTool ShadowMaker is a good choice. This is a professional Windows backup software, which has many useful features. For example, it supports schedule and event trigger backup, and differential and incremental backup schemes. You can use it to back up files, folders, partitions, disks, and systems. It also supports files and folders sync.
This software has a trial edition, which allows you to experience all feature for free within 30 days.
MiniTool ShadowMaker TrialClick to Download100%Clean & Safe
Bottom Line
It is a good idea to cleanup the AppData folder by deleting the unnecessary temporary files. This article introduces 3 ways to do this job. You can select one way accordingly. If unfortunately, you deleted some temporary files by mistake, you can restore them from Recycle Bin or using MiniTool Power Data Recovery.
If you encounter issues when using MiniTool software, you can contact [email protected] for help.
