Making dual-boot Windows is an easy task. If you want to try Windows 11 and don’t want to give up the current Windows 7 operating system, you can install both of these two OSs on your PC. How can you dual boot Windows 11 and Windows 7? MiniTool Solution gives you a detailed guide.
It’s Necessary to Dual Boot Windows 7 and Windows 11
If you are a technology enthusiast, you may prefer to try out new stuff. Windows 11, a brand new operating system, has come out for some time and you may want to install this OS on your PC to experience its new UI and features.
Most computers come with only one operating system. But it is possible to install two operating systems on a device and you can choose between them at boot time. We call this dual-boot. If you want to install Windows 11 on your PC but don’t want to reinstall the system, and keep the original OS (Windows 7) without messing up it, dual-boot is necessary. You can choose to dual boot Windows 11 and Windows 7.
Compared with a virtual machine, setting up a dual boot configuration on a hard disk can let you have full access to the hardware like graphics, memory, input/output devices, and more, and you can experience all the features of the system.
Well then, how to make dual boot Windows 11 and Windows 7? It is an easy operation if you follow the guide below. Now, let’s see some details.
Things to Consider Before Starting
Back up Your PC
Before making big changes to your Windows, for example, upgrade or dual boot, we always recommend backing up your PC since you can’t guarantee that there isn’t something wrong or you won’t lose precious files.
File backup is necessary since you can get lost files back in case of data loss. Besides, creating a system image for your computer is also required. Once Windows fails to boot, you can quickly restore it to its original state.
How can you create a backup for your computer before dual-booting Windows 11 and Windows 7? You can ask a PC backup software for help. MiniTool ShadowMaker, a free backup software for Windows 11/10/8/7, can be your good assistant.
With this free tool, you can easily create a system image. Once the system goes wrong, you can restore it from the system image and reduce the downtime. Performing a system image recovery requires you to use MiniTool ShadowMaker Bootable Edition (by creating a bootable USB drive or DVD/CD with MiniTool Media Builder).
Besides, MiniTool ShadowMaker allows you to back up files and folders, sync files and folders, and clone a disk. Automatic backups, incremental backups, and differential backups are also supported. Now, get MiniTool ShadowMaker from the following button and install it on your PC.
MiniTool ShadowMaker TrialClick to Download100%Clean & Safe
Steps to back up your machine:
Step 1: Double-click the icon of MiniTool ShadowMaker to launch this backup program.
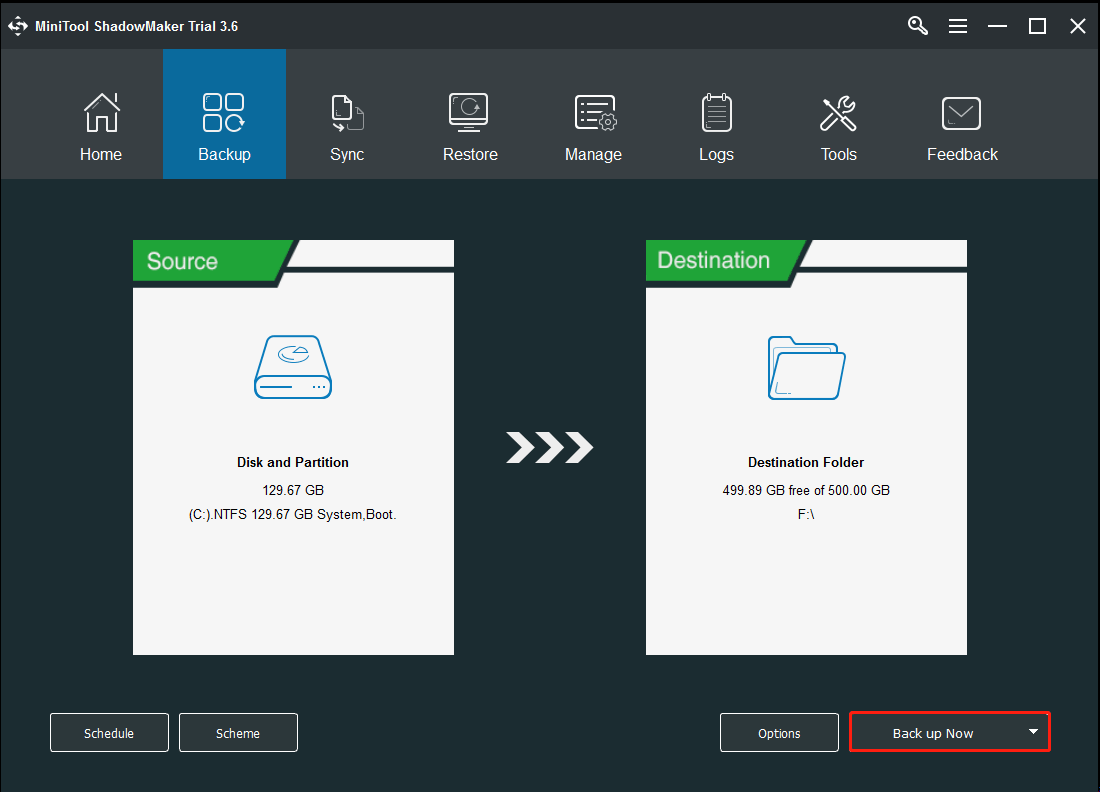
Step 2: Move to the Backup window and you see the system-related partitions are selected as the backup source. To create a system image, you won’t choose the source and need to click Destination to specify a storage path.
To back up data, click Source > Folders and Files, check the items you want to back up, and click OK. Then, you also need to choose a destination.
Step 3: Click the Back up Now button to execute the backup process.
After finishing backup, go to Tools, click Medial Builder to create a bootable USB hard drive, flash drive, or CD/DVD. Once the system fails to boot, you can boot the PC from the bootable medium for system recovery.
Make Sure Your PC Meets Windows 11 System Requirements
To install Windows 11 on your PC, you must make sure this machine meets the system requirements of Windows 11.
- Processor: 1 gigahertz (GHz) or faster, two or more cores, compatible 64-bit processor
- RAM: 4 gigabytes (GB) or greater
- Storage: 64 GB or more
- Graphics card: compatible with DirectX 12 or later, with a WDDM 2.0 driver
- System firmware: UEFI, Secure Boot capable
- TPM: Trusted Platform Module (TPM) version 2.0 enabled
- Display: High definition (720p) display, 9″ or greater monitor, 8 bits per color channel
- Internet connection
You can perform a compatibility check with PC Health Check to quickly know if your PC is compatible with Windows 11. If you find the device cannot meet the requirements of TPM, Secure Boot, and CPU, you can bypass the checks for these items by following methods in this post – How to Bypass Windows 11 Requirements – 2 Latest Ways.
Next, it’s time to dual boot Windows 11 and Windows 7. Move to the next section to know how to do this work.
How to Make Dual Boot Windows 11 and Windows 7
Part 1: Create a New Partition for Windows 11
To dual boot a computer, you had better install two operating systems on separate partitions. If you don’t have a second hard drive, you can create a new partition for Windows 11 on your PC. Make sure this partition has at least 64 GB of storage space. Of course, additional space is better since Windows may need more space to download updates and enable specific features.
Use Disk Management
To create a new partition in Windows 7, you can right-click Computer and choose Manage to open Disk Management. Then, right-click one partition and choose Shrink Volume. Enter the amount of space to shrink based on your needs and click Shrink to get an unallocated space.
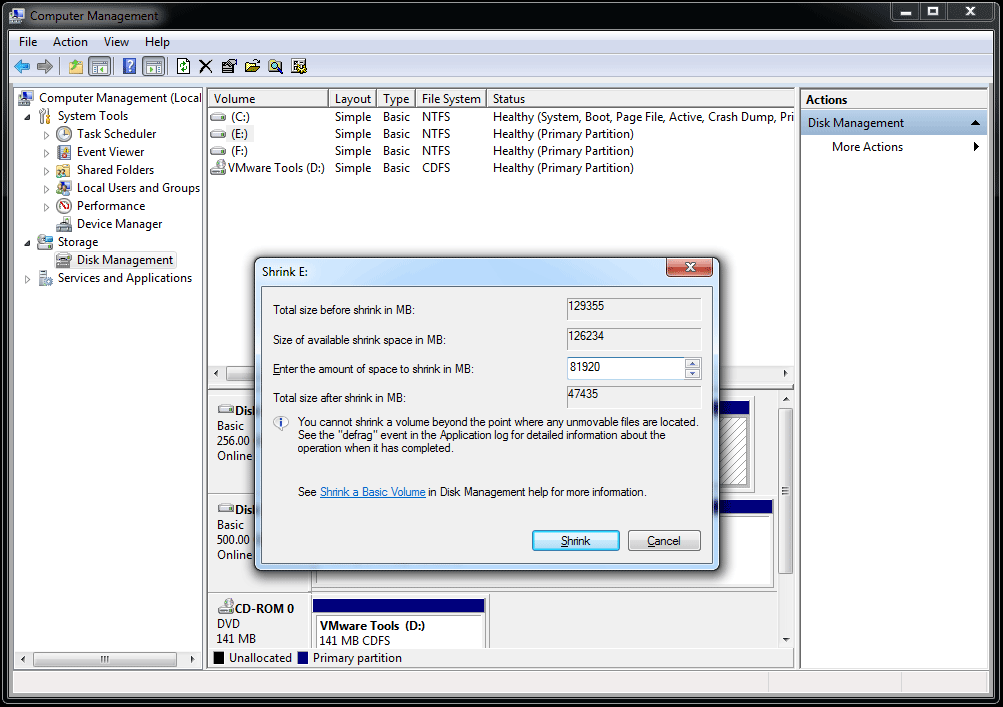
Next, right-click the unallocated space and choose New Simple Volume, set the maximum size, choose a drive letter, decide the file system, volume label, and click Finish.
Use MiniTool Partition Wizard
Besides, you can use a professional partition manager – MiniTool Partition Wizard to create a new partition to install Windows 11. This way is more flexible. This partition tool allows you to perform basic disk and partition management like resize, extend, shrink, split, merge, create, format, etc. partition, copy disk, migrate OS, convert MBR to GPT, and vice versa, check file system, perform partition recovery, and more.
MiniTool Partition Wizard FreeClick to Download100%Clean & Safe
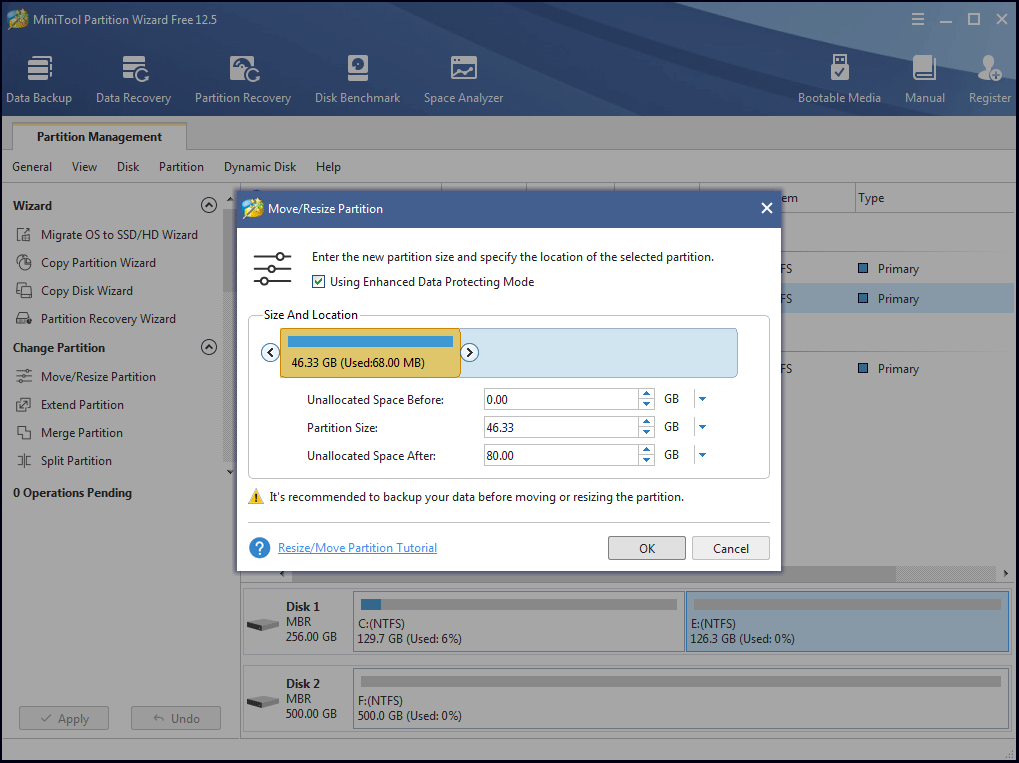
To create a new partition on your Windows 7 PC, you can download its free edition and install it. Then, after launching MiniTool Partition Wizard, right-click a partition and choose Move/Resize. Then, drag the bar to the left side to allocate an unallocated space for Windows 11.
Next, right-click the unallocated space and choose Create to create a new partition. Finally, click Apply.
Part 2: Create a Windows 11 Bootable USB Flash Drive
After making a new partition for Windows 11, the second step you can do is to get an ISO file of Windows 11 and create a bootable drive to install Windows 11 on Windows 7. Currently, Microsoft allows you to download its Windows ISO file from its official website.
Step 1: Get a Windows 11 ISO File
- Visit the Microsoft website and scroll down to the Download Windows 11 Disk Image (ISO)
- Choose Windows 11 from the pull-down menu and click Download.
- Select a language, for example, English, and click Confirm.
- Download the ISO file by clicking 64-bit Download. This can take some time.
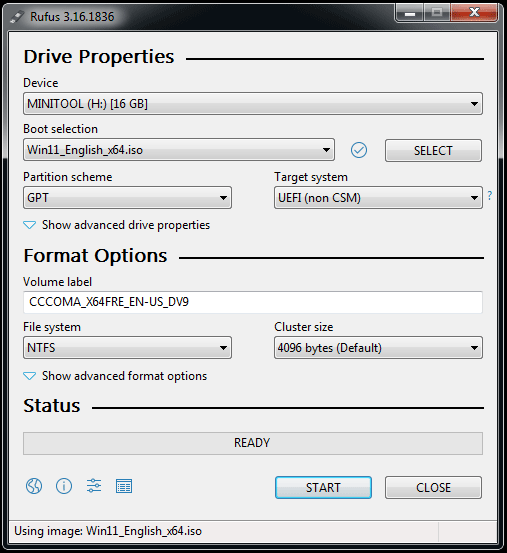
Step 2: Make a Bootable USB Drive with Rufus
- Go to download an excellent ISO burning tool – Rufus from its official website.
- Double-click this tool to open it.
- Connect your USB flash drive to your computer.
- Choose the ISO file you have just got, specify the partition scheme as GPT and then click START to begin the burning process.
Now, you can install Windows 11 on the PC to dual boot Windows 11 with Windows 7.
Part 3: Install Windows 11 on a Windows 7 PC
Insert the bootable USB drive you have created into your computer. Then restart the PC, press a specific key to enter BIOS, and then change the boot order to boot the PC from the drive. Next, follow the instructions to start the installation of Windows 11.
Step 1: After booting your PC from the USB drive, you get a Windows Setup interface. Choose a language, time and currency format, and keyboard or input method to continue.
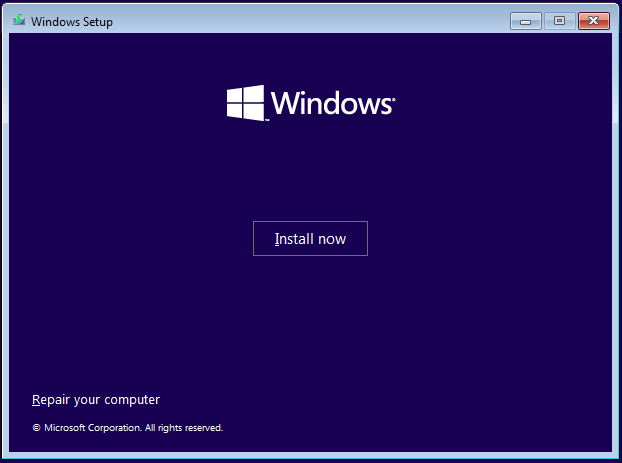
Step 2: Click Install now to continue.
Step 3: Choose I don’t have a product key and click Next.
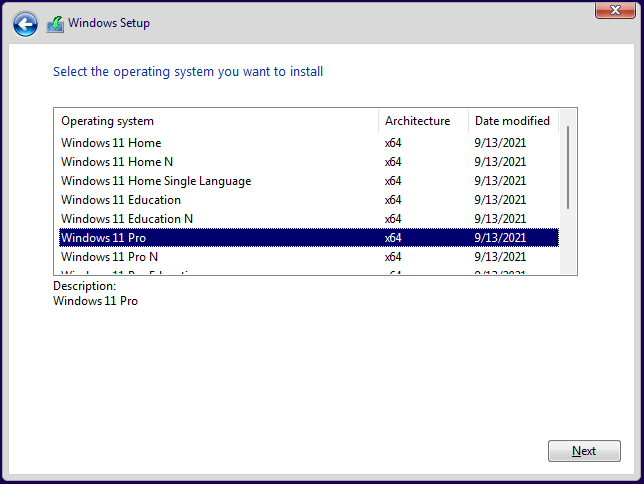
Step 4: Choose an edition of Windows 11 from the list.
Step 5: Choose an installation type – Custom: Install Windows only (advanced).
Step 6: Where do you want to install Windows? Choose the partition you have previously created for Windows 11 and click Next.
Step 7: The installation process will start. Wait a few minutes and Windows 11 will be installed on your PC.
Step 8: Then, you need to configure some settings for the newly installed OS by following the instructions on the screen, for instance, region, PC name, and keyboard layout.
Step 9: Next, you get an interface where you need to choose an operating system to load, Windows 11 or Windows 7? If you select Windows 11, you need to sign in with a Microsoft account and configure more settings for the new OS, including creating a PIN, choosing privacy settings, and more.
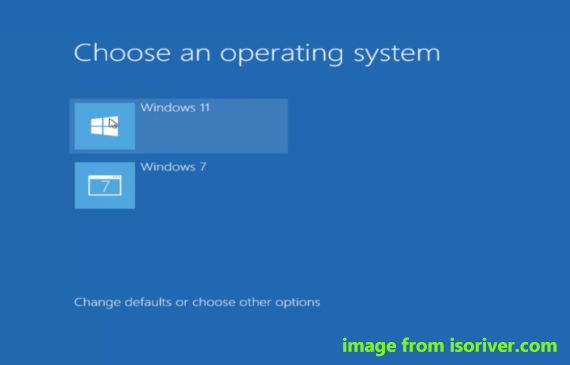
How to Set Default Operating System
In the above interface, there is an option called Change defaults or choose other options. In the new window, you can choose a default operating system and decide how long the operating system selection appears before it automatically boots the default version of Windows.
Besides, there is another way to set the default operating system to boot. After booting to a Windows version, you can press Win + R, type Sysdm.cpl to the text box and click OK to launch the System Properties window. Click Settings from the Startup and Recovery section, choose the default operating system from the System startup section.
Further Tip:
The above shows you how to install Windows 11 on Windows 7 to dual boot the PC. If you have a Windows 11 PC, how to dual boot Windows 11 with Windows 7 or how to install Windows 7 on Windows 11?
The steps are similar:
Step 1: Create a new partition for Windows 7 on Windows 11
Step 2: Download a Windows 7 ISO file online and also burn it to your USB flash drive
Step 3: Install Windows 7 from the USB drive
Here, we won’t show you the details.
Final Words
How to dual boot Windows 11 and Windows 7? After reading this post, you know many things – what you should consider before starting, how to make dual boot Windows 11 and Windows 7, and how to set the default operating to boot. Just follow the full guide for dual-booting your computer. If you have any suggestions, contact us via [email protected] or leave a comment below.
About The Author

Position: Columnist
Vera is an editor of the MiniTool Team since 2016 who has more than 7 years’ writing experiences in the field of technical articles. Her articles mainly focus on disk & partition management, PC data recovery, video conversion, as well as PC backup & restore, helping users to solve some errors and issues when using their computers. In her spare times, she likes shopping, playing games and reading some articles.