Windows 11 brings an all-new user interface with a greater focus on simplicity. It offers a clean and fresh design. One of the most subtle changes to Windows 11 concerns the new modern right-click or context menus for File Explorer and the desktop.
To enable show more options Windows 11, you need to right-click your desktop and choose Show more options or press the Shift + F10 keys together.
Way 1: Via Registry Editor
You can try to use Registry Editor to disable show more options Windows 11
Step 1: Type regedit in the Search box and click the OK button to open Registry Editor.
Step 2: Go to the following path:
HKEY_CURRENT_USER\SOFTWARE\CLASSES\CLSID
Step 3: Right-click the CLSID folder, expand New, and select DWORD (32-bit) Value. A new Key folder will be created.
Step 4: Rename the value as UndockingDisabled and press the Enter key.
Step 5: Double-click the newly created key and change the value data to 1 and click the OK button.
Step 6: Please remember to restart your PC to make the changes take effect.
If you decide to enable the “Show More Options” menu again, you need to repeat the same steps and expand the CLSID key. Then, right-click the UndockingDisabled key and select Delete. When the confirmation pop-up appears, Select Yes.
Way 2: Via Command Prompt
The second method for you to disable show more options Windows 11 is via Command Prompt.
Step 1: Type cmd in the Search box and choose the first result. Then, click Run as administrator.
Step 2: Once Command Prompt’s window opens you can put the following command and press Enter:
reg add “HKCU\Software\Classes\CLSID\{86ca1aa0-34aa-4e8b-a509-50c905bae2a2}\InprocServer32” /f /ve
Step 3: Restart your computer.
If want to enable the “Show more options” menu in Windows 11, you can enter the following command in Command Prompt and restart your PC.
reg delete “HKEY_CURRENT_USER\Software\Classes\CLSID\{86ca1aa0-34aa-4e8b-a509-50c905bae2a2}” /f
![[Guide] How to Use Themes to Personalize Your Windows 11 Desktop?](https://images.minitool.com/minitool.com/images/uploads/2022/08/use-themes-to-personalize-windows-11-desktop-thumbnail.png)
Way 3: Try Third-Party Program
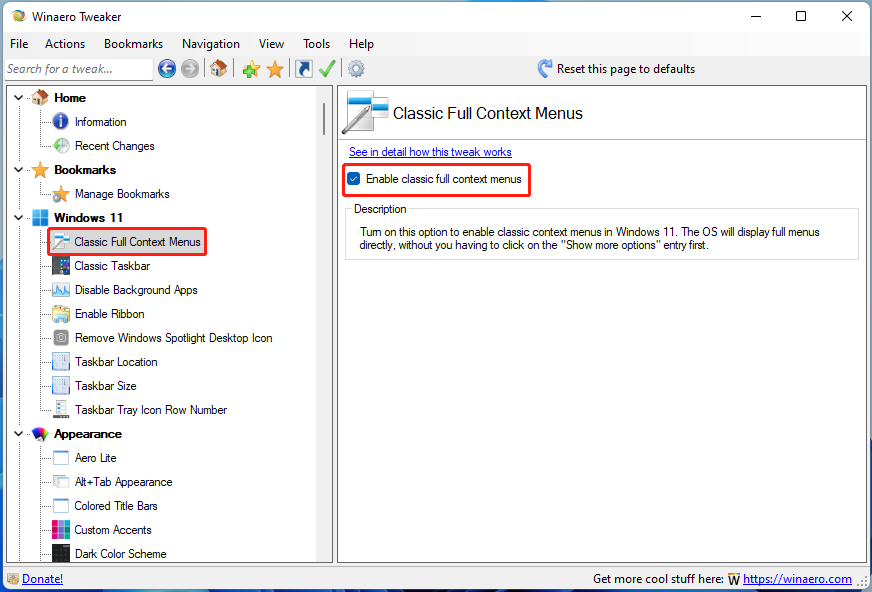
If the above methods are not working, you can try the third-party program to disable Show More Options on Windows 11. Winaero Tweaker is one of the greats tools. You can download it from its official website and install it on your PC. After that, run it to enter its main interface. Under the Classic Full Context Menus part, check the Enable classic full context menus box. Then, restart the tool to make the changes take effect.
Final Words
Here is all information about how to disable Show More Options on Windows 11. I hope this post can be helpful to you.
About The Author

Position: Columnist
Having been an editor at MiniTool since graduating college as an English major, Daisy specializes in writing about data backups, disk cloning, and file syncing as well as general computer knowledge and issues. In her free time, Daisy enjoys running and going with friends to the amusement park.