Do you need administrator permissions to run some tasks and make some changes to Windows? If yes, how can you change administrator in Windows 11? In this post, you can find a detailed guide on changing an account to Administrator. Just follow these 5 simple ways collected by MiniTool.
Many apps and games need administrator permission to work properly. To fully control your computer and make sure some apps run well, an administrator account is necessary. If you are running Windows 10, follow the methods in this post – How to Change Administrator on Windows 10? (5 Methods).
If you have installed Windows 11 – the brand new operating system (performing a compatibility check and enabling TPM & Secure Boot before installation), you come to the right place and we will show you how to make a user an administrator in Windows 11. Now, move to the next part to know a lot of information.
How to Change Administrator in Windows 11
Change an Account to Administrator via Windows Settings
1. Press the Win + I keys on the keyboard to open Windows 11 Settings. Also, you can launch the Windows Settings app by following other ways mentioned in this post – Windows 11 New Settings: How to Open it? | How to Use It.
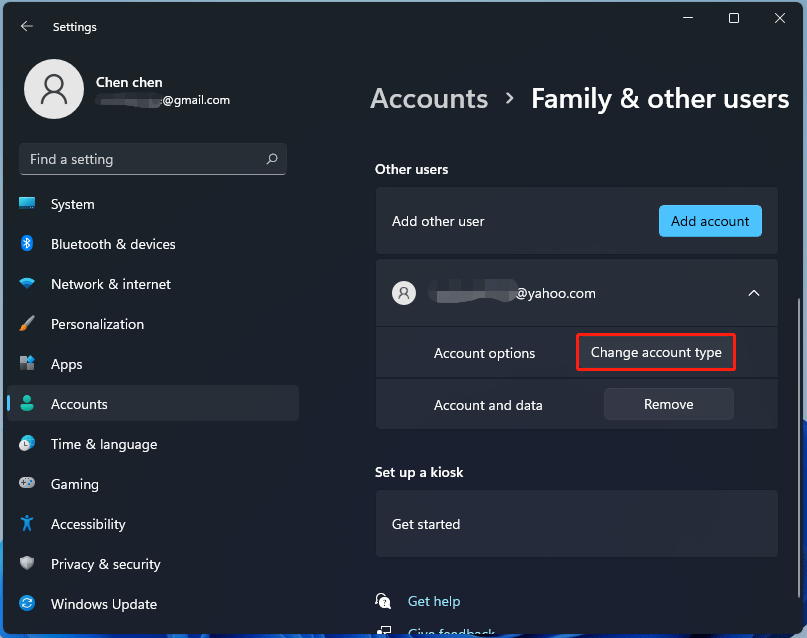
2. Navigate to the Accounts section and click Family & other users.
3. Under the Other users section, you can see all the user accounts on the Windows 11 system. Click the account that you need administrator permission for and click Change account type.
4. Select Administrator and click OK to save the change. If you need to change the Administrator account to the Standard User account, choose Standard User.
Change Windows 11 Administrator via User Accounts
- Press Win + R to launch the Run dialog, type netplwiz to the textbox, and click OK.
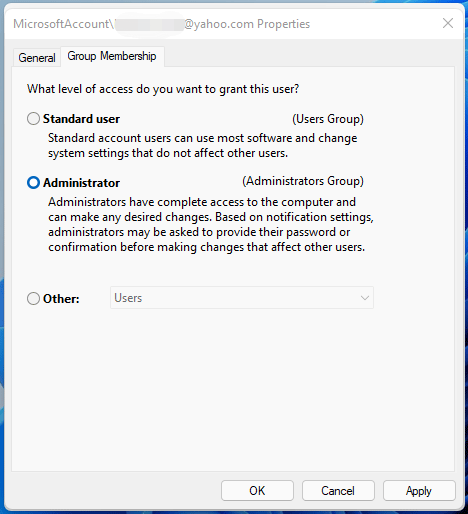
- You can see all the user accounts on your computer under the Users Click the target account and choose Properties.
- Go to the Group Membership tab, choose Administrator and save the change by clicking Apply and OK.
Change Administrator on Windows 11 via Control Panel
How to change administrator user in Windows 11 using Control Panel? It is very easy and just follow the instructions below.
- Launch Control Panel and view all the items by Category. (Related article: 10 Ways to Open Control Panel Windows 10/8/7)
- Click the Change account type link from User Accounts.
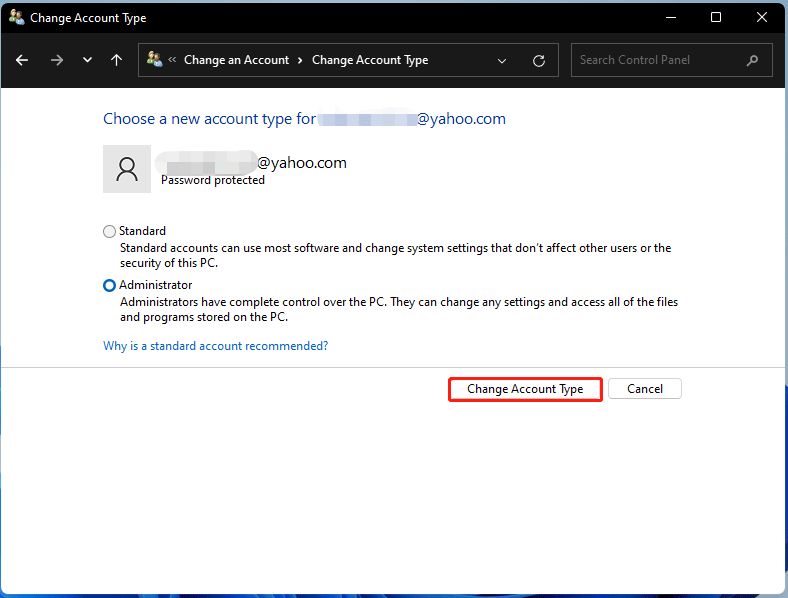
- In the new interface, click the user account that you want to change to Administrator and then click Change the account type.
- Check the box of Administrator and click Change Account Type. Also, you can change the account back to Standard in the same way.
Make a User an Administrator via Command Prompt
If you prefer performing some tasks in a terminal window, you can change administrator in Windows 11 using Command Prompt.
1. Run Command Prompt as an administrator in Windows 11. Related article: How to Open Command Prompt (CMD) in Windows 11? (7 Ways).
2. In the CMD window, type net user and press Enter to list all the local user accounts on your computer. You should note the name of the account that you want to change to Administrator.
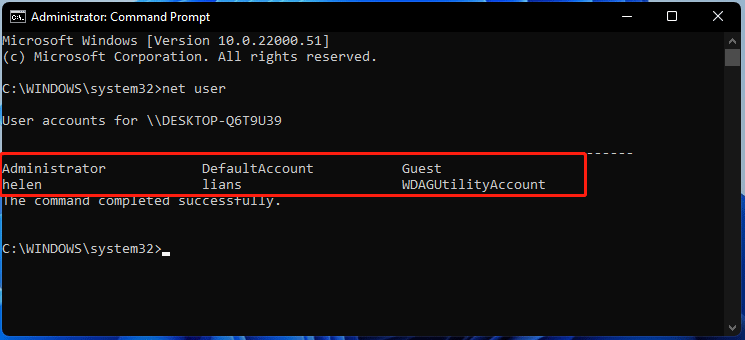
3. Execute the command: net localgroup Administrators “name” /add. Note that you should change “name” with your account name. To change the account type back to Standard, use the command net localgroup Administrators “name” /delete.
Change Administrator in Windows 11 via PowerShell
- Type powershell to the Windows 11 search box and right-click Windows PowerShell to run it as administrator.
- Type Get-LocalUser and press Enter.
- Execute the command: add-LocalGroupMember -Group “Administrators” -Member “Account Name”. Replace ”Account Name” with your exact account name. To reverse the change, use remove-LocalGroupMember -Group “Administrators” -Member “Account Name”.
That’s all the information on how to change administrator in Windows 11. If you need to change administrator user, try one of these methods above to easily perform the task.
About The Author

Position: Columnist
Vera is an editor of the MiniTool Team since 2016 who has more than 7 years’ writing experiences in the field of technical articles. Her articles mainly focus on disk & partition management, PC data recovery, video conversion, as well as PC backup & restore, helping users to solve some errors and issues when using their computers. In her spare times, she likes shopping, playing games and reading some articles.